Normal view

There are new articles available, click to refresh the page.
Before yesterdayJitsi

AV1 and more … how does Jitsi Meet pick video codecs?

18 December 2024 at 06:10

Say hello to AV1, the new default video codec in Jitsi Meet 

The AV1 codec represents the cutting edge of video compression technology. Developed by the Alliance for Open Media (AOMedia), a consortium including tech giants like Google, Microsoft, Netflix, and Mozilla, AV1 is a loyalty-free video codec that was designed to meet the ever-growing demand for high-quality video streaming while minimizing bandwidth usage. 

It offers up to 30-50% better compression compared to its predecessors like VP9, VP8 and H.264, enabling sharper visuals at lower bitrates. This makes it an ideal choice for bandwidth-constrained environments, such as mobile networks or rural areas with limited internet speeds. Despite its impressive capabilities, the adoption of AV1 has been slower than anticipated due to several factors. AV1 has higher computational demands as its advanced compression algorithms require significantly more processing power for encoding and decoding. Hardware acceleration for AV1 is still emerging and therefore use of AV1 can result in higher CPU/energy consumption and suboptimal performance on low end devices and those without hardware support.

The path to adding AV1 support in Jitsi was not straightforward. Before we could enable AV1, it was essential to integrate support for the various modes and complexities that the codec offers, both in the Jitsi Meet client and the Jitsi Video Bridge (JVB). Jitsi had to extend JVB’s capabilities to handle AV1 streams, including managing simulcast and SVC modes seamlessly for multi-user conferences. This groundwork laid the foundation for AV1’s eventual inclusion as the preferred codec in Jitsi deployments.

AV1’s RTP encapsulation is unusual, if not weird, compared to RTP payloads for other video codecs – all the information an RTP Selective Forwarding Unit (SFU) like the JVB needs is carried in a “Dependency Descriptor” RTP header extension, rather than in the RTP payload proper.  This means that the JVB doesn’t technically need to support the AV1 codec at all – it only needs to support the dependency descriptor header extension.

Decoding AV1’s Dependency Descriptor

This format is unusual in that it was developed not in the IETF, where RTP payload formats are normally defined, but rather by AOMedia itself.  The main consequence of this is that the header is encoded very much like a video codec: it’s very parsimonious of bit usage, at the cost of being both annoyingly complicated to parse, and being stateful – information needed to parse the header is sent only at intervals. For more information about this complexity, see Lorenzo’s post from several years ago – https://www.meetecho.com/blog/av1-svc/.

Handling the complex parsing is relatively straightforward once some utility classes are written. However, handling the statefulness is harder, especially given that an SFU always needs to be prepared for packet loss and reordering, so packets that use some state may arrive before the packet that provides it.  Thus this work needs to keep track of the state that’s reported in those packets that carry it, and pass it forward to the parser to parse subsequent headers, while handling the possibility that a state update may have been missed.

Because the AV1 DD is a header extension, it can be applied to codecs other than AV1 itself.  Notably, this allows us to indicate temporal scalability of an H.264 stream, which is useful because H.264 (without its little-implemented SVC extensions) has no way to indicate temporal scalability of its packets.  As a result, the work to support the AV1 DD also allows Jitsi to enable scalable H.264 streams for JVB-mediated conferences as well!  (Though there are currently some bugs in Chrome that make this less efficient than it could be – see here and here.)  In fact the header can be applied to any video codec, though we still prefer to handle VP8 and VP9 using their in-payload information when that information is available.

Another notable feature of the AV1 dependency descriptor is its concept of “decode targets”, which are a specific layer that a decoder can decode, and thus that an SFU can forward.  These usually correspond to a specific spatial and temporal layer, but technically they do not have to.  The idea is that a decoder can choose among the various decode targets present in the stream. In most cases it would want to choose the highest-quality one available, but in some circumstances (for instance if it was CPU-constrained, or displaying a source in a small window) it could choose a lower-quality target instead.

This has the consequence that a stream needs to be explicit about what decode targets are actually present.  An SFU, by design, forwards only some of the layers in a stream; this is what it means to “selectively forward”.  As a result, the ultimate decoder needs to know what layers it can actually expect to receive, vs. which ones it won’t receive, or it can end up waiting forever while it never gets the frames it thinks it should render.  To handle this case, the AV1 dependency descriptor contains a decode target bitmask in the AV1 header extension to indicate which layers are still present in the stream.  This bitmask then needs to be updated every time the SFU changes its layer forwarding decision, so the decoder doesn’t try to wait to decode a decode target that won’t be arriving any more, or, conversely, so it can know to start decoding a new layer that’s newly started arriving. Fortunately, the logic to do this work is not too complicated, and is similar in complexity to the logic needed to modify the in-payload information for forward VP8 or VP9 streams.

Scalable Video Coding (SVC) Extension for WebRTC

With the release of Chromium M111, significant advancements were made in WebRTC, particularly with the introduction of Scalable Video Coding (SVC) support. This update enabled WebRTC applications to configure encoding parameters for SVC by extending the RTCRtpEncodingParameters dictionary. Around the same time, Chrome also introduced AV1 and VP9 simulcast support. Before Chromium M111, the K-SVC mode (Keyframe-scalable video coding) was the only supported mode for SVC. This update allowed Jitsi Meet to experiment with various scalability modes for AV1 and VP9.

In a Jitsi conference, the client and JVB work in tandem to ensure efficient video streaming. This involves an ongoing exchange of sender and receiver video constraints.

  • Receiver Constraints: Each participant sends constraints (e.g., desired resolution and priority) to the JVB for the video streams they want to receive. These constraints are influenced by the participant’s current layout (e.g., larger tiles for active speakers).
  • Sender Constraints: JVB aggregates these constraints and communicates the required video resolutions to the senders. This ensures a participant only sends higher-resolution streams (e.g., 720p) if at least one other participant views them in a sufficiently large tile.

This dynamic coordination minimizes bandwidth usage and optimizes network resources while maintaining the quality of the user experience. Once the client receives sender constraints, it configures its outbound video streams using RTCRtpEncodingParameters. These parameters are tailored based on:

  1. Resolution: The effective resolution determined by JVB constraints.
  2. Video Type: Camera or desktop sharing (further based on content type).
  3. Codec Operating Mode: Whether the stream uses full SVC, simulcast, or unicast.

For AV1 and VP9, three operating modes were tested:

  1. Full SVC Mode: Uses L3T3 (3 spatial layers, 3 temporal layers) and L2T3 (2 spatial layers, 3 temporal layers) scalability modes.
  2. K-SVC Mode: Employs L3T3_KEY and L2T3_KEY scalability modes, focusing on keyframe-based scalability.
  3. Simulcast Mode: Configures each simulcast layer with L1T3 (single spatial layer, 3 temporal layers).

SVC allows a single video stream to be encoded in layers, each layer adding more detail or resolution to the base stream while simulcast involves sending multiple independent video streams of the same content, each at a different resolution and bitrate.

Aspect Simulcast SVC

Encoding

Multiple streams encoded separately.

One stream encoded with multiple layers.

Bandwidth Usage (Sender)

Higher (multiple streams).

Lower (single stream).

CPU Usage (Sender)

High (due to multiple encodings).

Lower (single encoding with layers).

CPU Usage (Receiver)

Lower (no need to decode layers).

Higher (decoding layered streams).
Adaptability
Coarser (switching between streams).

Finer (dynamic layer adjustment).

Compatibility

Broadly supported in WebRTC platforms.

Limited support, requires advanced codecs.
Key differences between Simulcast and SVC

After extensive performance testing and careful evaluation of product requirements, Jitsi selected full SVC mode as the default configuration for both AV1 and VP9. This choice ensures optimal scalability and video quality across Jitsi’s deployments. However, this behavior is not rigid; it is configurable and can be easily overridden through config.js settings, providing flexibility to adapt to specific use cases or deployment needs.

Choosing “The One”

To determine the optimal video codec for use in the Jitsi Meet client, Jitsi conducted comprehensive testing under realistic conditions to ensure that codec selection would meet product needs for quality, performance, and scalability. Below is an overview of the methodologies and considerations involved:

Testing Scenarios

  1. Bandwidth Variations – Simulations spanned low, medium, and high bandwidth environments. The goal was to assess how each codec managed network fluctuations while maintaining quality.
  2. Latency and Packet Loss – Varying levels of latency and packet loss were introduced to evaluate codec resilience. Stress tests were performed to observe behavior under severe conditions, such as 30% packet loss or latency spikes of 300ms.
  3. Device Diversity – Tests were conducted on a range of hardware, including Windows and macOS devices and multiple operating systems, to measure CPU load and adaptability. Both high-end and low-end systems were evaluated to cover a wide user base.

Metrics Captured

  1. CPU Usage – Encoding and decoding performance were assessed, focusing on average encode times (in milliseconds). Data was derived from totalEncodeTime stats in outbound RTP streams, with averages computed across test runs.
  2. Bandwidth Efficiency – The minimum bitrate required to deliver acceptable video quality was recorded. Metrics were analyzed for each codec to identify which offered optimal quality for a given bitrate.
  3. Scalability Performance – Tested the ability of each codec to handle spatial and temporal scalability. Metrics such as switch latency (time to adjust to new sender constraints) were captured to evaluate adaptability during resolution and frame rate changes.
  4. User Experience Metrics – Frame drops and jitter were monitored to quantify playback quality. Recovery time after network disruptions or resolution changes was measured, ensuring codecs could handle dynamic conditions effectively.

Results and observations

  • AV1: Delivered superior video quality at low bitrates but required higher CPU power (but surprisingly on par with VP9 in some cases), making it ideal for high-quality sessions on modern devices. It turned out that it was the best codec for screen sharing on all platforms because of how it uses screen content coding to achieve low bitrates without compromising on video quality and using low CPU, all at the same time.
  • VP9: Balanced bandwidth efficiency and CPU usage, proving effective for scalable video streams in multi-party calls.
  • VP8: Demonstrated resilience under suboptimal conditions but lagged in scalability and modern features compared to newer codecs.
  • H.264: Showed minimal CPU usage only where hardware acceleration was supported. The CPU usage was much higher when it was done in software, especially for higher resolutions like 4K and screenshare. It also struggled with bandwidth efficiency and adaptability in low-bandwidth scenarios.

By rigorously analyzing these metrics, Jitsi optimized its codec selection strategy. While Full SVC modes remained the default for high-performance scenarios, fallback options like VP9 and VP8 were configured for legacy or resource-constrained devices. This comprehensive approach ensures that the Jitsi Meet client provides the best possible video experience across a wide range of devices and network conditions.

Addressing CPU overuse with Adaptive Mode in Jitsi Meet

With the integration of AV1 into Jitsi Meet, users benefit from superior compression and high-quality video at lower bitrates. However, these advantages come at the cost of increased computational demands, especially on low-end devices. To address this, Jitsi introduced a three-fold adaptive quality control mechanism, ensuring a seamless experience even under CPU constraints.

How Adaptive Mode Works

  1. Decreasing the Encoding Load
    • Dynamic Codec Switching:
      In adaptive mode, the Jitsi Meet client monitors the WebRTC stats for outbound RTP streams. If the stats indicate a CPU limitation, the client iteratively switches to a lower-complexity codec. This process continues until the lowest complexity codec is reached, based on predefined performance benchmarks for each video type (e.g., camera feed, screen share)  thereby reducing the computational demand of video encoding without significantly compromising video quality.
  2. Decreasing the Decoding Load
    • Requesting Fewer Videos: If reducing encoding complexity isn’t sufficient, the client requests fewer video streams from the server. This limits the number of video decoders active at a given time, cutting down CPU usage.
    • Lowering Received Video Resolution: For videos already being received, the client requests lower resolutions, further reducing decoding requirements. This helps balance computational load while maintaining an acceptable user experience.

This adaptive approach enables Jitsi Meet to leverage the advanced capabilities of AV1 while ensuring that users with diverse hardware configurations can participate in meetings without disruptions caused by excessive CPU usage.

However, when the CPU spike originates from an external process rather than the Jitsi Meet client, the adaptive mode ensures that quality degradation is minimal. To enhance the user experience, Jitsi Meet also incorporates a recovery mechanism that restores the video configuration once the external constraints are resolved.

Mechanism for Recovery

  1. Continuous Monitoring
    • The client monitors the CPU limitation statistics reported by the browser through WebRTC metrics. If the browser no longer reports CPU constraints, the client initiates a recovery sequence.
  2. Incremental Recovery Process
    • The recovery mechanism keeps increasing the number of remote video streams the client requests from the JVB until it reaches the limit set for the conference.
    • This process is incremental to prevent sudden spikes in CPU usage that could destabilize the client.
  3. Dynamic Adjustment
    • If CPU constraints reappear during the recovery process, the client halts further recovery steps. This ensures the system does not enter a state where CPU usage exceeds the device’s capabilities.

This gradual approach minimizes the risk of overloading the system during recovery. It also adapts to fluctuating CPU availability, maintaining a balance between performance and quality. The client handles this entire process dynamically without any user interaction, providing a seamless experience.

Browser / device support

Firefox and Safari do not advertise support for the AV1 codec yet. As a result, when users on these browsers join a call, all other participants automatically switch to the next codec in the preferred list, ensuring compatibility across all endpoints.

Additionally, while Chromium-based mobile endpoints are capable of both encoding and decoding AV1, Jitsi has opted to use AV1 only for decoding. For encoding, a lower-complexity codec is used, as encoding typically imposes a higher CPU load compared to decoding. This decision balances performance and device resource constraints, especially on mobile devices.

Eager to start using AV1 in Jitsi?

We have great news for you then!! AV1 support was introduced to Jitsi in June 2024 and has been available in our stable packages ever since. Initially, AV1 had to be manually configured as the preferred codec through config.js settings, allowing users to opt in.

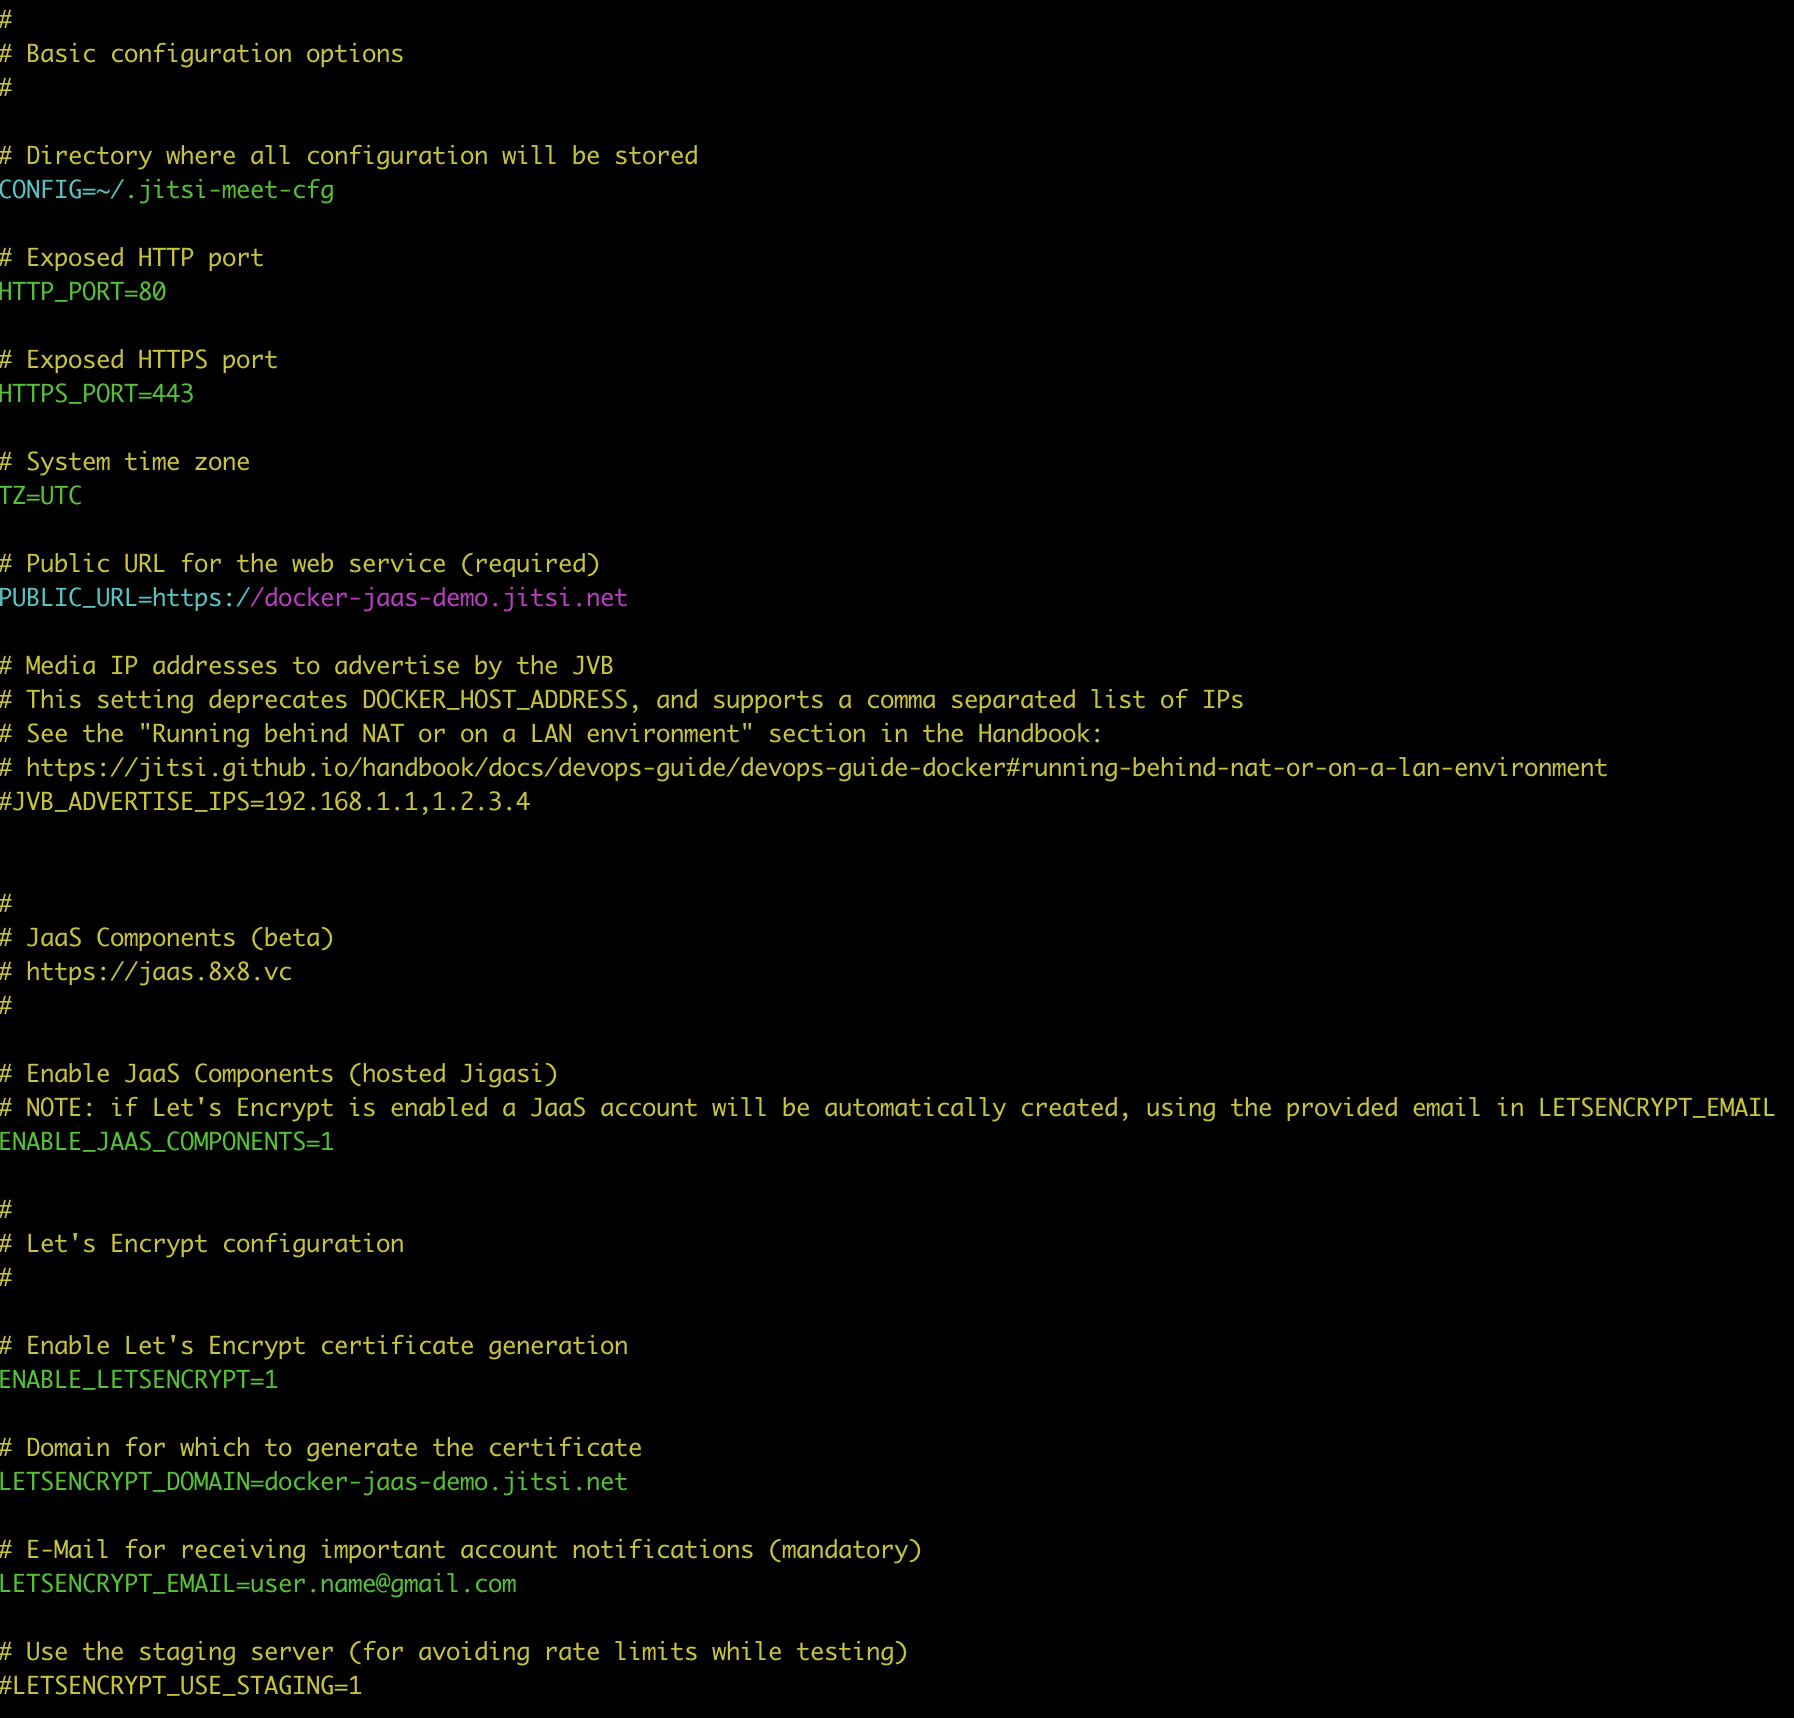
Building on this, AV1 was soon made the preferred codec on meet.jit.si, marking a significant step in leveraging its advanced compression capabilities. Starting with release stable-9909, AV1 became the default preferred codec in our Docker deployments, ensuring out-of-the-box support for users opting for containerized setups.

After thorough experimentation and analysis of real-world performance data, we’re excited to share that AV1 will very soon become the default preferred codec in all deployments, bringing its exceptional bandwidth efficiency and video quality to a broader audience. Stay tuned!

Happy holidays!

❤ Your personal meetings team.

P.S – With contributions from Jonathan Lennox (Jitsi VideoBridge)


The post AV1 and more … how does Jitsi Meet pick video codecs? appeared first on Jitsi.

Connecting anything to everything via SIP

By: Oana Ianc
21 May 2024 at 19:14

In the evolving landscape of virtual meetings, seamless connectivity remains paramount. SIP integration enables participants to join meetings from various devices, including hardware phones or softphones such as Bria, video conferencing systems such as Zoom, and traditional telephony systems. This broadens the scope of participants who can connect to Jitsi conferences, making it more inclusive.

Leveraging SIP for Video and Audio Connectivity

Prerequisites

  1. JaaS Account: Create a JaaS account
  2. Host this sample code on your server 
  3. Zoom Account: Ensure you have Room System enabled in Zoom

Note: We are using JaaS here for the purpose of simplicity, but all of this can be deployed using the Open Source components available on GitHub.

Step-by-Step Guide

  • Join a Jitsi conference on your hosted instance
  • Get the SIP Addresses for Dial-In

Note: Replace pinCode with the specific conference PIN provided for your Jitsi conference

  • Join a Zoom conference
    • To connect a Zoom conference to a Jitsi conference, use the Invite via Room System option in Zoom to call out to the provided SIP address
  • Testing:
    • Test the configuration by dialing the SIP address. Verify that the call connects to the Jitsi conference and that audio and video is properly routed.

SIP Audio-Only Connectivity: Cost-Effective and Reliable

SIP audio-only connectivity provides a cost-effective and reliable way for participants to join Jitsi conferences. It reduces bandwidth consumption and costs, making it ideal in scenarios where video isn’t really needed, such as webinars. This option ensures users with limited internet access or slower connections can participate without interruptions.

Under the Hood: Exploring the Technical Details

Integrating Voximplant with Jitsi Meet involves several key steps:

  1. Setting Up Voximplant Application:
    • Create a Voximplant application and configure it with the necessary call handling logic. This involves setting up a scenario for incoming calls, managing call routing, and defining custom IVRs 
    • Add logic in the scenario to validate the conference, select a SIP-Jibri and then forward the call to it
  2. Configuring SIP Video Gateways:
  3. Setting up a sip domain (Eg. video.8×8.vc):
    • Define a sip domain and ask VoxImplant to map it to your VoxImplant application
  4. Testing:
    • One easy way to test the integration is using a softphone to dial in

Note: Voximplant can be replaced with a programmable SIP server such as Kamailio or OpenSIPS.

Wrapping up

While SIP is these days referred to as legacy, it remains the most used protocol for VoIP and acts as the common denominator across many vendors in the industry. Thus it’s a great candiate for connecting anything to everything 😉

❤ Your personal meetings team.

The post Connecting anything to everything via SIP appeared first on Jitsi.

Improving performance on very large calls: introducing SSRC rewriting

23 April 2024 at 18:56

In the last stable release, Jitsi enabled a new feature called SSRC rewriting that improves the system performance for very large calls. This feature helps reduce the overall load on the system by reducing the number of signaling messages that get exchanged during a large call involving hundreds of endpoints. It also reduces the load on the local endpoint drastically by restricting the number of audio and video decoders created by the WebRTC engine thereby offering a better user experience for large calls.

When this feature is enabled, only a fixed set (let’s say up to 50) of SSRCs are signaled to the downstream endpoints in the call irrespective of the call size. An SSRC is nothing but a unique ID used for identifying a stream of RTP packets that belong to an audio or a video source. When additional media sources are requested by the receiver, the Jitsi Videobridge (JVB) overwrites the SSRCs of the newly requested media streams with that of the ones that were already signaled to the client before and are no longer needed. Therefore, no more than 50 SSRCs need to be signaled to the endpoints even if the number of media sources that will be routed in total far exceeds the set limit.

Moving on to the why – what is the problem that we were trying to solve by implementing SSRC rewriting?

The challenges that we faced when adding support for very large calls with respect to source signaling with the existing approach of signaling every new source to every other participant in the call were two fold.

At the client level, the number of m-lines in the SDP grew linearly with every remote source that got added to the call irrespective of whether media for that particular source gets routed to the endpoint or not. When a new m-line with SSRC is added to the remote SDP, the libwebrtc engine creates a transceiver and does all the plumbing necessary to decode a media stream with the given SSRC if and when it starts receiving it from the JVB. This tied up resources on the local endpoint unnecessarily and introduced delays in renegotiation cycles which resulted in unpleasant user experience. The client can also hit transceiver and SDP parser limits imposed by the browser resulting in unexpected behaviors. These performance issues are more pronounced on mobile endpoints which have fewer resources to begin with compared to the endpoints running on desktops.

On the backend, as the number of participants grew, so did the number of audio and video sources that needed to be signaled to every other participant in the call. This made the signaling traffic from prosody (XMPP communication server) to the endpoints grow quadratically. This was a problem, because Prosody, which is single-threaded, was already the bottleneck when scaling calls. Previously we had to introduce artificial delays in signaling in order to reduce the load. This caused long delays for the media to be established across participants when they unmuted their audio or video for the first time and was very disruptive to large meetings.

The solution to both of these problems was to switch to a demand based signaling mechanism where only a limited number of remote audio and video tracks are signaled to the endpoints depending on what is being needed or requested by them in real time instead of signaling all the known media sources in the call as and when they get added to the call.

Implementation in Jitsi Videobridge

Jitsi Videobridge (JVB) uses a slightly different approach for audio and for video when determining what sources to forward. Forwarding decisions for audio are based simply on the “loudness” of the streams determined from the audio level RTP extension.

With SSRC rewriting, JVB uses a separate SSRC space for each receiver. It maintains a map from an SSRC number to the name of a source. Changes to the map are signaled to the receiver over the direct signaling channel (a WebRTC DataChannel over SCTP), using partial updates:

[modules/RTC/BridgeChannel.js] <e.onmessage>:  Received AudioSourcesMap: [{"source":"fc63db0f-a0","owner":"fc63db0f","ssrc":2602882473},{"source":"449360a0-a0","owner":"449360a0","ssrc":1358697798}]
[modules/RTC/BridgeChannel.js] <e.onmessage>:  Received VideoSourcesMap: [{"source":"e01f2103-v0","owner":"e01f2103","ssrc":3129389873,"rtx":3219602897,"videoType":"CAMERA"},{"source":"9ac8fef2-v0","owner":"9ac8fef2","ssrc":1542056973,"rtx":1571329554,"videoType":"CAMERA"},{"source":"ed6b60f5-v0","owner":"ed6b60f5","ssrc":550523896,"rtx":2808127984,"videoType":"CAMERA"}]

When a new stream needs to be forwarded, it is allocated an SSRC. Before the limit is reached, JVB simply generates a new SSRC number, and when the limit has been reached the oldest entry is reused. Let’s look at an example to make this more clear. Assume the limit is set to just 3, and the available sources are A, B, C, D, E. Initially the map is empty. When A starts sending packets, we allocate SSRC 101 to it and signal it to the receiver like this:

AudioSourcesMap: [{"source":"A","owner":"endpoint-A","ssrc":101}]

Similarly when B and C start to speak we allocate SSRCs 102 and 103 for them:

AudioSourcesMap: [{"source":"B","owner":"endpoint-B","ssrc":102}]
AudioSourcesMap: [{"source":"C","owner":"endpoint-C","ssrc":103}]

Now we have reached the limit of 3 SSRCs. When D starts to speak, we’ll find the source in the map that has been active least recently (let’s say that’s B) and re-use its SSRC for D. We’ll signal an update (“SSRC 102 now belongs to D”):

AudioSourcesMap: [{"source":"D","owner":"endpoint-D","ssrc":102}]

The scheme is identical for video, except the forwarding decisions are made in a different way. Receivers explicitly signal their preferences using video constraints. The source names and their mute status are published in presence when an endpoint signals its source information to the Jitsi Conference Focus (Jicofo) and therefore this information is already available with all the other endpoints in the call. Based on the current layout in the UI and the user’s preferences, the client sends the updated receiver video constraints over the bridge channel.

A bandwidth allocation algorithm in the JVB then decides which streams to forward to a particular receiver, based on its constraints and current network conditions:

[modules/RTC/BridgeChannel.js] <Fa.sendReceiverVideoConstraintsMessage>:  Sending ReceiverVideoConstraints with {"constraints":{"ed6b60f5-v0":{"maxHeight":360},"e01f2103-v0":{"maxHeight":360},"9ac8fef2-v0":{"maxHeight":360}},"defaultConstraints":{"maxHeight":0},"lastN":-1,"onStageSources":[],"selectedSources":[]}

Implementation on the receiver side in the client

On receiving an update to one of the maps (audio or video), the client adds the signaled SSRCs to the remote description on the peerconnection. The browser then fires a track event for each of the SSRCs, the corresponding remote tracks are then added to the HTMLElements associated with the remote user.

So when the audio packets with this SSRC arrive, the browser starts decoding the media and plays it through the selected audio output device. If the SSRC is already in use (i.e. the limit on the bridge has been reached) the client updates the owner of the associated track so that it gets attached to the corresponding HTMLAudioElement and the audio switches over to the new speaker seamlessly.

The video track creation process is the same as that of the audio tracks as described above. The client application needs to update the track’s owner whenever there is an updated source map involving the SSRC that is assigned to the track and re-attach it to the corresponding HTMLVideoElement so that the correct video stream is rendered in the remote participant’s viewport.

Challenges

But wait, re-using an SSRC like this is okay for audio because the streams simply get mixed before playback, but what about video, how do we avoid video content being rendered in the wrong viewport when signaling and media race? That’s the elegance of this approach, we simply use a large enough limit (larger than the maximum number of streams forwarded at any one time) and the occurrence becomes extremely unlikely. If the limit is larger by K, then K new forwarding decisions must be made before the signaling arrives at the receiver for the problem to happen.

So how do we choose the limits? We have the constraint just mentioned, but also an interesting trade-off. If the limit is too high we’re using unnecessary resources at the receivers. But if the limit is too low, we’ll be signaling updates more often. We have chosen to set the limits to 50 by default. That’s 50 for audio and 50 for video, which is well above the maximum of 25 tiles that we display at any time.

When SSRC rewriting is enabled, the number of source signaling messages can increase drastically based on the SSRC limits set for the conference and the total number of participants in the call. Imagine a call with 100 participants where everyone has their video on; UI shows a grid of 25 participants and the SSRC limit is set to 25. Whenever the user scrolls to the next grid of 25 participants, existing SSRCs get remapped. This happens everytime the user scrolls back and forth. This results in a lot of signaling messages over the bridge channel. What if the websocket connection for the bridge channel is down at this time? This would result in videos not being rendered or audio from new dominant speakers not being heard which can be very disruptive to meetings. All the sources are signaled immediately after the websocket connection reforms but even minimal disruptions to audio can be very annoying.

To mitigate these issues, Jitsi client switches to using WebRTC’s SCTP data channel for establishing the bridge channel instead of using a websocket. This ensures that the bridge channel is up and running all the time as long as the media connection between the client and the JVB is up. This results in minimal or no disruptions to the signaling messages from the JVB to the downstream endpoints.

Current status of the feature

This feature has been well tested and has been running on meet.jit.si for the past few months now, with limits set to 50. We also enabled it by default in our last stable release of the Debian packages and Docker images. We will be releasing it soon to all our production deployments in the next few releases pending investigation into some SCTP crashes that we are seeing in the JVB .

❤ Your personal meetings team.

The post Improving performance on very large calls: introducing SSRC rewriting appeared first on Jitsi.

Jitsi + Moodle, with a dash of JaaS

28 March 2024 at 15:56

So you want to have live meetings in Moodle courses. Well, as it turns out, this is quite an easy feat. Thanks to the wonderful work done by UDIMA (Universidad a Distancia de Madrid), you can use their Jitsi Moodle Plugin.

If your use-case doesn’t go beyond 25 monthly individual endpoints, you might want to opt for the JaaS Dev offering which is completely free. For users requiring more than 25 monthly endpoints or desiring premium features like transcriptions, dial-in, recordings or RTMP streaming, there are two options:

1. Add a credit card for overages, paying extra costs as needed, without any discounts.

2. Sign up for alternative plans offering an initial discount of 80% off for the first three months of JaaS usage.

To benefit of the 80% discount you need to use the MOODLE23 JaaS Coupon. The coupon expires on September 2024.

Setting up the Jitsi Moodle Plugin

Before starting the configuration process, you need to download and install the latest Jitsi Moodle Plugin in your Moodle instance and create a JaaS account.

Right off the bat, the plugin tries to use the freely accessible meet.jit.si instance as the backend. This is only going to work for the first five minutes due to the changes announced here. This should be more than enough if you only want to give it a try.

Once you have created your JaaS Account, here are the steps to configure the plugin:

Go to the JaaS API Keys section and create a new key pair. Name it something meaningful. Download the private key and store it somewhere safe.

Open the Moodle Jitsi plugin settings and change the values as follows:

Domain: `8×8.vc`

Server type: pick `8×8 Servers`

App_ID: copy it from the JaaS Console API Keys page, i.e. `vpaas-magic-cookie-xxxxx`

Api Key ID: copy it from the keys table in the same page, it should be something like `vpaas-magic-cookie-xxxxx/somehex`

Private key: the contents of the private key you just downloaded from JaaS Console

– Make sure to leave the ID User (jitsi_id) dropdown to Username, the default


With just a few steps, you’ll now have a complete communication solution right within Moodle!

❤ Your personal meetings team.

The post Jitsi + Moodle, with a dash of JaaS appeared first on Jitsi.

Google Summer of Code 2024

22 February 2024 at 03:20

We’re happy to announce that Jitsi will be participating in Google Summer of Code 2024!

We have some very cool project ideas in the list for this year, and we’re still open to discussing new ones.

You can also check out the official program website, the list of accepted organizations and the full program timeline.

The next important date is March 18 when the contributor application period opens. In the meantime, please join me in welcoming the new contributors to our community!


The post Google Summer of Code 2024 appeared first on Jitsi.

Custom meeting controls with Elgato Stream Deck and WebHID

By: saghul
21 December 2023 at 20:08

With the holidays just around the corner we thought it would be a cool to show a perhaps non-conventional use of the Elgato StreamDeck, a gadget I recently acquired that would make a great gift!

The Elgato Stream Deck is a programmable hardware device that allows users to automate virtually any task with the press of a button. It has been around for a while but not too long ago I was at the RTC.ON conference chatting with my buddy Dan Jenkins when he told me there was a library to control these devices using WebHID. I instantly bought one (no, this is not a sponsored post).

The idea here is to use the Jitsi iframe API (you can start using it right away with a free JaaS account!) to map custom meeting controls on your own Stream Deck. Our iframe API provides a bunch of events and commands to interact with the meeting  and the WebHID library allows us to program each key individually, inluding the icon on each of the buttons, which is actually a tiny display!

Here is a video demonstrating the integration:

Cool, right! The potential for contextual controls for specific applications right from your browser is virtually boundless, what a time to be working on the Web Platform.

The source code can be found here. It works with 6 buttons by default (the Stream Deck Mini) but it’s easy to adapt to other models.

Have fun and happy holidays!

❤ Your personal meetings team.

The post Custom meeting controls with Elgato Stream Deck and WebHID appeared first on Jitsi.

Authentication on meet.jit.si

By: Emil Ivov
22 August 2023 at 22:38

What’s going on?

Starting on August 24th, we will no longer support the anonymous creation of rooms on meet.jit.si, and will require the use of an account (we will be supporting Google, GitHub and Facebook for starters but may modify the list later on). This is a first for us, so users may encounter a few bumps here and there as we are tweaking the experience to make sure there is as little friction as possible on the way into a meeting. 

Why make a change?

When we started the service back in 2013, our goal was to offer a meeting experience with as little friction and as much privacy as possible. We felt and still feel that both of these goals are very important and one of the main reasons that justified the existence of “yet another meeting service.” We wanted people to be able to converse easily and freely, without fear of expressing their views and opinions.

Our “one tap and you’re in” experience was a big part of our strategy to eliminate friction. We didn’t want people to have to worry about “creating” meetings in advance, remembering passwords, codes or long complicated sequences of numbers for a meeting ID. We wanted users to be able to think of a name and just go there. Through the years we’ve had to compromise on this a little bit. We ended up introducing a pre-meeting device check screen. We felt that checking your camera and microphone before you entered a room could save everyone some hassle so it was worth the pause. 

As for privacy, we previously made sure all communication was always encrypted and we retained no data beyond what is necessary to actually provide a decent meeting service. 

Offering the possibility to anonymously use the service felt like a good way to help with both its privacy and the usability.

Our commitment to both goals remains as strong as ever but anonymity is no longer going to be one of the tools we use to achieve them.

Earlier this year we saw an increase in the number of reports we received about some people using our service in ways that we cannot tolerate. To be more clear, this was not about some people merely saying things that others disliked. 

Over the past several months we tried multiple strategies in order to end the violations of our terms of service. However in the end, we determined that requiring authentication was a necessary step to continue operating meet.jit.si.

How does this impact user privacy on meet.jit.si? 

It is a good time to have a look at our privacy terms. 8×8 will now store the account responsible for creating rooms. Aside from the changes to our privacy terms referenced above, there is no other change to our meetings. We are still very much committed to holding user privacy in the highest regard and we still have no tools that would allow us to compromise the privacy of the actual audio or video content of a meeting, nor do we intend to create any.

That said, it is completely understandable that some users may feel uncomfortable using an account to access the service. For such cases we strongly recommend hosting your own deployment of Jitsi Meet. We spend a lot of effort to keep that a very simple process and this has always been the mode of use that gives people the highest degree of privacy.

If you see content that violates the jit.si terms of service you can always report it.

That’s all we’ve got for now!

The Jitsi Team

The post Authentication on meet.jit.si appeared first on Jitsi.

Introducing the Jitsi Meet Flutter SDK

By: saghul
3 August 2023 at 14:44

Flutter‘s initial release occurred in 2017, the same year as the introduction of our mobile apps and mobile SDKs. For those who are unfamiliar with it, Flutter is one of the most popular frameworks for developing cross-platform applications.

Now a few years after their first release, we are thrilled to announce that our mobile SDKs and Flutter cross paths as the Jitsi Meet Flutter SDK. Yes that’s right, after multiple requests, an official Jitsi Meet Plugin for Flutter is now available.

As of now, our family of mobile SDKs is more complete than ever.

Android and iOS are supported, of course. The plugin serves as a wrapper for the iOS and Android SDKs, on top of which a Flutter API was created with functionality similar to those found in native APIs.

Add Jitsi Meet to your Flutter app

The plugin is available on pub.dev under the jitsi_meet_flutter_sdk name. Discover it there, follow the instructions, and you’ll be able to utilize the API to the fullest extent.

Here is a sneak peek of how simple it is to add a meeting to a fresh page.

Here is how that looks like:

In your own Flutter app, you’ll have the same view as the one from the Jitsi Meet mobile apps, with just a few additional lines of code, amazing, right?

Have a look at the sample apps

We developed two apps using the Jitsi Meet Flutter SDK, one of which is the example app in the plugin repository and primarily acts as a tester app by displaying the majority of the plugin’s features in the user interface, and the other of which is an official sample app in the repository that contains all of our samples for all mobile SDKs and is just a straightforward example of integrating Jitsi Meet.

Flutter is new to us, and we hope this new SDK will make it easier for our users and JaaS customers to embed video meetings into their existing Flutter apps we agerly await your feedback!

❤ Your personal meetings team.


Author: Gabriel Borlea

The post Introducing the Jitsi Meet Flutter SDK appeared first on Jitsi.

Introducing the Jitsi Meet React Native SDK

By: saghul
20 July 2023 at 17:57

Ever since we introduced our mobile apps to the world back in 2017 they have been backed by React Native.

Using React Native allowed us to reach feature parity quickly since all logic is shared between our web and mobile codebases, because they are not 2 different things, it’s a single codebase 🙂

Later that year, we released our native mobile SDKs to the world. These SDKs werer a thin wrapper over our React Native application, so our users could embed the entire meeting experience into their own mobile apps, with little effort.

This has been our guiding priciple since the inception of the iframe API: to privide a high-level and fully-featured component that can be integrated into other apps.

Today we are taking another step in our mobile jouney by releasing a React Native SDK.

What does this mean? Before today if you had a React Native application we provided you with no way for embedding Jitsi Meet. Now we do!

As mentioned above, our mobile apps are built using React Native and over time we received a number of requests from our community and customers to have an actual React Native SDK. We finally managed to expose it as a React Native library. It’s not that we didn’t have it in the back of our minds, but we focused on native first to cater the needs of our internal consumers.

Exposing a React Native app as a component seems easy on the surface, but being so complex and having so many dependencies made it a lot harder han we had thought. Fortunately, this all changed thanks to Google Summer of Code. We were fortunate to have Filip Rejmus take on the project and kickstart it. After his amazing work, we took over and added the final touches and now it’s available on npm.

How can I start using it?

First go and grab our package from npm and follow the setup instructions.

In the screenshot below you can see how easy it is to integrate and enable different meeting options into your app, by simply importing the JitsiMeeting component and adding it to your code:

You will have access to the same features as the Jitsi Meet app.

Test the sample app!

We created a sample app which integrates our brand new SDK together with react-native-navigation, check it out!

This new SDK will make it easier for our users and JaaS customers to embed video meetings into their existing React Native apps, we agerly await your feedback!

❤ Your personal meetings team.


Author: Calin Chitu

The post Introducing the Jitsi Meet React Native SDK appeared first on Jitsi.

Self-hosting a fully-featured Jitsi Meet instance just got as easy as pie

By: saghul
16 December 2022 at 19:20

Hey there Fellow Jitsters!

Have you ever considered adding telephony to your Jitsi Meet self-hosted instance?

Up until now you only had the option to run Jigasi and deal with telephony yourself. Many of our users do this every day, but when we asked we learned that there was interest in offloading that part. Could someone else host it?

Today we’re launching a new way to quickly connect to the public telephone network and offer dial-in capabilities to your users without the need for hosting and managing the entire telephony infrastructure: JaaS components. You can give it a try today!

Are you running Jitsi Meet on a Debian instance or are you using Docker? Either way, you can opt-in for this feature and it will be automatically set up. A new JaaS account will be created for you and you’re good to… call.

If you’re running Jitsi Meet on Debian all you need to do is to answer ‘Yes’ to this question and you will have dial-in capability on your Jitsi instance.

Note: A Let’s Encrypt certificate is required and the email address used to generate the certificate will be used also for creating your new JaaS account.

If you’re running Jitsi Meet on Docker you’ll need to set the following variables on your .env file:

  • PUBLIC_URL: the domain were Jitsi Meet runs
  • ENABLE_JAAS_COMPONENTS=1
  • A Let’s Encrypt certificate is required so do enable it too

Now you can restart your setup with `docker-compose up –force-recreate`


An email will be sent to you, asking you to set up a password for the JaaS admin account:

From the JaaS admin console you can manage your account, see the overall activity and upgrade to another plan if needed.

You’re all set up now! Let’s make a phone call! Join a call on your Jitsi Meet instance and notice how the dial-in option becomes available when trying to invite participants. You can now dial-in to one of the phone numbers provided in the list and you’ll be connected to the meeting.

Get started today, a free trial is available! Please check the JaaS components website for details on pricing.

Jigasi is the first Jitsi component offered as a service, with more to come. Stay tuned!


❤ Your personal meetings team.


Author: Oana Emilia Ianc


The post Self-hosting a fully-featured Jitsi Meet instance just got as easy as pie appeared first on Jitsi.

Trust, but verify: introducing user verification

By: saghul
6 December 2022 at 17:51

It’s been a while since we introduced End-to-End Encryption (E2EE) over two years ago. Back then we started with a simple model consisting of a passphrase everyone needed to type and later migrated to a model with randomly generated keys per participant. Each have different characteristic and we ultimately chose to stick with the latter. Today we are introducing a missing piece in the E2EE puzzle: user verification.

User verification was not previously possible in Jitsi Meet. Just like our core E2EE we are basing our implementation on the Matrix protocol. Matrix’s libolm / vodozemac provide a Short Authentication String (SAS) mechanism implementation which developers can use. They even have great documentation on how it works, thanks Matrix!

So, how does it work?

First, you’d gather in a meeting and turn E2EE on.

Now you’ll see a new option for each participant in their tile menu that allows you to verify them:

After choosing to verify a user a dialog will open with a list of emojis:

.

Wait what? Emoji? These emojis conform the SAS. They have been carefully chosen to avoid ambiguity and make the process more user friendly than comparing random numbers. You can find more information in the Matrix spec.  You must verbally compare them with the other participant and if they match, mark it as verified.

Once a user is verified this will be reflected in the user information tooltip:

At this point you can be sure that not only your data is encrypted end-to-end, but also that there is no man-in-the-middle (MITM) attach happening.

Availability

User verification is currently available in Jitsi Meet master and deployed in beta. It will be part of the next stable release, but expect more improvements specially in the UX front.

Thanks

We’d like to thank Robertas Maleckas (ETH Zurich), Prof. Kenny Paterson (ETH Zurich) and Prof. Martin Albrecht (Royal Holloway, University of London) for their work researching Jitsi Meet’s E2EE and encouragement, and Matrix for their tools, which make implementing E2EE a much better experience.


Please note that we still consider our E2EE experimental and are still working on improvements. Please make sure you check out our post on how end-to-end encryption in general does NOT offer a meaningful level of trust and protection when it comes to modern meetings services.

❤ Your personal meetings team.

The post Trust, but verify: introducing user verification appeared first on Jitsi.

❌
❌