We’re excited to announce that our hit retro gaming book Code the Classics Volume I, recently released in a revised edition, is joined by even more vintage gaming goodness! Code the Classics Volume II is out now, featuring five games inspired by video games of the 1980s. This new volume takes you on a tour of the games that inspired their remakes. It also includes code listings and explanations to help you learn how to write games of your own.
If you played computer games back in the 1980s, you may have typed game code into your computer. Back then, computer game listings graced the pages of books from Usborne and magazines like ANALOG Computing and The Micro User. Spend a couple of hours of typing in code, and soon you’d be playing a game you could modify and learn from. A reasonable trade: you’d earn a gaming experience that matched what you could buy from your local computer store. And you’d learn a bit along the way!
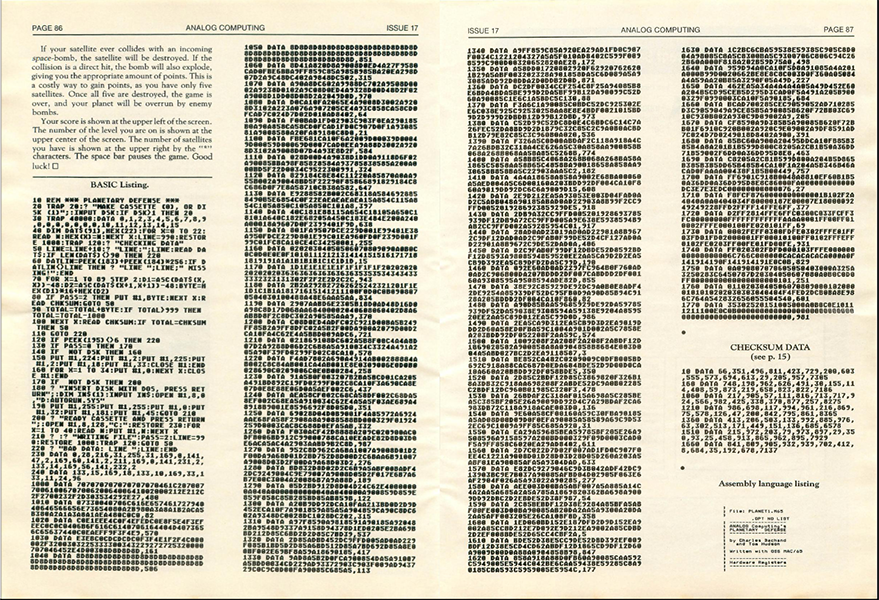
Planetary Defense from ANALOG Computing #17Planetary Defense from ANALOG Computing #17
Code the Classics Volume II features retro arcade games written by Raspberry Pi co-founder and CEO Eben Upton, ably assisted by Andrew Gillett and Sean M. Tracey. Dan Malone (famous for his work with The Bitmap Brothers) created the game graphics, and long-time game audio pro Allister Brimble provided the music and sound effects. Simon Brew, David Crookes, and Liz Upton wrote the stories that take you behind the scenes of the creation of the five classic arcade games featured in this book. What’s more, the book opens with a foreword from Dr. David Braben, co-creator of best-selling computer game Elite.
In this new volume, you’ll meet these vintage-inspired games, and learn from their code in between rounds of play:
Avenger: fly across a scrolling landscape while you save humans from malevolent aliens
Beat Streets: fight your way through a level, and defeat a notorious crime boss
Eggzy: collect gems and survive as long as possible before time runs out
Leading Edge: Race a car on a pseudo-3D race track
Kinetix: Break bricks with your paddle, and use powerups to avoid various menaces
Code the Classics Volume II features abridged code listings along with detailed explanations of the game logic. Not only that, you can download the source code from our GitHub repo and play all the games yourself. The book is available now from the Raspberry Pi Press store, and will be on sale from various print and electronic bookstores in the coming weeks.
Pay what you want for a bundle of books
What’s more, between now and Saturday 5 October 2024 (at 11 AM Pacific), you can get this and other fantastic books as part of our latest Humble Bundle. Pay what you want for 14 books from Raspberry Pi Press and learn about Raspberry Pi, retro gaming, and Python.
A few months back, we quietly dropped the Pico VS Code project on GitHub. It didn’t take long before the feedback started pouring in. Since then, we’ve been listening and tweaking. Now, we’re excited to officially unveil the public beta of the Raspberry Pi Pico Visual Studio Code Extension!
What is Pico VS Code?
Pico VS Code is a Microsoft Visual Studio Code extension designed to make your life easier when creating, developing, and debugging projects for Raspberry Pi Pico-series boards. Whether you’re a total beginner or a seasoned pro, this tool is here to help you dive into Pico development with confidence and ease.
If you’ve ever tried to set up an embedded development environment, you know it’s no small feat. Beginners often find themselves tangled up in the complexities of build systems, SDKs, and toolchains. And let’s not even get started on cross-compilation; developing on one machine to run code on another introduces a whole new set of challenges.
Getting all the right configurations and installations in place can be intimidating for everyone, not just those new to the game. Even experienced developers can find themselves tangled in frustrating setup processes that eat into valuable development time.
That’s why we created the Pico Visual Studio Code extension: a user-friendly tool that simplifies the entire development process. We wanted to offer something that takes the guesswork out of setting up your environment, so you can start coding in an interface you’re already familiar with — Visual Studio Code — as quickly as possible.
With Pico VS Code, you won’t have to worry about nitty-gritty details that trip up newcomers and sometimes stymie veterans. Instead, you’ll be able to focus on what really matters: bringing your Raspberry Pi Pico projects to life. Whether you’re working on your first blinking LED or a more complex project, Pico VSCode is there to help you get started and keep you moving forward.
How do I get Pico VS Code?
Prerequisites
To get started with the Pico VS Code extension, you’ll need to ensure that your development environment meets a few basic requirements. The extension is compatible with various platforms, including Raspberry Pi OS, Windows, macOS, and Linux, each with its own set of prerequisites.
All platforms require an install of Visual Studio Code version 1.92.1 or newer. For detailed instructions on setting up Pico VS Code on your platform, refer to the respective prerequisites outlined below.
Raspberry Pi OS
Ensure you are running a 64-bit distribution of Raspberry Pi OS.
Windows
Make sure you’re using a x86-based PC (not ARM64).
macOS
For macOS users, you can install all necessary dependencies by running the following command in your terminal:
xcode-select --install
Linux
Refer to the README.md on our GitHub page for a full list of required software. Many distros include the required software in the standard OS install.
Installing the Pico VS Code extension
You can install the extension in two ways. The first option is to install it directly from your editor’s marketplace. This provides a seamless integration and automatic updates. The second option is to download and manually install the package. This gives you more control and is helpful in restricted environments or when managing specific versions.
To create a project based on a blink example, select “New Project From Example” in the Pico sidebar panel added by the extension. Then, search for the example you want to use — in our case, “blink” — in the project name field. Click the “Create” button to generate a project from the template.
The blink example generated by pico-vscode
Once the project is generated, it will automatically open. When a Pico project is opened, the extension configures the build system for you based on the SDK version, board type, and other settings you’ve selected. After the progress bar disappears, you can compile the project by clicking the “Compile” button in the bottom right corner. This will open an output panel where you can follow the build progress. Once completed, you should see a line like this: [61/61] Linking CXX executable blink.elf.
When it comes to uploading firmware to your Raspberry Pi Pico board, you have two options. Both require you to connect your Pico in BOOTSEL mode. To put your Pico into BOOTSEL mode, connect your Pico board to your host computer while holding the BOOTSEL button.
The easiest way to get your firmware up and running is the “Run” button. Connect your Pico board in BOOTSEL mode, hit the “Run” button, and the firmware will upload automatically. You’ll know it’s working when the tiny LED near the USB connector starts blinking as the board disconnects itself.
In addition to the blink.elf executable, you’ll find a blink.uf2 file in the build directory within your project. If you prefer to manually flash firmware, drag and drop this UF2 file onto your Pico board in BOOTSEL mode.1 Once the file has been copied onto the board, it will automatically dismount and start running the blink project. You can confirm this by observing the tiny LED near the USB connector. It should start blinking as soon as the board disconnects itself.
For debugging directly within VS Code, the extension adds configuration to your project that allow you to use the debug panel and set breakpoints, just as you would when debugging other C/C++ projects on your computer. To run in debug mode with a Debug Probe, press F5. For detailed instructions on how to correctly wire your board for debugging, refer to the Getting Started guide on our website.2
Integrated offline documentation
When developing bare-metal code for the Pico, you often need to reference an API or check hardware specifications. To streamline your workflow, we’ve integrated the documentation directly into VS Code. This allows you to quickly access the information you need without leaving your editor — or requiring an internet connection.
A VS Code window showcasing a Pico project on the left with the offline documentation open to the right
To access the documentation, navigate to the Raspberry Pi Pico panel in your sidebar and select the topic you want to explore. The documentation will open within the editor, so you can position it wherever you need, just like any other file. This way, you can keep your code and reference materials side by side.
How to update the project configuration
A new SDK revision has been released, and you want to take advantage of its awesome new features in your Pico project. No problem — the extension has you covered. If you need to switch the target board, change the selected SDK, or adjust any other properties configured during project creation, the extension provides commands to update your project settings in just a few clicks.
For example, to switch the SDK version, you’ll find a UI element in the status bar at the bottom of the VS Code window, or in the Raspberry Pi Pico Project quick access panel in your sidebar, displaying your currently selected version. Clicking this will open a simple dialog where you can choose the new SDK version you want to use. Once selected, the extension will automatically reconfigure your project to use the new version. For optimal IntelliSense functionality, we recommended to reload your window after changing any project settings to ensure all extensions are aware of the new configuration. After the changes have been applied, the extension sends you a notification with a button that will reload the current window.
If you need to update settings other than the SDK version or board type, you can access additional commands via the VS Code command palette, which you can open with the keyboard shortcut Ctrl+Shift+P (or Cmd+Shift+P on macOS). Type “Raspberry Pi Pico,” and you’ll see a list of all available commands provided by the Pico extension. This makes it easy to adjust your project configuration as needed.
It also supports MicroPython
For beginners or developers who want to get their projects up and running on a Pico as quickly as possible, MicroPython is an excellent choice.3 It is a lean and efficient implementation of the Python 3 programming language, specifically designed to run on microcontrollers and in constrained environments. It includes a small subset of the Python standard library, making it a powerful yet lightweight option for embedded development.4
To create a Pico project using MicroPython instead of C/C++, select “New MicroPython Project”. You can find this button either in our Quick Access panel, located in your sidebar or by running the New Pico Project command and selecting MicroPython as language. This will launch the familiar project creation wizard, now tailored for setting up a MicroPython project. Choose the location for your project folder and set a name for your project. When you click “Create,” the extension generates the new project and opens it for you, just like with a C/C++ project. But instead of using C/C++, your new project uses the MicroPico extension to run your code on the board and manage project configurations.
A newly create MicroPython based MicroPico projectRaspberry Pi Pico W running the blink.py script in MicroPython
With MicroPython, you can quickly start prototyping and experimenting with your Raspberry Pi Pico-series device, making it an ideal option for both newcomers and seasoned developers alike.
Next steps
For more detailed information on using the Pico VS Code extension, including a comprehensive list of settings and additional guidance, visit our GitHub project page. It’s a great resource for getting the most out of the extension.
If you’re new to developing Pico projects, don’t forget to check out the Getting Started guide we mentioned earlier—it’s packed with helpful tips to get you up and running.
If you’re looking to create a project that leverages the advanced features of Pico-series devices — such as I2C, PIO, or enabling stdio support—be sure to explore the “New C/C++ Project” interface. This tool allows you to customize your project setup to suit your needs, so you can dive into development quickly and efficiently.