Reading view

There are new articles available, click to refresh the page.

Forlinx launches NXP i.MX 95 SoM and development board with 10GbE, CAN Bus, RS485, and more

NXP i.MX 95 board with 10GbE, CAN Bus, RS485

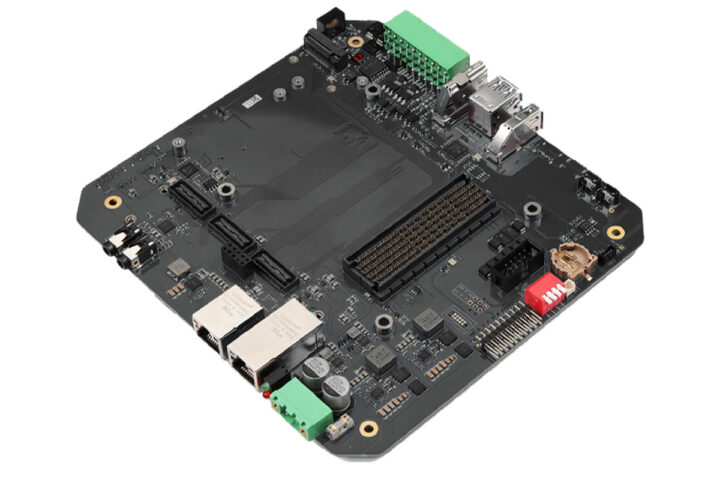
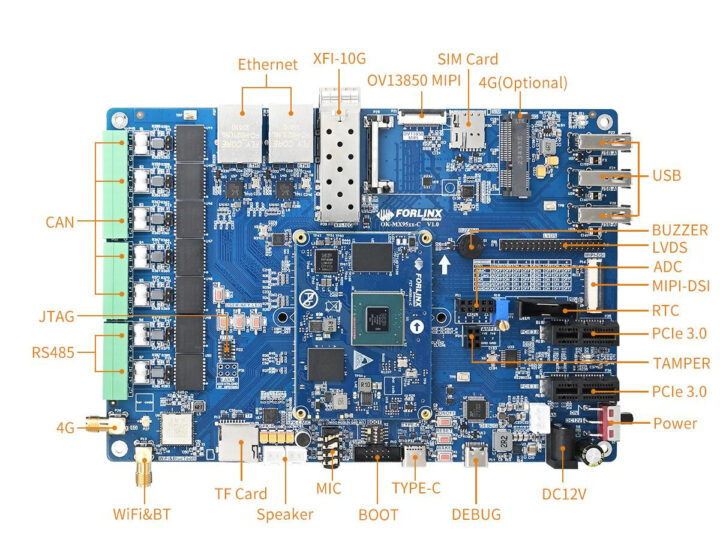
Forlinx FET-MX95xx-C is a system-on-module (SoM) based on NXP i.MX 95 SoC with up to six Cortex-A55 cores, an Arm Cortex-M7 real-time core clocked at 800 MHz, an Arm Cortex-M33 “safety” core clocked at 333 MHz, and equipped with 8GB LPDDR4x and 64GB eMMC flash. The company also provides the feature-rich OK-MX95xx-C development board based on the i.MX 95 module with a wide range of interfaces such as dual GbE, a 10GbE SFP+ cage, terminal blocks with RS485 and CAN Bus interface, three USB Type-A ports, two PCIe slots, and more. Forlinx FET-MX95xx-C system-on-module Specifications: SoC – NXP i.MX 9596 CPU 6x Arm Cortex-A55 application cores clocked at 1.8 GHz (industrial) with 32K I-cache and D-cache, 64KB L2 cache, and 512KB L3 cache Arm Cortex-M7 real-time core clocked at 800 MHz Arm Cortex-M33 safety core clocked at 333 MHz GPU – Arm Mali-G310 V2 GPU for 2D/3D acceleration with support [...]

The post Forlinx launches NXP i.MX 95 SoM and development board with 10GbE, CAN Bus, RS485, and more appeared first on CNX Software - Embedded Systems News.

Giveaway Week 2024 – Orbbec Femto mega 3D depth and 4K RGB camera

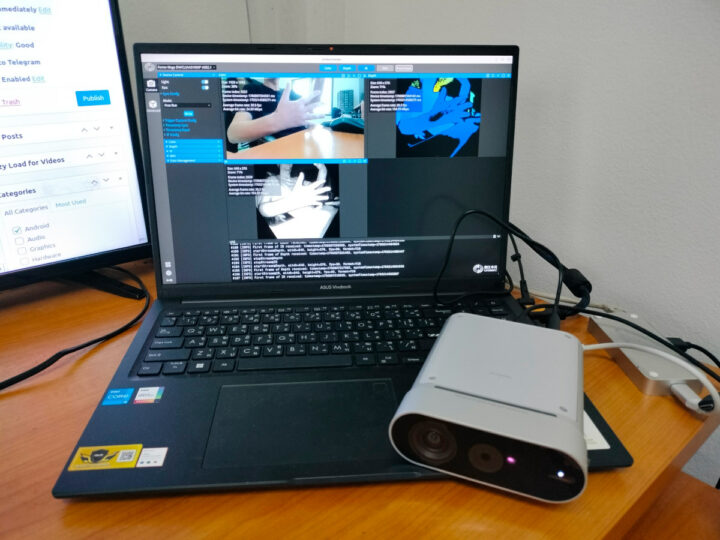
Orbbec Femto Mega review OrbbecViewer

The second prize of Giveaway Week 2024 is the Orbbec Femto Mega 3D depth and 4K RGB camera powered by an NVIDIA Jetson Nano module and featuring Microsoft ToF technology found in Hololens and Azure Kinect DevKit. The camera connects to Windows or Linux host computers through USB or Ethernet and is supported by the Orbbec SDK with the NVIDIA Jetson Nano running depth vision algorithms to convert raw data to precise depth images. I first reviewed the Orbbec Femto Mega using the Orbbec Viewer for a quick test connected to an Ubuntu laptop (as shown above) before switching to a more complex demo using the Orbbec SDK for body tracking in Windows 11. Although it was satisfying once it worked, I struggled quite a lot to run the body tracking demo in Windows 11, so there’s a learning curve, and after you have this working, you’d still need to [...]

The post Giveaway Week 2024 – Orbbec Femto mega 3D depth and 4K RGB camera appeared first on CNX Software - Embedded Systems News.

Orbbec Gemini 335Lg 3D depth and RGB camera features MX6800 ASIC, GMSL2/FAKRA connector for multi-device sync on NVIDIA Jetson Platforms

Gemini 335Lg 3D Camera

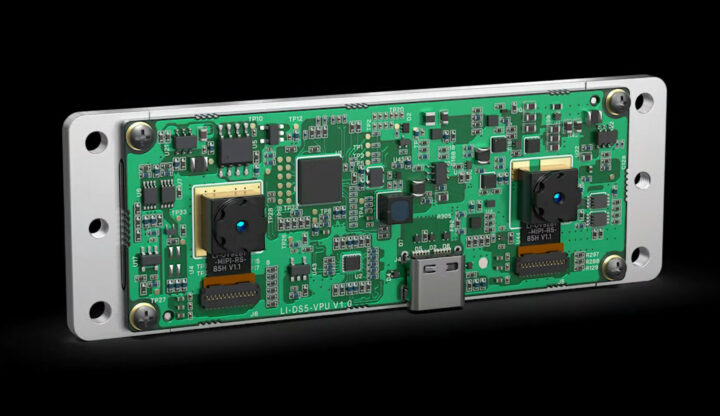
The Orbbec Gemini 335Lg is a 3D Depth and RGB camera in the Gemini 330 series, built with a GMSL2/FAKRA connector to support the connectivity needs of autonomous mobile robots (AMRs) and robotic arms in demanding environments. As an enhancement of the Gemini 335L, the 335Lg features a GMSL2 serializer and FAKRA-Z connector ensuring reliable performance in industrial applications requiring high mobility and precision. The Gemini 335Lg integrates with the Orbbec SDK, enabling flexible platform support across deserialization chips, carrier boards, and computing boxes, including NVIDIA’s Jetson AGX Orin and AGX Xavier. The device can operate in both USB and GMSL (MIPI) modes, which can be toggled via a switch next to the 8-pin sync port, with GMSL as the default. The GMSL2/FAKRA connection provides high-quality streaming with synchronized multi-device capability, enhancing adaptability for complex setups. Previously, we covered several 3D cameras from Orbbec, including the Orbbec Femto Mega 3D [...]

The post Orbbec Gemini 335Lg 3D depth and RGB camera features MX6800 ASIC, GMSL2/FAKRA connector for multi-device sync on NVIDIA Jetson Platforms appeared first on CNX Software - Embedded Systems News.

OpenUC2 10x is an ESP32-S3 portable microscope with AI-powered real-time image analysis

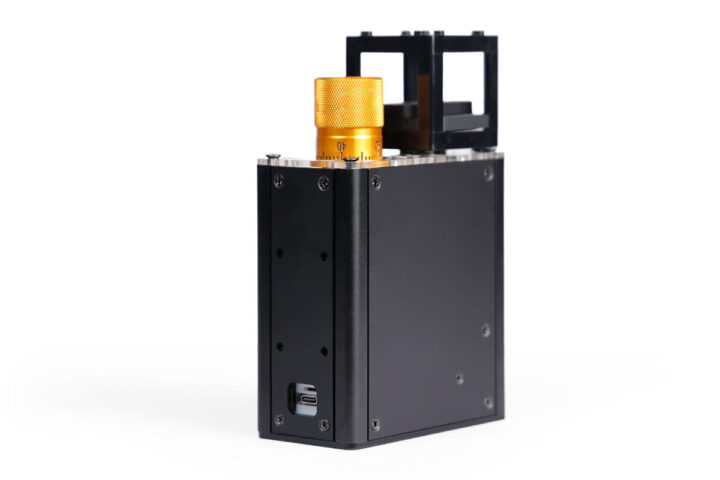
Seeed Studio OpenUC2 10x AI Microscope

Seeed Studio has recently launched the OpenUC2 10x AI portable microscope built around the XIAO ESP32-S3 Sense module. Designed for educational, environmental research, health monitoring, and prototyping applications this microscope features an OV2640 camera with a 10x magnification with precise motorized focusing, high-resolution imaging, and real-time TinyML processing for image handling. The microscope is modular and open-source making it easy to customize and expand its features using 3D-printed parts, motorized stages, and additional sensors. It supports Wi-Fi connectivity with a durable body, uses USB-C for power and swappable objectives make it usable in various applications. Previously we have written about similar portable microscopes like the ioLight microscope and the KoPa W5 Wi-Fi Microscope, and Jean-Luc also tested a cheap USB microscope to read part number of components. Feel free to check those out if you are looking for a cheap microscope. OpenUC2 10x specifications: Wireless MCU – Espressif Systems ESP32-S3 CPU [...]

The post OpenUC2 10x is an ESP32-S3 portable microscope with AI-powered real-time image analysis appeared first on CNX Software - Embedded Systems News.

Waveshare ESP32-S3 ETH board provides Ethernet and camera connectors, supports Raspberry Pi Pico HATs

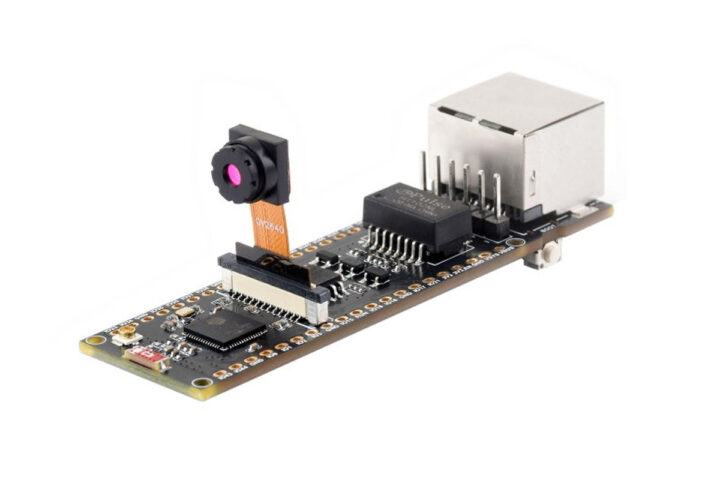
ESP32 S3 ETH CAM KIT ESP32 S3 ETH Development Board with OV2640 camera support

Waveshare has recently launched the ESP32-S3-ETH development board with an Ethernet RJ45 jack, a camera interface, and compatibility with Raspberry Pi Pico HAT expansion boards. This board includes a microSD card interface and supports OV2640 and OV5640 camera modules. Additionally, it offers an optional Power over Ethernet (PoE) module, making it ideal for applications such as smart home projects, AI-enhanced computer vision, and image acquisition. Previously, we have written about LILYGO T-ETH-Lite, an ESP32-S3 board with Ethernet and optional PoE support. We have also written about LuckFox Pico Pro and Pico Max, Rockchip RV1106-powered development boards with 10/100M Ethernet and camera support. The ESP32-S3-ETH board is like a combination of those two, where you get an ESP32-S3 microcontroller, Ethernet (with optional PoE), and a camera interface. ESP32-S3 ETH development board specifications: Wireless module ESP32-S3R8 MCU – ESP32-S3 dual-core LX7 microprocessor @ up to 240 MHz with Vector extension for machine learning Memory – 8MB PSRAM Storage [...]

The post Waveshare ESP32-S3 ETH board provides Ethernet and camera connectors, supports Raspberry Pi Pico HATs appeared first on CNX Software - Embedded Systems News.

Orbbec Introduces Perceptor Dev Kit for Advanced AMR Development with NVIDIA Isaac

Orbbec unveiled the Orbbec Perceptor Developer Kit at ROSCon 2024 in Odense, Denmark, offering a comprehensive, out-of-the-box solution for autonomous mobile robot development. Developed in collaboration with NVIDIA, the OPDK is designed to streamline application development for dynamic environments, such as warehouses and factories. The OPDK integrates four Gemini 335L Depth+RGB cameras with the NVIDIA […]

How to get started with your Raspberry Pi AI Camera

If you’ve got your hands on the Raspberry Pi AI Camera that we launched a few weeks ago, you might be looking for a bit of help to get up and running with it – it’s a bit different from our other camera products. We’ve raided our documentation to bring you this Getting started guide. If you work through the steps here you’ll have your camera performing object detection and pose estimation, even if all this is new to you. Then you can dive into the rest of our AI Camera documentation to take things further.

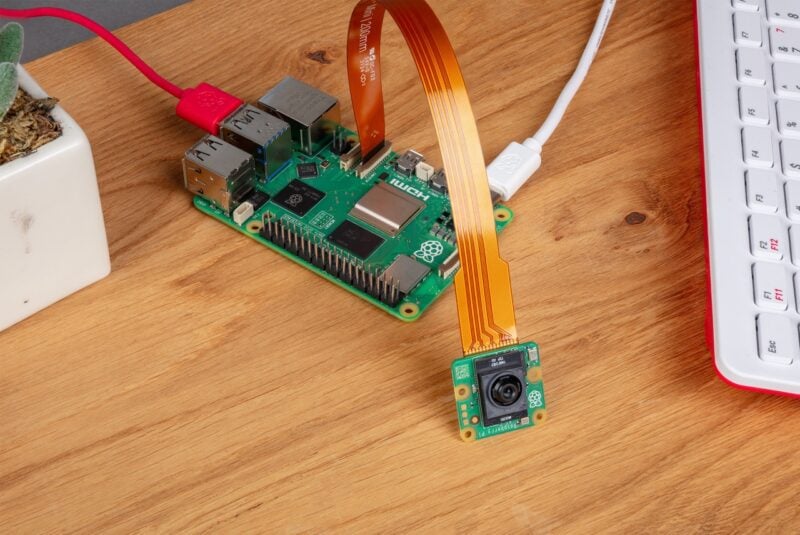
This image shows a Raspberry Pi setup on a wooden surface, featuring a Raspberry Pi board connected to an AI camera module via an orange ribbon cable. The Raspberry Pi board is attached to several cables: a red one on the left for power and a white HDMI cable on the right. The camera module sits in the lower right corner, with its lens facing up. Part of a white and red keyboard is visible on the right side of the image, and a small plant in a white pot is partially visible on the left. The scene suggests a Raspberry Pi project setup in progress.

Here we describe how to run the pre-packaged MobileNet SSD (object detection) and PoseNet (pose estimation) neural network models on the Raspberry Pi AI Camera.

Prerequisites

We’re assuming that you’re using the AI Camera attached to either a Raspberry Pi 4 or a Raspberry Pi 5. With minor changes, you can follow these instructions on other Raspberry Pi models with a camera connector, including the Raspberry Pi Zero 2 W and Raspberry Pi 3 Model B+.

First, make sure that your Raspberry Pi runs the latest software. Run the following command to update:

sudo apt update && sudo apt full-upgrade

The AI Camera has an integrated RP2040 chip that handles neural network model upload to the camera, and we’ve released a new RP2040 firmware that greatly improves upload speed. AI Cameras shipping from now onwards already have this update, and if you have an earlier unit, you can update it yourself by following the firmware update instructions in this forum post. This should take no more than one or two minutes, but please note before you start that it’s vital nothing disrupts the process. If it does – for example, if the camera becomes disconnected, or if your Raspberry Pi loses power – the camera will become unusable and you’ll need to return it to your reseller for a replacement. Cameras with the earlier firmware are entirely functional, and their performance is identical in every respect except for model upload speed.

Install the IMX500 firmware

In addition to updating the RP2040 firmware if required, the AI camera must download runtime firmware onto the IMX500 sensor during startup. To install these firmware files onto your Raspberry Pi, run the following command:

sudo apt install imx500-all

This command:

  • installs the /lib/firmware/imx500_loader.fpk and /lib/firmware/imx500_firmware.fpk firmware files required to operate the IMX500 sensor
  • places a number of neural network model firmware files in /usr/share/imx500-models/
  • installs the IMX500 post-processing software stages in rpicam-apps
  • installs the Sony network model packaging tools

NOTE: The IMX500 kernel device driver loads all the firmware files when the camera starts, and this may take several minutes if the neural network model firmware has not been previously cached. The demos we’re using here display a progress bar on the console to indicate firmware loading progress.

Reboot

Now that you’ve installed the prerequisites, restart your Raspberry Pi:

sudo reboot
The image shows a Raspberry Pi AI Camera Module. It's a small, square-shaped green circuit board with four yellow mounting holes at each corner. In the center, there's a black camera lens marked with "MU2351." An orange ribbon cable is attached to the bottom of the board, used for connecting the camera to a Raspberry Pi. The Raspberry Pi logo, a white raspberry outline, is visible on the left side of the board.

Run example applications

Once all the system packages are updated and firmware files installed, we can start running some example applications. As mentioned earlier, the Raspberry Pi AI Camera integrates fully with libcamera, rpicam-apps, and Picamera2. This blog post concentrates on rpicam-apps, but you’ll find more in our AI Camera documentation.

rpicam-apps

The rpicam-apps camera applications include IMX500 object detection and pose estimation stages that can be run in the post-processing pipeline. For more information about the post-processing pipeline, see the post-processing documentation.

The examples on this page use post-processing JSON files located in /usr/share/rpicam-assets/.

Object detection

The MobileNet SSD neural network performs basic object detection, providing bounding boxes and confidence values for each object found. imx500_mobilenet_ssd.json contains the configuration parameters for the IMX500 object detection post-processing stage using the MobileNet SSD neural network.

imx500_mobilenet_ssd.json declares a post-processing pipeline that contains two stages:

  1. imx500_object_detection, which picks out bounding boxes and confidence values generated by the neural network in the output tensor
  2. object_detect_draw_cv, which draws bounding boxes and labels on the image

The MobileNet SSD tensor requires no significant post-processing on your Raspberry Pi to generate the final output of bounding boxes. All object detection runs directly on the AI Camera.

The following command runs rpicam-hello with object detection post-processing:

rpicam-hello -t 0s --post-process-file /usr/share/rpi-camera-assets/imx500_mobilenet_ssd.json --viewfinder-width 1920 --viewfinder-height 1080 --framerate 30

After running the command, you should see a viewfinder that overlays bounding boxes on objects recognised by the neural network:

To record video with object detection overlays, use rpicam-vid instead:

rpicam-vid -t 10s -o output.264 --post-process-file /usr/share/rpi-camera-assets/imx500_mobilenet_ssd.json --width 1920 --height 1080 --framerate 30

You can configure the imx500_object_detection stage in many ways.

For example, max_detections defines the maximum number of objects that the pipeline will detect at any given time. threshold defines the minimum confidence value required for the pipeline to consider any input as an object.

The raw inference output data of this network can be quite noisy, so this stage also performs some temporal filtering and applies hysteresis. To disable this filtering, remove the temporal_filter config block.

Pose estimation

The PoseNet neural network performs pose estimation, labelling key points on the body associated with joints and limbs. imx500_posenet.json contains the configuration parameters for the IMX500 pose estimation post-processing stage using the PoseNet neural network.

imx500_posenet.json declares a post-processing pipeline that contains two stages:

  1. imx500_posenet, which fetches the raw output tensor from the PoseNet neural network
  2. plot_pose_cv, which draws line overlays on the image

The AI Camera performs basic detection, but the output tensor requires additional post-processing on your host Raspberry Pi to produce final output.

The following command runs rpicam-hello with pose estimation post-processing:

rpicam-hello -t 0s --post-process-file /usr/share/rpi-camera-assets/imx500_posenet.json --viewfinder-width 1920 --viewfinder-height 1080 --framerate 30

You can configure the imx500_posenet stage in many ways.

For example, max_detections defines the maximum number of bodies that the pipeline will detect at any given time. threshold defines the minimum confidence value required for the pipeline to consider input as a body.

Picamera2

For examples of image classification, object detection, object segmentation, and pose estimation using Picamera2, see the picamera2 GitHub repository.

Most of the examples use OpenCV for some additional processing. To install the dependencies required to run OpenCV, run the following command:

sudo apt install python3-opencv python3-munkres

Now download the picamera2 repository to your Raspberry Pi to run the examples. You’ll find example files in the root directory, with additional information in the README.md file.

Run the following script from the repository to run YOLOv8 object detection:

python imx500_object_detection_demo.py --model /usr/share/imx500-models/imx500_network_yolov8n_pp.rpk --ignore-dash-labels -r

To try pose estimation in Picamera2, run the following script from the repository:

python imx500_pose_estimation_higherhrnet_demo.py

To explore further, including how things work under the hood and how to convert existing models to run on the Raspberry Pi AI Camera, see our documentation.

The post How to get started with your Raspberry Pi AI Camera appeared first on Raspberry Pi.
Building a Raspberry Pi Pico 2-powered drone from scratch

The summer, and Louis Wood’s internship with our Maker in Residence, was creeping to a close without his final build making it off the ground. But as if by magic, on his very last day, Louis got his handmade drone flying.

3D-printed CAD design

The journey of building a custom drone began with designing in CAD software. My initial design was fully 3D-printed with an enclosed structure and cantilevered arms to support point forces. The honeycomb lid provided cooling, and the enclosure allowed for embedded XT-60 and MR-30 connections, creating a clean and integrated look. Inside, I ensured all electrical components were rigidly mounted to avoid unwanted movement that could destabilise the flight.

Testing quickly revealed that 3D-printed frames were brittle, often breaking during crashes. Moreover, the limitations of my printer’s build area meant that motor placement was cramped. To overcome these issues, I CNC-routed a new frame from 4 mm carbon fibre, increasing the wheelbase for better stability. Using Carveco software, I generated toolpaths and cut the frame on a WorkBee CNC in our Maker Lab. After two hours, I had a sturdy, assembled frame ready for electronics.

Not one, not two, but three Raspberry Pis

For the drone’s brain, I used a Raspberry Pi Pico 2 connected to an MPU6050 gyroscope for real-time orientation data and an IBUS protocol receiver for streamlined control inputs. Initially, I faced issues with signal processing due to the delay of handling five separate PWM signals. Switching to IBUS sped up the loop frequency by tenfold, which greatly improved flight response. The Pico handled PID (Proportional-Integral-Derivative) calculations for stability, and a 4-in-1 ESC managed the motor signals. The drone also carries a Raspberry Pi Zero with a Camera Module 2 and an analogue VTX for real-time FPV (first-person view) flying.

All coming together in the Maker Lab at Pi Towers

Programming was based on Tim Hanewich’s Scout flight controller code, implementing a ‘rate’ mode controller that uses PID values to maintain desired angular velocities. Fine-tuning the PID gains was essential; improper settings could lead to instability and dangerous oscillations. I followed a careful tuning process, starting with low values for each parameter and slowly increasing them.

To make the process safer, I constructed a testing rig to isolate each axis and simulate flight conditions. This allowed me to achieve a rough tune before moving on to actual flight tests, ultimately ensuring the drone’s safe and stable performance.

The post Building a Raspberry Pi Pico 2-powered drone from scratch appeared first on Raspberry Pi.

Gugusse Roller transfers analogue film to digital with Raspberry Pi

This canny way to transfer analogue film to digital was greatly improved by using Raspberry Pi, as Rosie Hattersley discovered in issue 145 of The MagPi.

Gugusse is a French term meaning something ‘quite flimsy’, explains software engineer and photography fan Denis-Carl Robidoux. The word seemed apt to describe the 3D-printed project: a “flimsy and purely mechanical machine to transfer film.” 

The Gugusse Roller uses Raspberry Pi HQ camera and Pi 4B+ to import and digitise analogue film footage
Image credit: Al Warner

Denis-Carl created Gugusse as a volunteer at the Montreal museum where his girlfriend works. He was “their usual pro bono volunteer guy for anything special with media, [and] they asked me if I could transfer some rolls of 16mm film to digital.” Dissatisfied with the resulting Gugusse Roller mechanism, he eventually decided to set about improving upon it with a little help from Raspberry Pi. Results from the Gugusse Roller’s digitisation process can be admired on YouTube.

New and improved

Denis-Carl brought decades of Linux coding (“since the era when you had to write your own device drivers to make your accessories to work with it”), and a career making drivers for jukeboxes and high-level automation scripts, to the digitisation conundrum. Raspberry Pi clearly offered potential: “Actually, there was no other way to get a picture of this quality at this price level for this DIY project.” However, the Raspberry Pi Camera Module v2 Denis-Carl originally used wasn’t ideal for the macro photography approach and alternative lenses involved in transferring film. The module design was geared up for a lens in close proximity to the camera sensor, and Bayer mosaics aligned for extremities of incoming light were at odds with his needs. “But then came Raspberry Pi HQ camera, which didn’t have the Bayer mosaic alignment issue and was a good 12Mp, enough to perform 4K scans.” 

Gugusse Roller fan Al Warner built his own version
Image credit: Al Warner

Scene stealer

Denis-Carl always intended the newer Gugusse Roller design to be sprocketless, since this would allow it to scan any film format. This approach meant the device needed to be able to detect the film holes optically: “I managed this with an incoming light at 45 degrees and a light sensitive resistor placed at 45 degrees but in the opposite direction.” It was “a Eureka moment” when he finally made it work. Once the tension is set, the film scrolls smoothly past the HQ camera, which captures each frame as a DNG file once the system detects the controlling arms are correctly aligned and after an interval for any vibration to dissipate. 

Version 3.1 of Denis-Carl’s Gugusse Roller PCB

The Gugusse Roller uses Raspberry Pi 4 to control the HQ Camera, three stepper motors, and three GPIO inputs. So far it has scanned thousands of rolls of film, including trailers of classics such as Jaws, and other, lesser-known treasures. The idea has also caught the imagination of more than a dozen followers who have gone on to build their own Gugusse Roller using Denis-Carl’s instructions — check out other makers’ builds on Facebook.

Denis-Carl Robidoux beside his Gugusse Roller film digitiser

The post Gugusse Roller transfers analogue film to digital with Raspberry Pi appeared first on Raspberry Pi.

Raspberry Pi AI Camera with Sony IMX500 AI sensor and RP2040 MCU launched for $70

Raspberry Pi AI camera

We previously noted that Raspberry Pi showcased a Raspberry Pi Zero 2W with a Raspberry Pi AI camera based on a Sony IMX500 intelligent vision sensor at Embedded World 2024, but it was not available at the time. The good news is that the Raspberry Pi AI camera is now available for $70 from your favorite distributor. This follows the launch of the more powerful Raspberry Pi AI Kit designed for the Raspberry Pi 5 with a 13 TOPS Hailo-8L NPU connected through PCIe. The AI camera based on a Sony IMX500 AI camera sensor assisted by a Raspberry Pi RP2040 to handle neural network and firmware management is less powerful, but can still perform many of the same tasks including object detection and body segmentation, and works on any Raspberry Pi board with a MIPI CSI connector, while the AI Kit only works on the latest Pi 5 board. [...]

The post Raspberry Pi AI Camera with Sony IMX500 AI sensor and RP2040 MCU launched for $70 appeared first on CNX Software - Embedded Systems News.

Raspberry Pi AI Camera on sale now at $70

People have been using Raspberry Pi products to build artificial intelligence projects for almost as long as we’ve been making them. As we’ve released progressively more powerful devices, the range of applications that we can support natively has increased; but in any generation there will always be some workloads that require an external accelerator, like the Raspberry Pi AI Kit, which we launched in June.

The AI Kit is an awesomely powerful piece of hardware, capable of performing thirteen trillion operations per second. But it is only compatible with Raspberry Pi 5, and requires a separate camera module to capture visual data. We are very excited therefore to announce a new addition to our camera product line: the Raspberry Pi AI Camera.

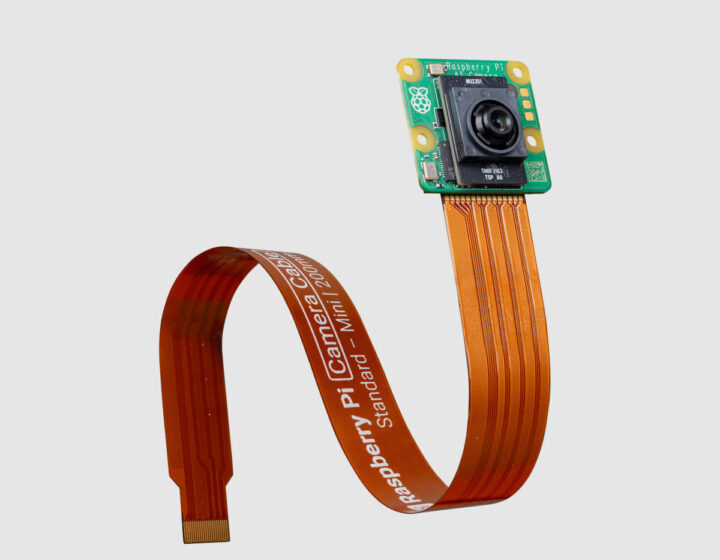
This image features a Raspberry Pi AI Camera Module connected to a long, curved orange ribbon cable. The small, square-shaped green circuit board has a black camera lens at its center and yellow mounting holes at each corner. The ribbon cable is flexed into a loop and prominently displays white text that reads "Raspberry Pi Camera Cable Standard – Mini – 200mm." The cable is designed to connect the camera to a Raspberry Pi device, and the image is set against a plain gray background.

The AI Camera is built around a Sony IMX500 image sensor with an integrated AI accelerator. It can run a wide variety of popular neural network models, with low power consumption and low latency, leaving the processor in your Raspberry Pi free to perform other tasks.

Key features of the Raspberry Pi AI Camera include:

  • 12 MP Sony IMX500 Intelligent Vision Sensor
  • Sensor modes: 4056×3040 at 10fps, 2028×1520 at 30fps
  • 1.55 µm × 1.55 µm cell size
  • 78-degree field of view with manually adjustable focus
  • Integrated RP2040 for neural network and firmware management

The AI Camera can be connected to all Raspberry Pi models, including Raspberry Pi Zero, using our regular camera ribbon cables.

This image shows a Raspberry Pi setup on a wooden surface, featuring a Raspberry Pi board connected to an AI camera module via an orange ribbon cable. The Raspberry Pi board is attached to several cables: a red one on the left for power and a white HDMI cable on the right. The camera module sits in the lower right corner, with its lens facing up. Part of a white and red keyboard is visible on the right side of the image, and a small plant in a white pot is partially visible on the left. The scene suggests a Raspberry Pi project setup in progress.

Using Sony’s suite of AI tools, existing neural network models using frameworks such as TensorFlow or PyTorch can be converted to run efficiently on the AI Camera. Alternatively, new models can be designed to take advantage of the AI accelerator’s specific capabilities.

Under the hood

To make use of the integrated AI accelerator, we must first upload a model. On older Raspberry Pi devices this process uses the I2C protocol, while on Raspberry Pi 5 we are able to use a much faster custom two-wire protocol. The camera end of the link is managed by an on-board RP2040 microcontroller; an attached 16MB flash device caches recently used models, allowing us to skip the upload step in many cases.

The image shows a Raspberry Pi AI Camera Module. It's a small, square-shaped green circuit board with four yellow mounting holes at each corner. In the center, there's a black camera lens marked with "MU2351." An orange ribbon cable is attached to the bottom of the board, used for connecting the camera to a Raspberry Pi. The Raspberry Pi logo, a white raspberry outline, is visible on the left side of the board.

Once the sensor has started streaming, the IMX500 operates as a standard Bayer image sensor, much like the one on Raspberry Pi Camera Module 3. An integrated Image Signal Processor (ISP) performs basic image processing steps on the sensor frame (principally Bayer-to-RGB conversion and cropping/rescaling), and feeds the processed frame directly into the AI accelerator. Once the neural network model has processed the frame, its output is transferred to the host Raspberry Pi together with the Bayer frame over the CSI-2 camera bus.

This image shows a clean, organized desk setup. At the center, there is a laptop with a screen displaying data analysis or machine learning model results, with performance metrics shown in percentages. The laptop is identified as taking up 73% of the image.

On the left side, there's a small potted plant (50%) inside a decorative, geometric-patterned vase (43%). A computer mouse (50%) rests beside the plant.

On the right side, a coffee mug (42%) sits alone, adding a simple personal touch to the workspace.

The overall vibe is minimalist and focused, with soft lighting and a light-colored background.

Integration with Raspberry Pi libcamera

A key benefit of the AI Camera is its seamless integration with our Raspberry Pi camera software stack. Under the hood, libcamera processes the Bayer frame using our own ISP, just as it would for any sensor.

We also parse the neural network results to generate an output tensor, and synchronise it with the processed Bayer frame. Both of these are returned to the application during libcamera’s request completion step.

This image shows a close-up of a Raspberry Pi board with an attached AI camera module. The Raspberry Pi board, a small green circuit board with various electronic components, is partially visible in the upper part of the image. Connected to it is a camera module with a lens, positioned in the lower portion of the image. A flat orange ribbon cable links the camera to the Raspberry Pi, allowing it to transmit data. The background is a plain, muted teal color, making the electronics the clear focus of the image.

The Raspberry Pi camera frameworks — Picamera2 and rpicam-apps, and indeed any libcamera-based application — can retrieve the output tensor, correctly synchronised with the sensor frame. Here’s an example of an object detection neural network model (MobileNet SSD) running under rpicam-apps and performing inference on a 1080p video at 30fps.

This demo uses the postprocessing framework in rpicam-apps to generate object bounding boxes from the output tensor and draw them on the image. This stage takes no more than 300 lines of code to implement. An equivalent application built using Python and Picamera2 requires many fewer lines of code.

Another example below shows a pose estimation neural network model (PoseNet) performing inference on a 1080p video at 30fps.

Although these examples were recorded using a Raspberry Pi 4, they run with the same inferencing performance on a Raspberry Pi Zero!

Together with Sony, we have released a number of popular visual neural network models optimised for the AI Camera in our model zoo, along with visualisation example scripts using Picamera2.

Which product should I buy?

Should you buy a Raspberry Pi AI Kit, or a Raspberry Pi AI Camera? The AI Kit has higher theoretical performance than the AI Camera, and can support a broader range of models, but is only compatible with Raspberry Pi 5. The AI Camera is more compact, has a lower total cost if you don’t already own a camera, and is compatible with all models of Raspberry Pi.

Ultimately, both products provide great acceleration performance for common models, and both have been optimised to work smoothly with our camera software stack.

Getting started and going further

Check out our Getting Started Guide. There you’ll find instructions on installing the AI Camera hardware, setting up the software environment, and running the examples and neural networks in our model zoo.

This image shows a Raspberry Pi AI Camera Module connected to a long, flat, orange ribbon cable. The camera module is small, square-shaped, and green with a black lens in the center. There are yellow mounting holes at each corner of the module. The orange ribbon cable attached to the module has white regulatory symbols and logos printed on it, such as "UKCA," "CE," "FCC," and the Raspberry Pi logo. The cable appears to be flexible and designed for connecting the camera to a Raspberry Pi. The camera is resting on a light gray background.

Sony’s AITRIOS Developer site has more technical resources on the IMX500 sensor, in particular the IMX500 Converter and IMX500 Package documentation, which will be useful for users who want to run custom-trained networks on the AI Camera.

We’ve been inspired by the incredible AI projects you’ve built over the years with Raspberry Pi, and your hard work and inventiveness encourages us to invest in the tools that will help you go further. The arrival of first the AI Kit, and now the AI Camera, opens up a whole new world of opportunities for high-resolution, high-frame rate, high-quality visual AI: we don’t know what you’re going to build with them, but we’re sure it will be awesome.

The post Raspberry Pi AI Camera on sale now at $70 appeared first on Raspberry Pi.

ESP32-Based Module with 3MP Camera and 9-Axis Sensor System

The ATOMS3R Camera Kit M12 is a compact, programmable IoT controller featuring a 3-megapixel OV3660 camera for high-resolution image capture. Designed for IoT applications, motion detection, wearable devices, and educational development, its small form factor is suited for various embedded projects. Powered by the ESP32-S3-PICO-1-N8R8, the kit features an embedded ESP32-S3 SoC with a dual-core […]

reServer Industrial J501 – An NVIDIA Jetson AGX Orin carrier board with 10GbE, 8K video output, GMSL camera support

reServer Industrial J501 Carrier board

Seeed Studio’s reServer Industrial J501, a Jetson AGX Orin carrier board designed for building Edge AI systems. With up to 275 TOPS of exceptional AI performance, this carrier board is designed for advanced robotics and edge AI applications for industrial environments. The carrier board features GbE and 10GbE LAN via RJ45 ports, three USB 3.1 ports, an HDMI 2.1 output, and multiple M.2 slots for expansion, including support for wireless connectivity via the M.2 Key B socket. Additionally, it has support for 8K video decoding and up to 8 GMSL cameras via an optional extension board. reServer Industrial J501 Jetson AGX Orin carrier board specification System-on-Module (one or the other) SoM –  NVIDIA Jetson AGX Orin 64GB with CPU – 12-core Arm Cortex-A78AE v8.2 64-bit processor with 3MB L2 + 6MB L3 cache GPU / AI accelerators NVIDIA Ampere architecture with 2048 NVIDIA CUDA cores and 64 Tensor Cores @ [...]

The post reServer Industrial J501 – An NVIDIA Jetson AGX Orin carrier board with 10GbE, 8K video output, GMSL camera support appeared first on CNX Software - Embedded Systems News.

Intel RealSense Depth Module D421 offers a low-cost depth-sensing solution at just $80

Intel RealSense Depth Module D421

Intel RealSense Depth Module D421 is an entry-level stereo depth module with a 0.2 to 3-meter recommended range, a global shutter to capture motion without artifacts, and a 75° × 50° field of view (FoV). Intel has made RealSense Depth cameras for years, including the popular RealSense D435i with 6 DoF tracking introduced in 2018 that currently sells for about $320. But not all projects need the most advanced features and/or are viable when needing to spend several hundred dollars on the camera itself. The RealSense Depth Module D421 is a much cheaper way to integrate depth-sensing into projects at a much lower price point. It’s fairly similar to the earlier D435 but lacks an RGB camera. Intel RealSense Depth Module D421 specifications: Based on the Intel D4 Vision Processor Image sensor technology – Global Shutter Recommended Range – 0.2 m to over 3 m (varies with lighting conditions) Depth [...]

The post Intel RealSense Depth Module D421 offers a low-cost depth-sensing solution at just $80 appeared first on CNX Software - Embedded Systems News.

M5Stack ESP32-S3-Pico-based devkits: ATOMS3R with 0.85-inch color display, and ATOMS3R Cam with VGA camera

ATOMS3R ESP32-S3-Pico devkit

M5Stack ATOMS3R and ATOMS3R Cam are two tiny devkits based on ESP32-S3-Pico system-in-package and a similar design but the first one features a 0.85-inch color color IPS display, while the other is equipped with a GC0308 VGA camera. Both modules measure just 24x24mm with a thickness of around 13mm, integrate BMM150 and BMI270 motion sensors, offer GPIO expansion through female headers and a grove connector, and feature an infrared transmitter and a USB Type-C port for power and programming. Those are the second devkits based on the ESP32-S3-Pico SiP after we covered the tiny OMGS3 module earlier this week. M5Stack ATOMS3R with display ATOMS3R specifications: SiP – Espressif ESP32-S3-PICO-1-N8R8 SoC ESP32-S3 dual-core Tensilica LX7 up to 240 MHz with 512KB SRAM, 16 KB RTC SRAM Wireless – WiFi 4 and Bluetooth 5 LE + Mesh Memory – 8MB QSPI PSRAM Storage – 8MB QSPI flash Display – 0.85-inch color IPS screen [...]

The post M5Stack ESP32-S3-Pico-based devkits: ATOMS3R with 0.85-inch color display, and ATOMS3R Cam with VGA camera appeared first on CNX Software - Embedded Systems News.

❌