Reading view

There are new articles available, click to refresh the page.

Raspberry Pi product series explained

As our product line expands, it can get confusing trying to keep track of all the different Raspberry Pi boards out there. Here is a high-level breakdown of Raspberry Pi models, including our flagship series, Zero series, Compute Module series, and Pico microcontrollers.

Raspberry Pi makes computers in several different series:

  • The flagship series, often referred to by the shorthand ‘Raspberry Pi’, offers high-performance hardware, a full Linux operating system, and a variety of common ports in a form factor roughly the size of a credit card.
  • The Zero series offers a full Linux operating system and essential ports at an affordable price point in a minimal form factor with low power consumption.
  • The Compute Module series, often referred to by the shorthand ‘CM’, offers high-performance hardware and a full Linux operating system in a minimal form factor suitable for industrial and embedded applications. Compute Module models feature hardware equivalent to the corresponding flagship models but with fewer ports and no on-board GPIO pins. Instead, users should connect Compute Modules to a separate baseboard that provides the ports and pins required for a given application.

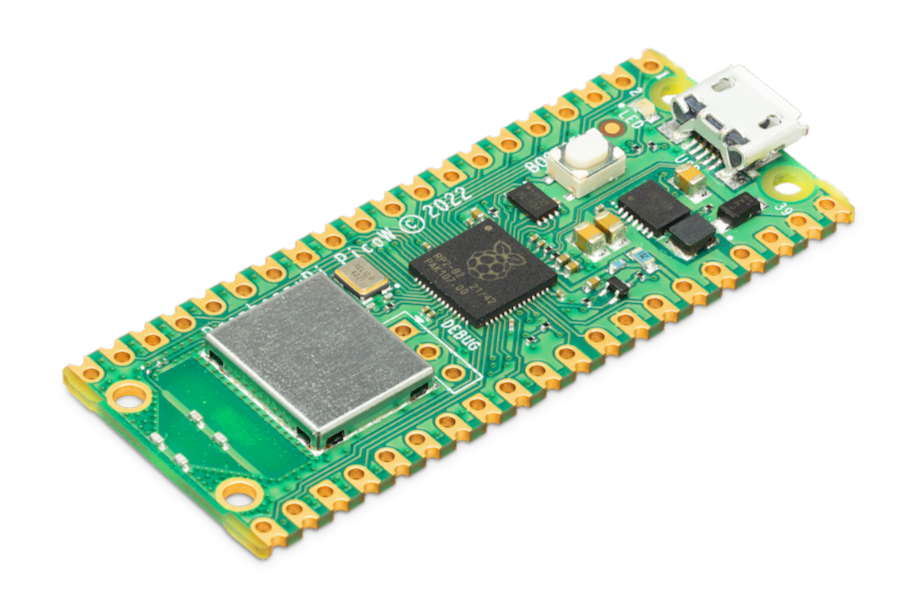
Additionally, Raspberry Pi makes the Pico series of tiny, versatile microcontroller boards. Pico models do not run Linux or allow for removable storage, but instead allow programming by flashing a binary onto on-board flash storage.

Flagship series

Model B indicates the presence of an Ethernet port. Model A indicates a lower-cost model in a smaller form factor with no Ethernet port, reduced RAM, and fewer USB ports to limit board height.

ModelSoCMemoryGPIOConnectivity
Raspberry Pi Model BRaspberry Pi Model BBCM2835256MB, 512MB26-pin GPIO headerHDMI, 2 × USB 2.0, CSI camera port, DSI display port, 3.5mm audio jack, RCA composite video, Ethernet (100Mb/s), SD card slot, micro USB power
Raspberry Pi Model ARaspberry Pi Model ABCM2835256MB26-pin GPIO headerHDMI, USB 2.0, CSI camera port, DSI display port, 3.5mm audio jack, RCA composite video, SD card slot, micro USB power
Raspberry Pi Model B+Raspberry Pi Model B+BCM2835512MB40-pin GPIO headerHDMI, 4 × USB 2.0, CSI camera port, DSI display port, 3.5mm AV jack, Ethernet (100Mb/s), microSD card slot, micro USB power
Raspberry Pi Model A+Raspberry Pi Model A+BCM2835256MB, 512MB40-pin GPIO headerHDMI, USB 2.0, CSI camera port, DSI display port, 3.5mm AV jack, microSD card slot, micro USB power
Raspberry Pi 2 Model BRaspberry Pi 2 Model BBCM2836 (in version 1.2, switched to BCM2837)1 GB40-pin GPIO headerHDMI, 4 × USB 2.0, CSI camera port, DSI display port, 3.5mm AV jack, Ethernet (100Mb/s), microSD card slot, micro USB power
Raspberry Pi 3 Model BRaspberry Pi 3 Model BBCM28371 GB40-pin GPIO headerHDMI, 4 × USB 2.0, CSI camera port, DSI display port, 3.5mm AV jack, Ethernet (100Mb/s), 2.4GHz single-band 802.11n Wi-Fi (35Mb/s), Bluetooth 4.1, Bluetooth Low Energy (BLE), microSD card slot, micro USB power
Raspberry Pi 3 Model B+Raspberry Pi 3 Model B+BCM2837b01GB40-pin GPIO headerHDMI, 4 × USB 2.0, CSI camera port, DSI display port, 3.5mm AV jack, PoE-capable Ethernet (300Mb/s), 2.4/5GHz dual-band 802.11ac Wi-Fi (100Mb/s), Bluetooth 4.2, Bluetooth Low Energy (BLE), microSD card slot, micro USB power
Raspberry Pi 3 Model A+Raspberry Pi 3 Model A+BCM2837b0512 MB40-pin GPIO headerHDMI, USB 2.0, CSI camera port, DSI display port, 3.5mm AV jack, 2.4/5GHz dual-band 802.11ac Wi-Fi (100Mb/s), Bluetooth 4.2, Bluetooth Low Energy (BLE), microSD card slot, micro USB power
Raspberry Pi 4 Model BRaspberry Pi 4 Model BBCM27111GB, 2GB, 4GB, 8GB40-pin GPIO header2 × micro HDMI, 2 × USB 2.0, 2 × USB 3.0, CSI camera port, DSI display port, 3.5 mm AV jack, PoE-capable Gigabit Ethernet (1Gb/s), 2.4/5GHz dual-band 802.11ac Wi-Fi (120Mb/s), Bluetooth 5, Bluetooth Low Energy (BLE), microSD card slot, USB-C power (5V, 3A (15W))
Raspberry Pi 400Raspberry Pi 400BCM27114GB40-pin GPIO header2 × micro HDMI, 2 × USB 2.0, 2 × USB 3.0, Gigabit Ethernet (1Gb/s), 2.4/5GHz dual-band 802.11ac Wi-Fi (120Mb/s), Bluetooth 5, Bluetooth Low Energy (BLE), microSD card slot, USB-C power (5V, 3A (15W))
Raspberry Pi 5Raspberry Pi 5BCM2712 (2GB version uses BCM2712D0)2GB, 4GB, 8GB40-pin GPIO header2 × micro HDMI, 2 × USB 2.0, 2 × USB 3.0, 2 ×  CSI camera/DSI display ports, single-lane PCIe FFC connector, UART connector, RTC battery connector, four-pin JST-SH PWM fan connector, PoE+-capable Gigabit Ethernet (1Gb/s), 2.4/5GHz dual-band 802.11ac Wi-Fi 5 (300Mb/s), Bluetooth 5, Bluetooth Low Energy (BLE), microSD card slot, USB-C power (5V, 5A (25W) or 5V, 3A (15W) with a 600mA peripheral limit)

For more information about the ports on the Raspberry Pi flagship series, see the Schematics and mechanical drawings.

Zero series

Models with the H suffix have header pins pre-soldered to the GPIO header. Models that lack the H suffix do not come with header pins attached to the GPIO header; the user must solder pins manually or attach a third-party pin kit.

All Zero models have the following connectivity:

  • a microSD card slot
  • a CSI camera port (version 1.3 of the original Zero introduced this port)
  • a mini HDMI port
  • 2 × micro USB ports (one for input power, one for external devices)
ModelSoCMemoryGPIOWireless Connectivity
Raspberry Pi ZeroRaspberry Pi ZeroBCM2835512MB40-pin GPIO header (unpopulated)none
Raspberry Pi Zero WRaspberry Pi Zero WBCM2835512MB40-pin GPIO header (unpopulated)2.4GHz single-band 802.11n Wi-Fi (35Mb/s), Bluetooth 4.0, Bluetooth Low Energy (BLE)
Raspberry Pi Zero WHRaspberry Pi Zero WHBCM2835512MB40-pin GPIO header2.4GHz single-band 802.11n Wi-Fi (35Mb/s), Bluetooth 4.0, Bluetooth Low Energy (BLE)
Raspberry Pi Zero 2 WRaspberry Pi Zero 2 WRP3A0512MB40-pin GPIO header (unpopulated)2.4GHz single-band 802.11n Wi-Fi (35Mb/s), Bluetooth 4.2, Bluetooth Low Energy (BLE)

Compute Module series

ModelSoCMemoryStorageForm factorWireless Connectivity
Raspberry Pi Compute Module 1Raspberry Pi Compute Module 1BCM2835512MB4GBDDR2 SO-DIMMnone
Raspberry Pi Compute Module 3Raspberry Pi Compute Module 3BCM28371GB0GB (Lite), 4GBDDR2 SO-DIMMnone
Raspberry Pi Compute Module 3+Raspberry Pi Compute Module 3+BCM2837b01GB0GB (Lite), 8GB, 16GB, 32GBDDR2 SO-DIMMnone
Raspberry Pi Compute Module 4SRaspberry Pi Compute Module 4SBCM27111GB, 2GB, 4GB, 8GB0GB (Lite), 8GB, 16GB, 32GBDDR2 SO-DIMMnone
Raspberry Pi Compute Module 4Raspberry Pi Compute Module 4BCM27111GB, 2GB, 4GB, 8GB0GB (Lite), 8GB, 16GB, 32GBdual 100-pin high density connectorsoptional: 2.4/5GHz dual-band 802.11ac Wi-Fi 5 (300Mb/s), Bluetooth 5, Bluetooth Low Energy (BLE)

For more information about Raspberry Pi Compute Modules, see the Compute Module documentation.

Pico microcontrollers

Models with the H suffix have header pins pre-soldered to the GPIO header. Models that lack the H suffix do not come with header pins attached to the GPIO header; the user must solder pins manually or attach a third-party pin kit.

ModelSoCMemoryStorageGPIOWireless Connectivity
Raspberry Pi PicoRaspberry Pi PicoRP2040264KB2MBtwo 20-pin GPIO headers (unpopulated)none
Raspberry Pi Pico HRaspberry Pi Pico HRP2040264KB2MBtwo 20-pin GPIO headersnone
Raspberry Pi Pico WRaspberry Pi Pico WRP2040264KB2MBtwo 20-pin GPIO headers (unpopulated)2.4GHz single-band 802.11n Wi-Fi (10Mb/s), Bluetooth 5.2, Bluetooth Low Energy (BLE)
Raspberry Pi Pico WHRaspberry Pi Pico WHRP2040264KB2MBtwo 20-pin GPIO headers2.4GHz single-band 802.11n Wi-Fi (10Mb/s), Bluetooth 5.2, Bluetooth Low Energy (BLE)
Raspberry Pi Pico 2Raspberry Pi Pico 2RP2350520KB4MBtwo 20-pin GPIO headers (unpopulated)none

For more information about Raspberry Pi Pico models, see the Pico documentation.

If you’re interested in schematics, mechanical drawings, and information on thermal control, visit our documentation page.

The post Raspberry Pi product series explained appeared first on Raspberry Pi.

Get started with Raspberry Pi Pico-series and VS Code

In the latest issue of The MagPi, Raspberry Pi Documentation Lead Nate Contino shows you how to attach a Raspberry Pi Pico-series device and start development with the new VS Code extension.

The following tutorial assumes that you are using a Pico-series device; some details may differ if you use a different Raspberry Pi microcontroller-based board. Pico-series devices are built around microcontrollers designed by Raspberry Pi itself. Development on the boards is fully supported with both a C/C++ SDK, and an official MicroPython port. This article talks about how to get started with the SDK, and walks you through how to build, install, and work with the SDK toolchain.

VS Code running on a Raspberry Pi computer. This IDE (integrated development environment) has an extension for Pico-series computers

To install Visual Studio Code (known as VS Code for short) on Raspberry Pi OS or Linux, run the following commands: 

$ sudo apt update
$ sudo apt install code

On macOS and Windows, you can install VS Code from magpi.cc/vscode. On macOS, you can also install VS Code with brew using the following command: 

$ brew install --cask visual-studio-code

The Raspberry Pi Pico VS Code extension helps you create, develop, run, and debug projects in Visual Studio Code. It includes a project generator with many templating options, automatic toolchain management, one-click project compilation, and offline documentation of the Pico SDK. The VS Code extension supports all Raspberry Pi Pico-series devices.

Creating a project in VS Code

Install dependencies

On Raspberry Pi OS and Windows no dependencies are needed.

Most Linux distributions come preconfigured with all of the dependencies needed to run the extension. However, some distributions may require additional dependencies.

The extension requires the following: 

  • Python 3.9 or later 
  • Git 
  • Tar 
  • A native C and C++ compiler (the extension supports GCC) 

You can install these with: 

$ sudo apt install python3 git tar build-essential

On macOS 

To install all requirements for the extension on macOS, run the following command: 

$ xcode-select --install

This installs the following dependencies:

  • Git
  • Tar 
  • A native C and C++ compiler (the extension supports GCC and Clang)

Install the extension 

You can find the extension in the VS Code Extensions Marketplace. Search for the Raspberry Pi Pico extension, published by Raspberry Pi. Click the Install button to add it to VS Code.

You can find the store entry at magpi.cc/vscodeext. You can find the extension source code and release downloads at magpi.cc/picovscodegit. When installation completes, check the Activity sidebar (by default, on the left side of VS Code). If installation was successful, a new sidebar section appears with a Raspberry Pi Pico icon, labelled “Raspberry Pi Pico Project”.

Create code to blink the LED on a Pico 2 board

Load and debug a project 

The VS Code extension can create projects based on the examples provided by Pico Examples. For an example, we’ll walk you through how to create a project that blinks the LED on your Pico-series device: 

  1. In the VS Code left sidebar, select the Raspberry Pi Pico icon, labelled Raspberry Pi Pico Project. 
  2. Select New Project from Examples. 
  3. In the Name field, select the blink example. 
  4. Choose the board type that matches your device. 
  5. Specify a folder where the extension can generate files. VS Code will create the new project in a sub-folder of the selected folder. 
  6. Click Create to create the project. The extension will now download the SDK and the toolchain, install them locally, and generate the new project. The first project may take five to ten minutes to install the toolchain. VS Code will ask you whether you trust the authors because we’ve automatically generated the .vscode directory for you. Select yes.

The CMake Tools extension may display some notifications at this point. Ignore and close them. 

two raspberry pi pico 2 boards on a yellow and a blue cutting board. both are connected via usb c with raspberry red cables
Pico’s Micro USB connector makes sending code easy

On the left Explorer sidebar in VS Code, you should now see a list of files. Open blink.c to view the blink example source code in the main window. The Raspberry Pi Pico extension adds some capabilities to the status bar at the bottom right of the screen:

  • Compile. Compiles the sources and builds the target UF2 file. You can copy this binary onto your device to program it. 
  • Run. Finds a connected device, flashes the code into it, and runs that code.

The extension sidebar also contains some quick access functions. Click on the Pico icon in the side menu and you’ll see Compile Project. Hit Compile Project and a terminal tab will open at the bottom of the screen displaying the compilation progress.

Compile and run blink 

To run the blink example: 

  1. Hold down the BOOTSEL button on your Pico-series device while plugging it into your development device using a Micro USB cable to force it into USB Mass Storage Mode. 
  2. Press the Run button in the status bar or the Run Project button in the sidebar. You should see the terminal tab at the bottom of the window open. It will display information concerning the upload of the code. Once the code uploads, the device will reboot, and you should see the following output:
The device was rebooted to start the application.

Your blink code is now running. If you look at your device, the LED should blink twice every second. 

The image shows a Raspberry Pi Pico 2, a small, rectangular microcontroller development board designed by the Raspberry Pi Foundation. This board is similar in appearance to the Raspberry Pi Pico, but it includes wireless connectivity features, as denoted by the "W" in its name. Here are some details visible in the image: Board Design: The board has a green printed circuit board (PCB) with gold-plated connections along the edges. These are pin headers designed for easy connection to other components or breadboards. Microcontroller: In the center of the board is a black integrated circuit chip, which is likely the RP2040 microcontroller. It features the Raspberry Pi logo on it. Labeling: The board is labeled "Pico" with the number "2" alongside it, indicating it is a Pico W model, a second version of the original Pico with enhanced features. The Raspberry Pi logo, a stylized raspberry with a leaf, is printed near the labeling. USB Connector: At the top end of the board, there is a micro USB connector, which is used for power supply and data transfer. Other Components: Visible components include a white reset button, small surface-mounted components like resistors and capacitors, and a black square component which is likely the wireless module for Wi-Fi connectivity. The board includes a small square chip next to the microcontroller, which could be the antenna or additional circuitry for the wireless module. Form Factor: The board has a compact form factor, designed for embedding into various projects, especially in IoT applications that require Wi-Fi connectivity. The Raspberry Pi Pico 2 is used for a wide range of applications, from simple programming projects to complex IoT systems, due to its small size, affordability, and ease of use with the MicroPython programming environment.
The new Raspberry Pi Pico 2 has upgraded capabilities over the original model

Make a code change and re-run 

To check that everything is working correctly, click on the blink.c file in VS Code. Navigate to the definition of LED_DELAY_MS at the top of the code: 

#ifndef LED_DELAY_MS
#define LED_DELAY_MS 250
#endif LED_DELAY_MS

Change the 250 (in ms, a quarter of a second) to 100 (a tenth of a second): #ifndef LED_DELAY_MS #define LED_DELAY_MS 100 #endif LED_DELAY_MS 

  1. Disconnect your device, then reconnect while holding the BOOTSEL button just as you did before. 
  2. Press the Run button in the status bar or the Run Project button in the sidebar. You should see the terminal tab at the bottom of the window open. It will display information concerning the upload of the code. Once the code uploads, the device will reboot, and you should see the following output: 
The device was rebooted to start the application.

Your blink code is now running. If you look at your device, the LED should flash faster, five times every second.

Top tip

Read the online guide

This tutorial also features in the Raspberry Pi Datasheet: Getting started with Pico. It also features information on using Raspberry Pi’s Debug Probe.

The post Get started with Raspberry Pi Pico-series and VS Code appeared first on Raspberry Pi.

Raspberry Pi Pico brings junked joysticks back to life | The MagPi #146

In the latest issue of The MagPi, out today, we talk to David Miles, who designed a Raspberry Pi Pico kit to bring junked joysticks back to life.

One of the many great things about the EMF Camp events is the swap shop tent, where all kinds of things are brought to be sold and exchanged. On one of my many visits there, I found a slightly worn (but very heavy) pair of joysticks which looked as if they had been part of a professional simulator at some point. In this article, I’ll talk about how I reverse-engineered them to create a fully fledged flight simulator controller. Along the way, I happened to create a Pico program that makes it easy to use any input device as a USB joystick. 

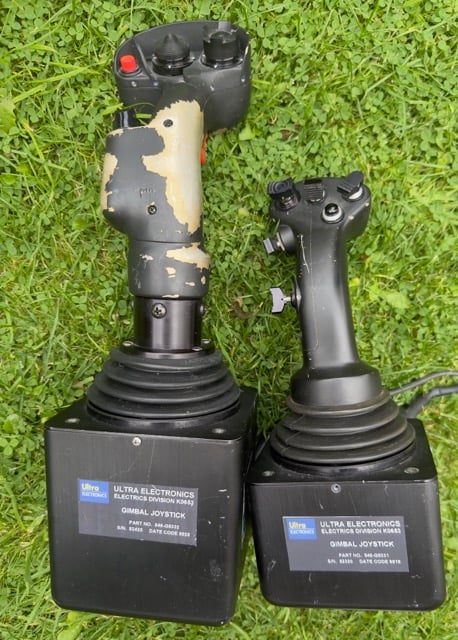
The image shows two gimbal joysticks resting on grass. These joysticks are industrial or military-grade, manufactured by "Ultra Electronics" (Electrical Division). They both have black bases with model information labels on them, identifying the joysticks as part of the Ultra Electronics line. Left Joystick: It appears worn, with patches of the original paint chipped away, revealing a lighter color underneath. The grip features several buttons and what looks like a control hat (small thumbstick). Right Joystick: This one appears to be in better condition, with a smoother and more consistent finish. It also has buttons and a control hat, similar to the left joystick, but the design is slightly more compact and less worn. Both joysticks are mounted on black gimbal bases, which allow for multidirectional movement, and each has a label with the Ultra Electronics branding. The labels contain text, including "Gimbal Joystick" and some part or batch numbers, but they are partially obscured or difficult to read due to the angle. These joysticks could be from fighter jets or advanced simulation setups.
Figure 1: The joysticks as I found them in the EMF Camp swap shop

Getting started

Figure 1 shows the joysticks as I found them. Ultra Electronics is a manufacturer of devices for the Ministry of Defence in the UK, so this looked like something interesting. My hope was to try and get them working so I could use them with a flight simulator for a plane that used joysticks like these. This meant I had two challenges:

  • Getting data out of the joystick
  • Making something which connects to a PC as a game controller

Follow the signals

To discover how to get data out of the joystick, I had a look at the wires that came out of it. The main unit has two plugs on the end of a (surprisingly long) wire — what looks like a nine-pin RS232 serial connector, and a 15-pin game port connector. The secondary joystick (the one on the right in Figure 1) has a 25-pin connector which plugs into the primary one, which suggests that it just contains switches, and that the first is the brains of the operation. The connector types fit the late-’90s feel of the hardware and give clues as to how we can talk to it, but we can take a look inside to confirm some assumptions.

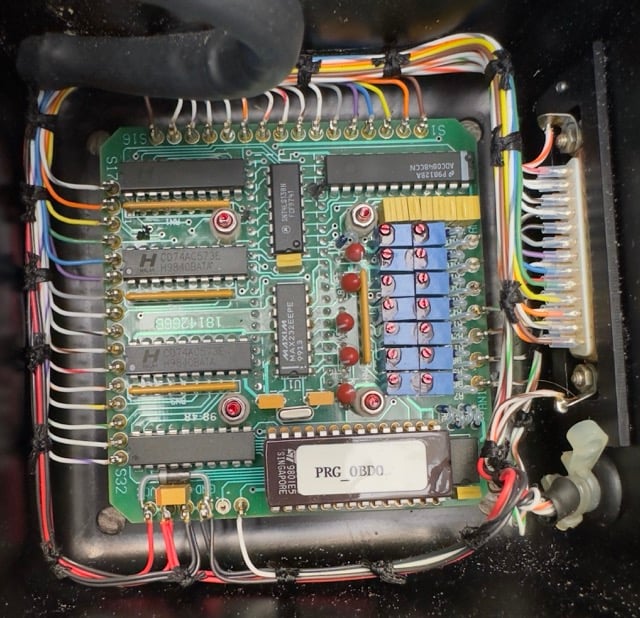
Figure 2 shows the view inside the device. There are four screws holding the top part of the joystick inside the case. After removing these, the whole stick and gimbal assembly lifts out and we can see this circuit board. Some of the components on here give us some pointers on how this works.

The image shows the internal components of an electronic device, likely part of the control mechanism for the joysticks in the previous image. It features a printed circuit board (PCB) with various electronic components and wiring. Key elements visible in the image include: Integrated Circuits (ICs): Several IC chips are mounted on the PCB, including some marked with "H" and what appears to be part numbers like "CD74AC573E" and "1814306." These ICs likely control the logic and processing functions of the device. Dip Switches: A blue section of the board has multiple red dip switches, which are used to configure the device for various settings or functions. Wiring: Color-coded wires connect the board to a nearby connector, which suggests this component interfaces with other parts of a larger system. The wiring is neatly organized and secured in place with black ties. Labelled Component: One chip has a white label with "PRG_OBDO," which could indicate this is a programmable chip or ROM that stores specific instructions or firmware for the device. LEDs or Indicators: Several small red components, possibly LEDs, are mounted near the switches, likely serving as status indicators for the system. This appears to be a custom-built or specialized electronics module, possibly part of a control system for industrial or aviation-related equipment, given the context of the previous images. The wiring and the presence of programmable chips suggest it controls a complex system.
Figure 2: The PCB at the heart of the joystick. Look at all those carefully adjusted and sealed calibration resistors!

There’s a chip with a label covering it. This is normally a sign of some sort of microcontroller, indicating that there’s more going on than just a simple controller. This is backed up by seeing some chips with ‘ADC’ on them — this stands for ‘Analogue to Digital Converter’, and could be used to turn an analogue value (e.g. the position of a potentiometer in a joystick) into a digital value sent to a computer. 

Finally, in the middle, there is a chip with ‘MAX232’ written on it. This family of chips are used to convert 5v logic levels you often see used in microelectronics to the 15v levels used in RS232 communications. This is another sign that the nine-pin connector is probably a regular RS232 connector I can use to get data from the joystick.

This leaves the 15-pin connector. Is it a game port? Game port connectors were often used in the ’90s to connect a joystick to your PC (confusingly, often using a socket on your sound card). They allowed you to connect two joysticks to your computer, each with two buttons. We can see that this joystick has more than four buttons — doing a quick count, we seem to have about 30, so maybe it’s being used for something else.

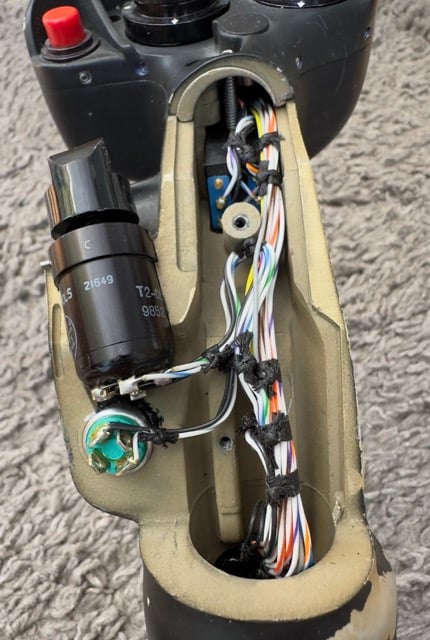
The image shows the internal view of a joystick, likely the same worn joystick seen in a previous image. The outer casing has been removed to reveal the internal wiring and components. Key elements include: Wiring: A bundle of color-coded wires runs vertically inside the joystick housing. The wires are neatly organized and secured with black ties, indicating they are part of the internal control system that connects the buttons and control mechanisms of the joystick to the external interface. Capacitor: A large black cylindrical component marked "2I649" and "T2" appears to be a capacitor. Capacitors like this are used for energy storage within electrical circuits and are common in joystick designs to manage power surges or smooth out signals. Metal Shaft: A metal rod or shaft is visible running vertically through the center of the joystick, likely part of the gimbal system that allows for multidirectional movement. Green Component: Near the bottom, there's a small green component with what looks like a circular interface or sensor, possibly related to the joystick's motion tracking or button functionality. Buttons: The top of the image shows part of the joystick grip with external buttons still visible, including a red button and a few other black controls. These buttons are connected to the internal components via the wiring. This internal view reveals the intricate electronic design and mechanical structure of the joystick, highlighting its complexity as a precision control device, likely for industrial or aviation purposes.
Figure 3: All the wires have unique colour combinations

If we pull the back off the connector, we can see that there are only two pins connected using red and black wires. If we check those pins on the game port specification, we see that these are connected to ground and 5v.

This fits in with our earlier findings. There’s no way to power a device over a regular serial connection, but using a game port alongside a serial connector would allow you to connect to a PC and transfer power and data.

Plugging it in

Now that we think we know how this works, we can have a go at connecting it to a computer. To do this, I used a regular USB-to-serial converter and a power adapter connected to a USB power bank.

After connecting power, I could see a steady 100ma power draw, which felt reassuring, so I hooked up the serial connection and tried a few different configurations to see if I could receive anything sensible. Eventually, I found one which gave me a regular stream of data which changed as I moved the controls and pressed buttons. It turns out that these joysticks work at 9600 baud (around 100 characters per second) and send 8-bit data. 

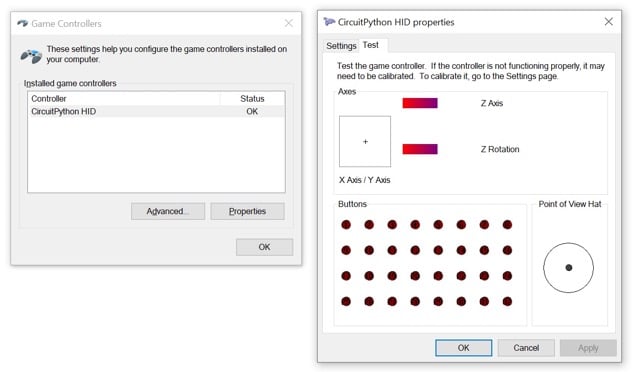
The image shows two dialog boxes from the "Game Controllers" settings interface in a Windows operating system. These settings are used to configure and test game controllers connected to the computer. The controller being used appears to be recognized as a "CircuitPython HID" device. Left Dialog Box: Title: "Game Controllers" This box lists the connected game controllers and their status. One controller is listed: "CircuitPython HID," which has a status of "OK," indicating that the controller is recognized and functioning correctly. Buttons include "Advanced" and "Properties" for further configuration or testing of the device. Right Dialog Box: Title: "CircuitPython HID properties" This is the "Test" tab for the game controller, allowing the user to test and calibrate various inputs of the controller. Axes Section: There are visual indicators for the X Axis/Y Axis, Z Axis, and Z Rotation. The test allows movement of the joystick to see how the axes respond in real time. Buttons Section: A grid of red circles represents buttons on the controller, where each circle lights up when a corresponding button on the joystick is pressed. Currently, all the button indicators are off. Point of View Hat Section: This section represents the directional pad (or "POV hat") found on some controllers, allowing for testing of its functionality. Overall, this image shows the controller has been successfully recognized by the system and is being tested using the built-in Windows game controller settings. The "CircuitPython HID" designation suggests the controller is using the CircuitPython library, commonly used for custom hardware projects like joysticks.
Figure 4: This is how Windows sees the controller. The Raspberry Pi has a similar interface for joysticks

Now that I had data, the next thing was to decode it. I started by writing a Python program to read from the joystick and write it out. By starting to build something on the PC, I would have something I could then use on a Pico with CircuitPython.

Working through the controls on the joystick, I found that each button corresponds to a single bit in the data, and each of the axes (X and Y movements of the sticks) with a byte in the output, ranging from -128 to 127, and encoded using two’s complement.

Making a game controller

Now that I could read from the joystick, I needed to send these to the computer as a proper game controller that could be used by programs such as Microsoft Flight Simulator. Figure 3 shows what I was aiming for: I wanted all the abilities of the joystick to be exposed for use on the PC. 

A Raspberry Pi Pico was the perfect thing to use here as it has great IO options and support for working in Python. I needed to configure it to announce itself as a game controller over USB, and then adapt my code to run on the Pico and send the appropriate messages to the PC.

Fortunately, CircuitPython has great support for making custom devices like this. First, we need to define how we want our device to appear over USB, and write some Python to make sure this is registered whenever the Pico connects over USB.

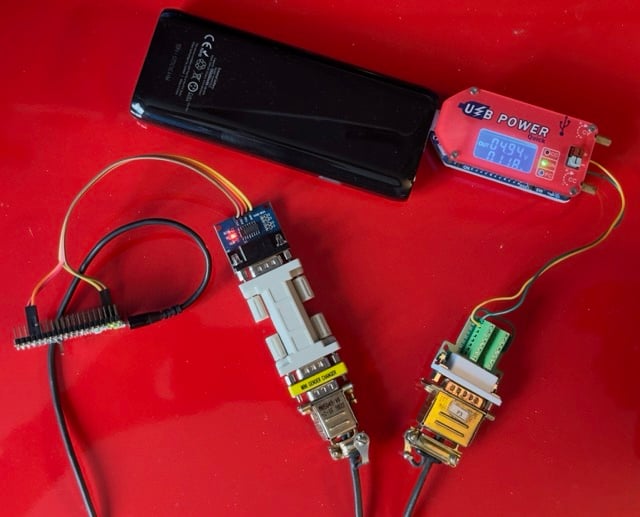
The image shows a collection of electronic components and connectors laid out on a red surface, likely part of a hardware setup for interfacing with or powering a device. Key components include: USB Power Supply: A black external battery pack is powering the setup via a USB cable. The USB cable is connected to a small red "USB Power" module with an integrated display showing output values, including 4.94V and 0.18A. This module is likely monitoring the power draw of the connected components. DB9 Connectors: There are two separate DB9 (serial) connectors. One has a grey body and a blue breakout board at the top, while the other appears to be connected to a green terminal block for wiring. These connectors are typically used for RS-232 or other serial communication interfaces, often found in industrial or retro computing hardware. Breakout Boards: The setup includes at least two small breakout boards attached to the serial connectors. These boards seem to have small ICs and wiring that enable communication or power regulation between the connected devices. Wiring: Several wires, color-coded in yellow, black, and red, are connecting various parts of the setup. Some wires are plugged into a pin header at the left, likely for GPIO or serial communication. Overall Setup: The combination of serial connectors, breakout boards, and USB power monitoring suggests this setup is being used for testing or interfacing with an external device, perhaps an older serial-controlled system or custom hardware. The USB power module ensures that the components receive regulated power, while the serial connectors enable communication between devices. This configuration looks like a development or testing setup for a project involving serial communication and low-power electronics.
Figure 5: The system laid out on the desk. At the top is the power supply provided by a USB battery, at the left is a Raspberry Pi Pico connected to the PC using USB, in the middle is the RS232 interface, and on the right is the game port adapter

This involves digging into the world of USB HID descriptors. HID stands for Human Interface Device, and covers a wide range of gadgets which you can connect over USB, including mice, keyboards, and game controllers, even going as far as volume controls and exercise equipment. 

These descriptors contain information about the device, such as what class it is and which types of data it will send to the PC. By default, CircuitPython supports only a mouse and keyboard. We need to send a descriptor which contains the different axes, buttons, and hats the controller supports.

The full specification for this is on the official www.usb.org site, but we can extend the Adafruit example to increase the number of buttons to 32, and to add an additional entry for the joystick’s hats. 

Putting the boot in

When building CircuitPython projects, you will normally write Python in the code.py file. Code in this file runs after the Pico has initialised USB, so it’s too late to change anything about the device. To do this, we need to look at the lesser-known boot.py file. This file runs when CircuitPython first boots, and before USB is configured, which means that you can make changes to the USB devices that are registered. 

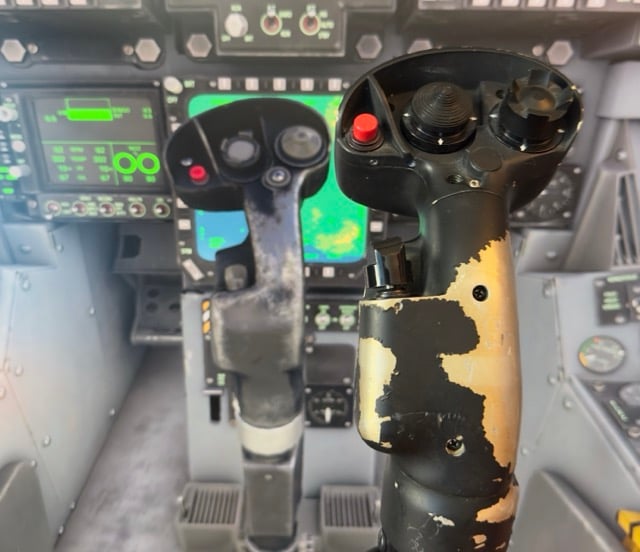
The image shows the interior of what appears to be an aircraft cockpit, with a focus on two joysticks. These joysticks are positioned in front of a set of displays and control panels. Key elements in the image: Joysticks: The foreground joystick is similar to the one seen in previous images, with visible paint wear and a weathered appearance, revealing a lighter color underneath. It has multiple buttons and controls, including a prominent red button and a thumbstick on top. The background joystick is in better condition, with less visible wear and a more uniform appearance. It has similar controls, including buttons and knobs. Cockpit Displays: Behind the joysticks, there are large digital displays, some of which show what appears to be radar or navigation information. The green display on the left is likely a radar or targeting screen, while the right display shows a similar visual. Control Panels: The cockpit is filled with various buttons, switches, and dials, typical of a fighter jet or advanced aircraft. These controls are likely used for navigation, communication, and weapon systems. This image suggests the joysticks are part of an aircraft control system, likely in a military or aviation simulation environment. The worn joystick in the foreground might be an older or heavily used unit, while the cockpit setup and display screens indicate advanced avionics and targeting systems common in modern fighter jets or flight simulators.
Figure 6: The EMF joystick with its virtual counterpart. This looks like a close match to the real thing

The program in the code.py file reads data packets from the joystick, decodes values from the data, and sends USB messages corresponding to the state of the joystick. The present version is in two parts. The first reads the data into a buffer, and the second pulls values out of this buffer and sends USB messages. 

Bringing it all together

Finally, we need to integrate our project which reads from the PC serial port with our game controller code. As the Pico only supports 5v logic levels, we can use our own MAX232 to map the RS232 voltages to something the Pico can handle. To do this, I used an integrated module with a DB-9 connector on one side and a pin header on the other, connected to the Pico. I could also power the joystick from the Pico’s 5v supply.

Now that I had the two halves of the project working together, it was a case of going through the buttons on the device and mapping them across to the controls defined for the controller. This was one of the more tedious parts of the project, but it was a good chance to make sure everything was working correctly.

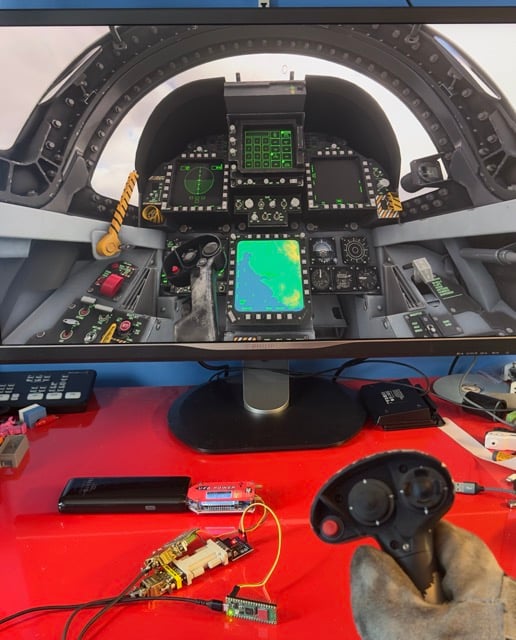
The image shows a combination of a physical hardware setup and a simulation displayed on a monitor. Key elements: Monitor Display: The monitor displays a realistic aircraft cockpit, likely from a flight simulator. The cockpit features multiple digital screens with radar, navigation, and flight information, including a map, similar to what might be seen in a modern fighter jet. The design and layout of the cockpit are highly detailed, suggesting a realistic simulation environment, perhaps for military or aviation training or entertainment. Hardware Setup: In front of the monitor, there is a physical setup on a red desk, which includes: USB Power Module: A red USB power module similar to what was seen in previous images, connected to the external power source (a black battery pack) and other components. DB9 Serial Connectors and Breakout Boards: The serial connectors, wiring, and breakout boards are also present, part of an electronic interface setup, likely interfacing with the joystick and/or the simulator. Green Microcontroller Board: A small green board with headers and connections, possibly a microcontroller like a Raspberry Pi or an Arduino, is also connected to the system, likely controlling the joystick or interfacing with the simulator. Joystick: In the foreground, someone is holding the joystick (the same one seen in previous images). The person appears to be interacting with the simulation displayed on the monitor, suggesting that the joystick is being used as a control input for the flight simulator. The person is wearing gloves, which might be to protect the equipment or for comfort when handling the joystick during extended use. Context: This image seems to show a setup where a custom-built joystick (and related electronics) is being used to control a flight simulator. The combination of the joystick, the hardware setup on the desk, and the detailed simulator on the monitor points to a project involving custom hardware integration for flight control, possibly as part of a DIY or experimental setup. The physical electronics appear to enable the connection between the joystick and the simulator, allowing for real-time interaction with the simulated aircraft environment.
Figure 7: The joystick in action

Finally, I’ve got everything I need to use the joystick to control a plane running on the PC. Here I’m using it to control the McDonnell Douglas F/A-18 included with Flight Simulator, which has a similar stick to this, but with two hats swapped. I still don’t know precisely which plane (if any) this joystick is based on. The AV-8 Harrier has those hats in the correct order, but has an extra button just below them on the face of the joystick.

I’ve not been able to find any images of joysticks similar to the second stick anywhere, so if you have any idea where that could have come from, please let me know! 

Read the full story, including some extra tips from the maker David Miles, in The MagPi #146.

The MagPi #146 out NOW!

You can grab the new issue right now from Tesco, Sainsbury’s, Asda, WHSmith, and other newsagents, including the Raspberry Pi Store in Cambridge. It’s also available at our online store, which ships around the world. You can also get it via our app on Android or iOS.

The image you provided is the cover of "The MagPi" magazine, issue 146, from October 2024. This magazine is dedicated to Raspberry Pi enthusiasts. The cover design is orange with black and white elements, featuring a retro horror theme. Some of the key elements on the cover include: The main headline, "PLAY RETRO HORROR CLASSICS ON RASPBERRY PI 5," likely highlighting a feature on retro horror games. The text "Police Line Do Not Cross" in several places, adding to the spooky, horror theme, possibly in reference to crime or mystery-themed games. The imagery of a crow, a spooky-looking house, a cassette tape, and various retro gaming motifs, reinforcing the horror and retro gaming aesthetic. Additional highlights like "LEGO Card Shuffler," "Top 10 Spooky Projects," and "Recycle a Fighter Jet Joystick," suggesting other tech and DIY projects featured in this issue. The bottom of the cover mentions "TURN IT UP TO 11 WITH AUDIO UPGRADES," hinting at content related to enhancing audio experiences. The overall theme seems focused on retro horror gaming and tech projects for Raspberry Pi.

You can also subscribe to the print version of The MagPi. Not only do we deliver it globally, but people who sign up to the six- or twelve-month print subscription get a FREE Raspberry Pi Pico W!

The post Raspberry Pi Pico brings junked joysticks back to life | The MagPi #146 appeared first on Raspberry Pi.

Boost Your Pico Projects with the new Pico VS Code Extension

A few months back, we quietly dropped the Pico VS Code project on GitHub. It didn’t take long before the feedback started pouring in. Since then, we’ve been listening and tweaking. Now, we’re excited to officially unveil the public beta of the Raspberry Pi Pico Visual Studio Code Extension!

What is Pico VS Code?

Pico VS Code is a Microsoft Visual Studio Code extension designed to make your life easier when creating, developing, and debugging projects for Raspberry Pi Pico-series boards. Whether you’re a total beginner or a seasoned pro, this tool is here to help you dive into Pico development with confidence and ease.

If you’ve ever tried to set up an embedded development environment, you know it’s no small feat. Beginners often find themselves tangled up in the complexities of build systems, SDKs, and toolchains. And let’s not even get started on cross-compilation; developing on one machine to run code on another introduces a whole new set of challenges.

Getting all the right configurations and installations in place can be intimidating for everyone, not just those new to the game. Even experienced developers can find themselves tangled in frustrating setup processes that eat into valuable development time.

pico-vscode New C/C++ Project wizard

That’s why we created the Pico Visual Studio Code extension: a user-friendly tool that simplifies the entire development process. We wanted to offer something that takes the guesswork out of setting up your environment, so you can start coding in an interface you’re already familiar with — Visual Studio Code — as quickly as possible.

With Pico VS Code, you won’t have to worry about nitty-gritty details that trip up newcomers and sometimes stymie veterans. Instead, you’ll be able to focus on what really matters: bringing your Raspberry Pi Pico projects to life. Whether you’re working on your first blinking LED or a more complex project, Pico VSCode is there to help you get started and keep you moving forward.

How do I get Pico VS Code?

Prerequisites

To get started with the Pico VS Code extension, you’ll need to ensure that your development environment meets a few basic requirements. The extension is compatible with various platforms, including Raspberry Pi OS, Windows, macOS, and Linux, each with its own set of prerequisites.

All platforms require an install of Visual Studio Code version 1.92.1 or newer. For detailed instructions on setting up Pico VS Code on your platform, refer to the respective prerequisites outlined below.

Raspberry Pi OS

  • Ensure you are running a 64-bit distribution of Raspberry Pi OS.

Windows

  • Make sure you’re using a x86-based PC (not ARM64).

macOS

  • For macOS users, you can install all necessary dependencies by running the following command in your terminal:
xcode-select --install

Linux

  • Refer to the README.md on our GitHub page for a full list of required software. Many distros include the required software in the standard OS install.

Installing the Pico VS Code extension

You can install the extension in two ways. The first option is to install it directly from your editor’s marketplace. This provides a seamless integration and automatic updates. The second option is to download and manually install the package. This gives you more control and is helpful in restricted environments or when managing specific versions.

Install in your editor

You can download the Pico VS Code extension directly from the Visual Studio Code Marketplace within your editor.

pico-vscode marketplace page in VS Code
The marketplace page of the Raspberry Pi Pico extension within VS Code
  1. Open the “Extensions” tab on the left side of VS Code (or press Ctrl+Shift+X on Windows/Linux, or Cmd+Shift+X on macOS).
  2. In the search bar at the top, type “pico-vscode”.
  3. Once you find the extension, click “Install”. Wait until the installation completes, and you’re ready to create a Raspberry Pi Pico project.

If you’re using a different VS Code-compatible editor, the extension is also available through the OpenVSX marketplace.

Manual installation

If you prefer, you can manually install the extension by downloading the package directly. Follow these steps:

  1. Visit the pico-vscode GitHub page and download the latest .vsix file from the release assets.
  2. To install the file in VS Code:
    • Open the “Extensions” panel as described earlier.
    • Click the three-dots menu (...) above the search bar and select “Install from VSIX…”.
    • Choose the .vsix file you just downloaded.

Alternatively, you can install the .vsix file via the terminal using the following command:

code --install-extension raspberry-pi-pico-<version>.vsix

Building a blink example with Pico VS Code

To create a project based on a blink example, select “New Project From Example” in the Pico sidebar panel added by the extension. Then, search for the example you want to use — in our case, “blink” — in the project name field. Click the “Create” button to generate a project from the template.

Raspberry Pi Pico blink example generated by pico-vscode
The blink example generated by pico-vscode

Once the project is generated, it will automatically open. When a Pico project is opened, the extension configures the build system for you based on the SDK version, board type, and other settings you’ve selected. After the progress bar disappears, you can compile the project by clicking the “Compile” button in the bottom right corner. This will open an output panel where you can follow the build progress. Once completed, you should see a line like this: [61/61] Linking CXX executable blink.elf.

When it comes to uploading firmware to your Raspberry Pi Pico board, you have two options. Both require you to connect your Pico in BOOTSEL mode. To put your Pico into BOOTSEL mode, connect your Pico board to your host computer while holding the BOOTSEL button.

The easiest way to get your firmware up and running is the “Run” button. Connect your Pico board in BOOTSEL mode, hit the “Run” button, and the firmware will upload automatically. You’ll know it’s working when the tiny LED near the USB connector starts blinking as the board disconnects itself.

In addition to the blink.elf executable, you’ll find a blink.uf2 file in the build directory within your project. If you prefer to manually flash firmware, drag and drop this UF2 file onto your Pico board in BOOTSEL mode.1 Once the file has been copied onto the board, it will automatically dismount and start running the blink project. You can confirm this by observing the tiny LED near the USB connector. It should start blinking as soon as the board disconnects itself.

For debugging directly within VS Code, the extension adds configuration to your project that allow you to use the debug panel and set breakpoints, just as you would when debugging other C/C++ projects on your computer. To run in debug mode with a Debug Probe, press F5. For detailed instructions on how to correctly wire your board for debugging, refer to the Getting Started guide on our website.2

Integrated offline documentation

When developing bare-metal code for the Pico, you often need to reference an API or check hardware specifications. To streamline your workflow, we’ve integrated the documentation directly into VS Code. This allows you to quickly access the information you need without leaving your editor — or requiring an internet connection.

Raspberry Pi Pico Project in VS Code with offline documentation for ADC open to the right
A VS Code window showcasing a Pico project on the left with the offline documentation open to the right

To access the documentation, navigate to the Raspberry Pi Pico panel in your sidebar and select the topic you want to explore. The documentation will open within the editor, so you can position it wherever you need, just like any other file. This way, you can keep your code and reference materials side by side.

How to update the project configuration

A new SDK revision has been released, and you want to take advantage of its awesome new features in your Pico project. No problem — the extension has you covered. If you need to switch the target board, change the selected SDK, or adjust any other properties configured during project creation, the extension provides commands to update your project settings in just a few clicks.

For example, to switch the SDK version, you’ll find a UI element in the status bar at the bottom of the VS Code window, or in the Raspberry Pi Pico Project quick access panel in your sidebar, displaying your currently selected version. Clicking this will open a simple dialog where you can choose the new SDK version you want to use. Once selected, the extension will automatically reconfigure your project to use the new version. For optimal IntelliSense functionality, we recommended to reload your window after changing any project settings to ensure all extensions are aware of the new configuration. After the changes have been applied, the extension sends you a notification with a button that will reload the current window.

If you need to update settings other than the SDK version or board type, you can access additional commands via the VS Code command palette, which you can open with the keyboard shortcut Ctrl+Shift+P (or Cmd+Shift+P on macOS). Type “Raspberry Pi Pico,” and you’ll see a list of all available commands provided by the Pico extension. This makes it easy to adjust your project configuration as needed.

It also supports MicroPython

For beginners or developers who want to get their projects up and running on a Pico as quickly as possible, MicroPython is an excellent choice.3 It is a lean and efficient implementation of the Python 3 programming language, specifically designed to run on microcontrollers and in constrained environments. It includes a small subset of the Python standard library, making it a powerful yet lightweight option for embedded development.4

To create a Pico project using MicroPython instead of C/C++, select “New MicroPython Project”. You can find this button either in our Quick Access panel, located in your sidebar or by running the New Pico Project command and selecting MicroPython as language. This will launch the familiar project creation wizard, now tailored for setting up a MicroPython project. Choose the location for your project folder and set a name for your project. When you click “Create,” the extension generates the new project and opens it for you, just like with a C/C++ project. But instead of using C/C++, your new project uses the MicroPico extension to run your code on the board and manage project configurations.

A newly create MicroPython based MicroPico project
Raspberry Pi Pico W running the blink.py script in MicroPython

With MicroPython, you can quickly start prototyping and experimenting with your Raspberry Pi Pico-series device, making it an ideal option for both newcomers and seasoned developers alike.

Next steps

For more detailed information on using the Pico VS Code extension, including a comprehensive list of settings and additional guidance, visit our GitHub project page. It’s a great resource for getting the most out of the extension.

If you’re new to developing Pico projects, don’t forget to check out the Getting Started guide we mentioned earlier—it’s packed with helpful tips to get you up and running.

If you’re looking to create a project that leverages the advanced features of Pico-series devices — such as I2C, PIO, or enabling stdio support—be sure to explore the “New C/C++ Project” interface. This tool allows you to customize your project setup to suit your needs, so you can dive into development quickly and efficiently.

  1. https://www.raspberrypi.com/documentation/microcontrollers/c_sdk.html#your-first-binaries ↩︎
  2. https://www.raspberrypi.com/news/raspberry-pi-debug-probe-a-plug-and-play-debug-kit-for-12/ ↩︎
  3. https://www.raspberrypi.com/documentation/microcontrollers/micropython.html#what-is-micropython ↩︎
  4. https://micropython.org ↩︎

The post Boost Your Pico Projects with the new Pico VS Code Extension appeared first on Raspberry Pi.

New book release: Design an RP2040 board with KiCad

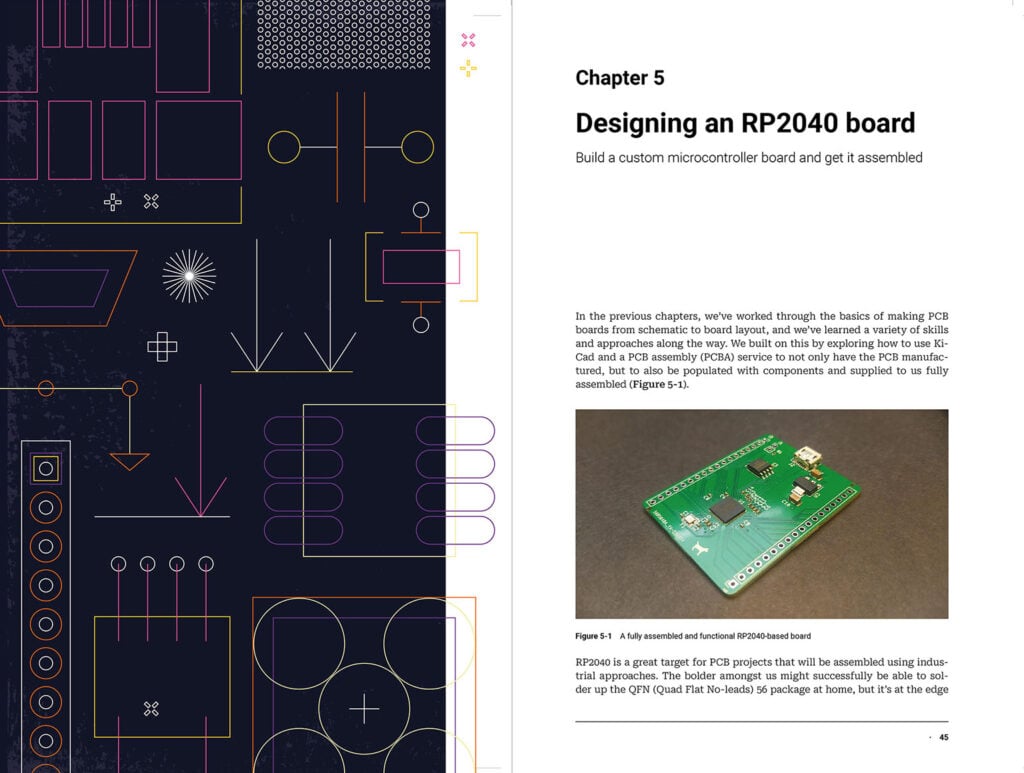
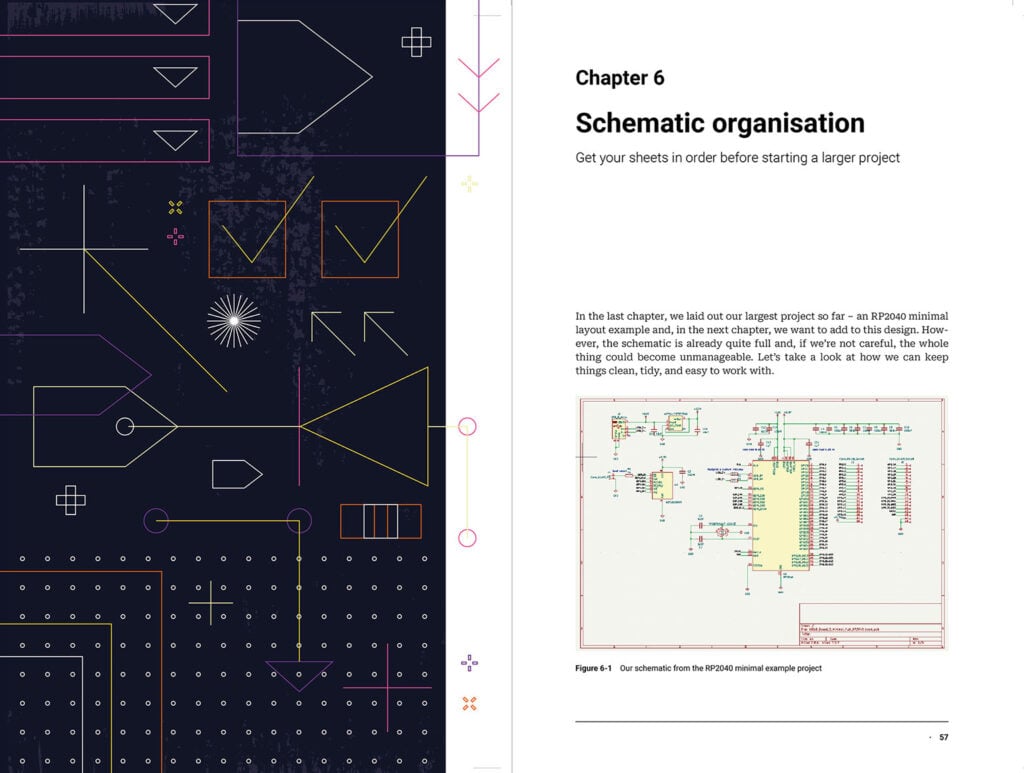
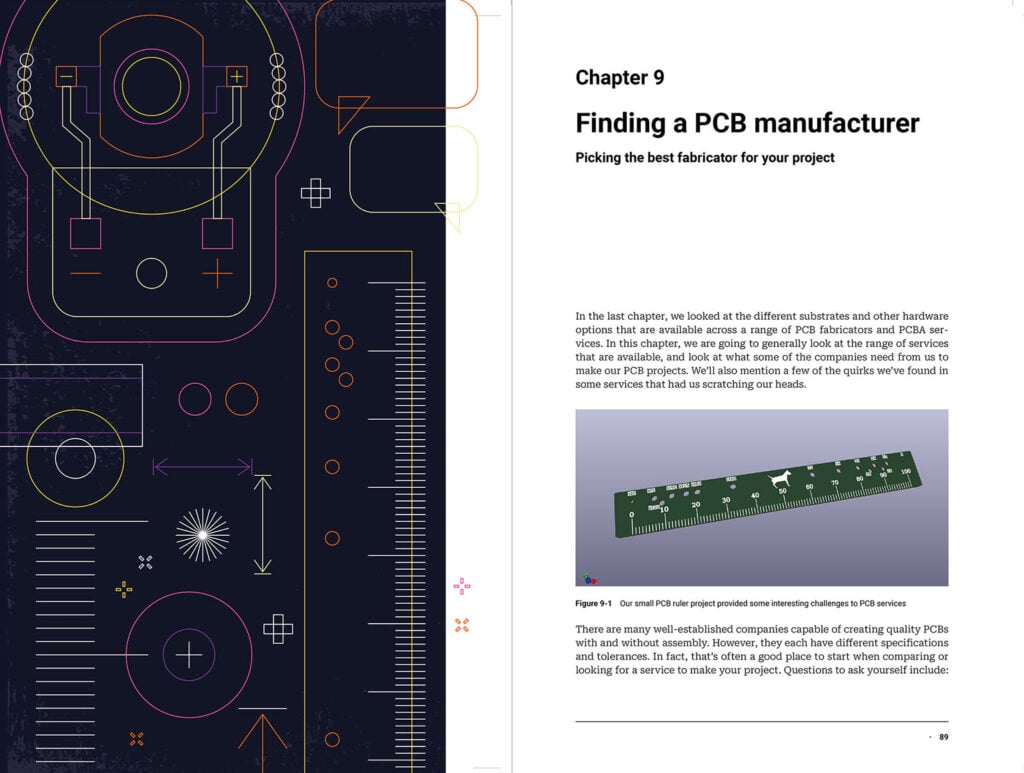
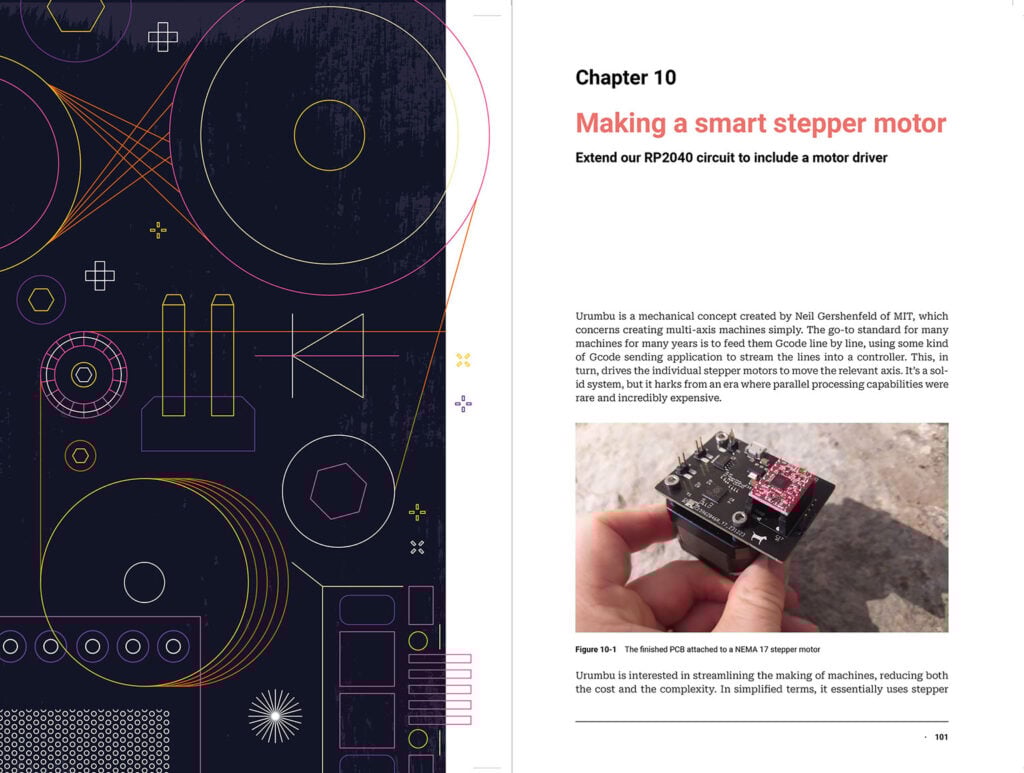
As affordable as Raspberry Pi Pico is, there are plenty of reasons to want to make your own board based on the chip that powers it, RP2040. We’re releasing a new book today that helps you do just that: Design an RP2040 board with KiCad (by Jo Hinchliffe and Ben Everard). KiCad is an amazing piece of free and open-source software that allows anyone, with some time and effort, to make high-quality PCB designs. Couple this amazing software with numerous PCB fabrication companies and even PCBA services (companies that will make and assemble your PCB designs), and you can go from idea to finished board more quickly than ever.

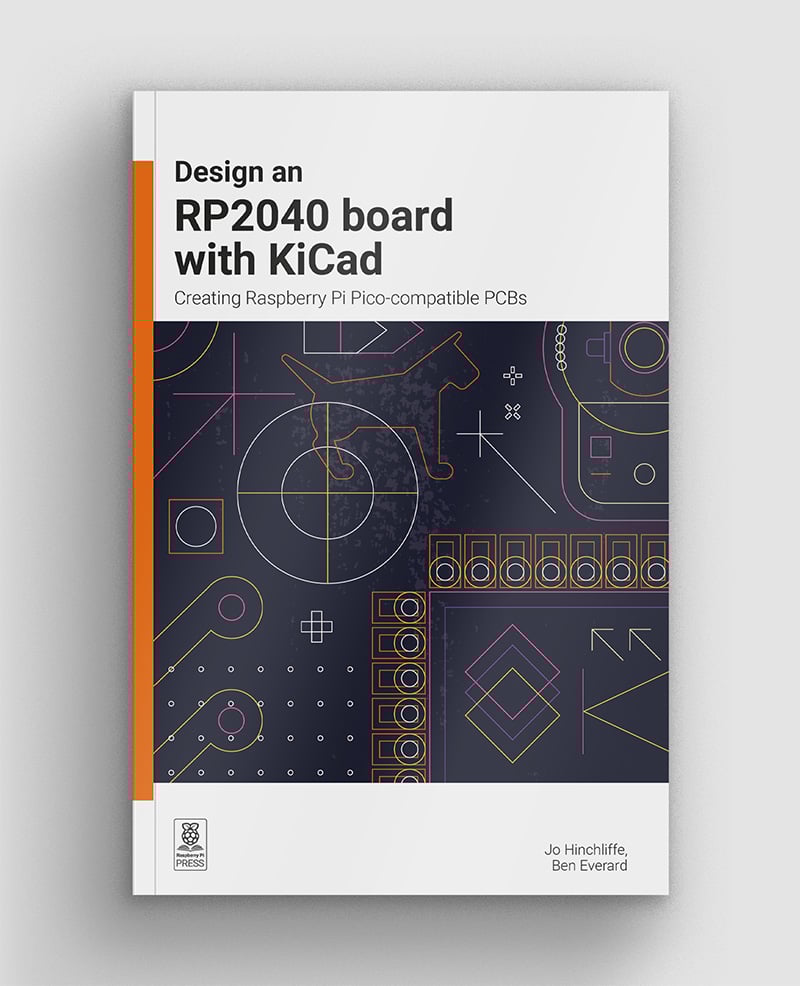
The cover of the book, Design an RP2040 board with KiCad.

This book provides a gentle introduction to PCB design using the RP2040 microcontroller chip (the same chip that’s at the heart of Raspberry Pi Pico). You’ll learn the basics of creating schematics and PCB designs in KiCad and learn how to work with component footprints that you create yourself (or get from another source). You’ll find out how to get a PCB design manufactured — and populated with surface-mount components. Before long, you’ll be holding your own board in your hands.

After you use KiCad to design your RP2040 board, this book will show you how to send it off to be manufactured and assembled. You’ll find out about the various materials (or substrates) you can choose for your board, and learn how to pick the right manufacturer. Once you have your board in hand, you’ll also learn what you can do (and make!) with it. Our new book also includes information on designing specialised boards, such as motor drivers and game controllers.

Design an RP2040 board with KiCad is available now from the Raspberry Pi Press store, and will be on sale from various print and electronic bookstores in the coming weeks.

Pay what you want for a bundle of books

What’s more, between now and Saturday, 5 October, 2024 (at 11 AM Pacific), you can get this and other fantastic books as part of our latest Humble Bundle. Pay what you want for 14 books from Raspberry Pi Press and learn about Raspberry Pi, retro gaming, and Python.

The post New book release: Design an RP2040 board with KiCad appeared first on Raspberry Pi.
❌