The silk industry has a rich history in Italy, but modern challenges have brought this centuries-old tradition to the brink of decline. Once a cornerstone of the rural economy in Italy, with a strong presence in Zagarolo, Rome, silk production has dwindled in the country due to industrial developments, synthetic fibers’ growing popularity, and fierce price competition from foreign exporters. Enter Tecnoseta, a small startup founded in 2019 with a bold mission: to rebuild and innovate the silk production chain, making it 100% Made in Italy.
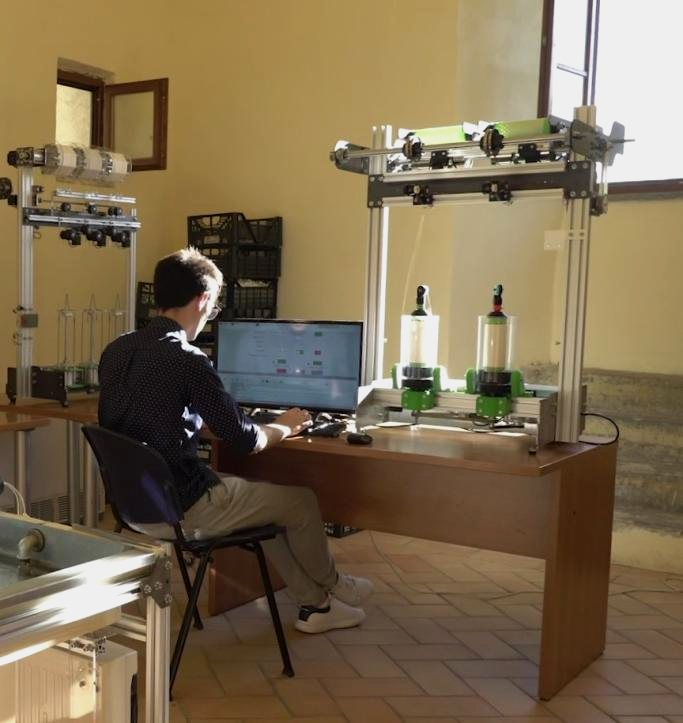
By combining traditional silk production expertise with modern Industry 4.0 technology, Tecnoseta’s founders have envisioned a sustainable, modular system to produce high-quality Italian silk. Their goals include not only manufacturing efficient, high-tech machinery but also revitalizing rural communities and offering hope to younger generations by creating local job opportunities.
“We’ve grown alongside Arduino. As the platform evolved, we were ready to seize the new possibilities.” – Maddalena Mariani, co-founder and CEO of Tecnoseta
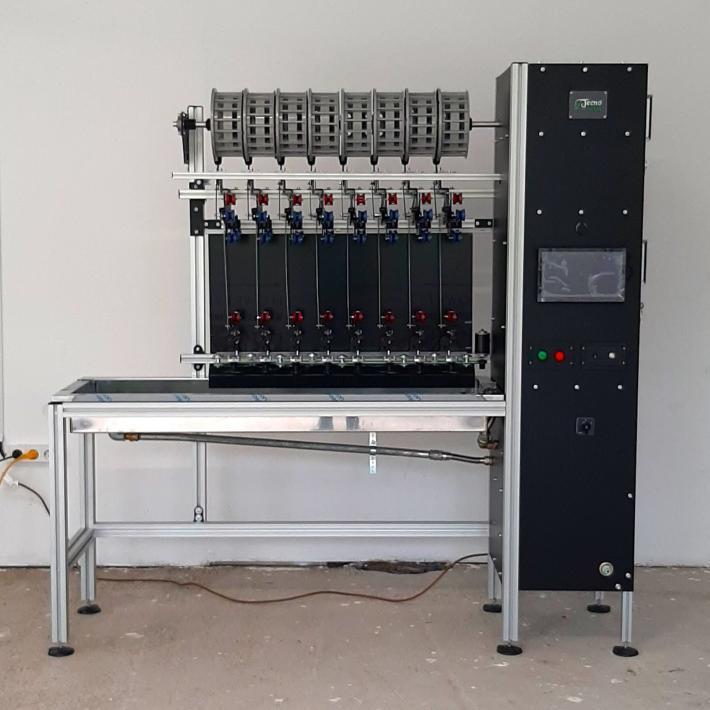
Tecnoseta turned to Arduino’s accessible and reliable technology to bring their vision to life. Thanks to our open-source platform, their in-house team has developed a modular line of high-performance machinery tailored for each step of silk production, including reeling, re-reeling, twisting, and spooling.
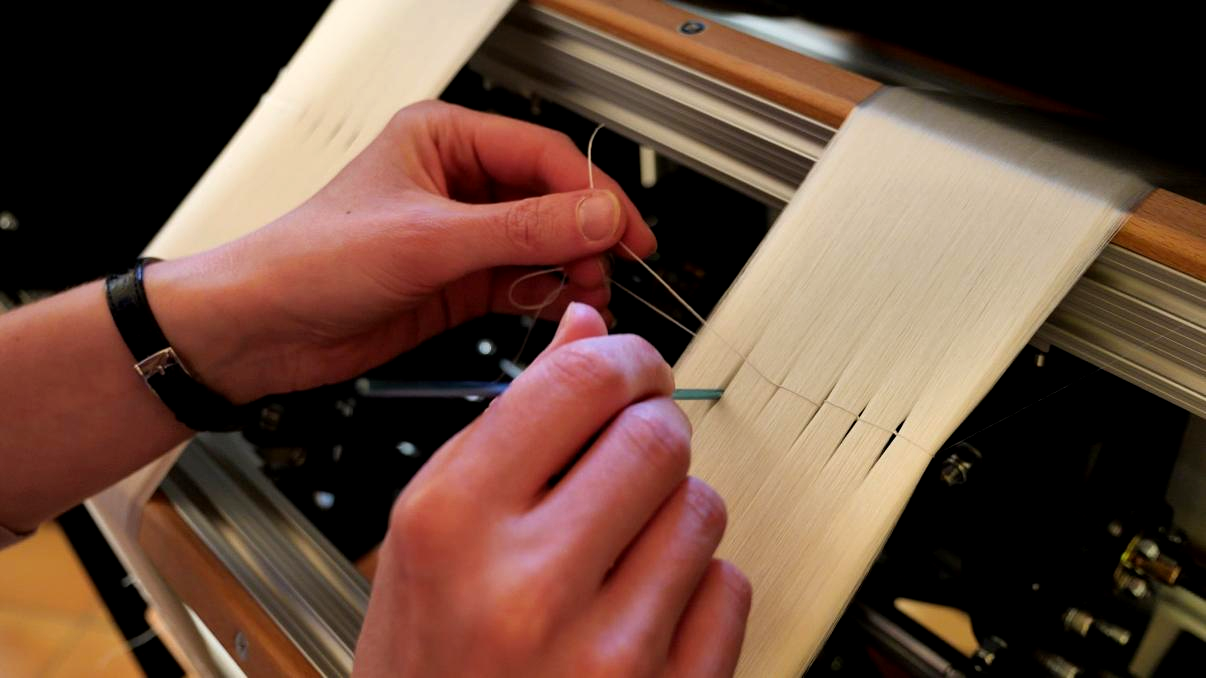
Using the Arduino Nano Every and Nano 33 IoT, they implemented automated processes and sensor-based monitoring across their specialized equipment. This allows for real-time fault detection, such as alerting operators when a silk thread breaks. This innovation drastically reduces downtime and improves efficiency, even for small-scale production.
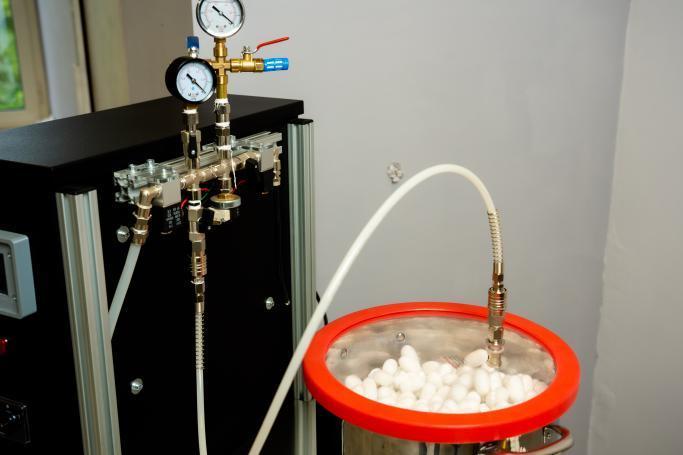
The modularity of Tecnoseta’s system means clients can scale operations according to their needs, from artisanal to industrial. The machines are also designed to integrate with renewable energy sources like solar panels, reflecting a strong commitment to sustainability.
Now the company is looking to the future, exploring ways to enhance their machinery with advanced sensors for predictive maintenance.
Leveraging tools like Arduino Cloud and the Opta micro PLC, Tecnoseta plans to collect data from the machines to monitor their performance and quickly intervene remotely in case of any issues, ensuring even greater reliability and precision. As their technology evolves, the company’s mission remains rooted in their heritage: combining cutting-edge innovation with traditional craftsmanship to create a sustainable future for the Italian silk industry.
Tecnoseta is now working within an agritech framework, to develop high-tech architectures and AI models for the automated management of silkworm breeding. “By supporting the transition of Italy’s sericulture to truly modern standards, we aim to have a positive impact on the local territory by attracting highly specialized professionals. What’s more, it will add to Italy’s competitive edge while making the supply chain more efficient and sustainable,” says Maddalena Mariani, co-founder and CEO.
If you haven’t yet experimented with the Arduino Cloud, then you may not be aware of how powerful it is for Internet of Things (IoT) applications. Using the service and its online tools, you can quickly build and deploy smart IoT devices — often with little or no custom code required. Rei Vilo’s Remote E-Paper Weather and Message Board perfectly demonstrates how you can accomplish that.
This device shows current weather information and custom messages on a Pervasive Displays E-Paper Development Kit for Matter’s 2.9″ screen. Though that was designed for use with the Arduino Nano Matter, is also works with others, including the Nano ESP32 that Vilo chose for this project. Like all e-paper displays, it only consumes power when refreshing the screen. And the adapter makes it easy to connect to the Arduino board.
The hardware setup is very straightforward: just connect the Arduino to the display adapter and plug in a USB cable for power. Most of Vilo’s tutorial focuses on configuring an Arduino Cloud service and setting up the Nano ESP32 to work with that.
This showcases the real power of Arduino Cloud, which is its ability to automatically generate sketches to make use of hardware and specified variables. For example, Vilo didn’t need to explicitly program functions to gather the weather data. The Arduino Cloud service automatically passes that data over Wi-Fi to the Nano ESP32, which then updates the display with the new information. Arduino Cloud also provides a nice online dashboard where users can interact with their devices, such as to enter a custom message.
As a Node.js developer, you’re probably eager to put your JavaScript skills to work beyond the browser or server, diving into the world of hardware control with Raspberry Pi GPIOs. If that’s the case, you’re in the right place!
But IoT isn’t just about managing hardware locally. True IoT projects require remote dashboards that let you visualize real-time and historical data, and control devices from anywhere. With Arduino Cloud, you can do all of this with ease.
Let’s dive in and see how you can take your IoT skills to the next level with Node.js and the Arduino Cloud!
Raspberry Pi basic GPIO setup
In this article, we present a straightforward yet comprehensive example to demonstrate the power of Arduino Cloud. You’ll learn how to use an Arduino Cloud dashboard to remotely control and monitor your Raspberry Pi’s digital GPIOs. Specifically, we’ll cover how to:
Turn an LED connected to your Raspberry Pi on and off.
Detect when a push button connected to your Raspberry Pi is pressed.
Visualize the real-time and historical values of an integer variable.
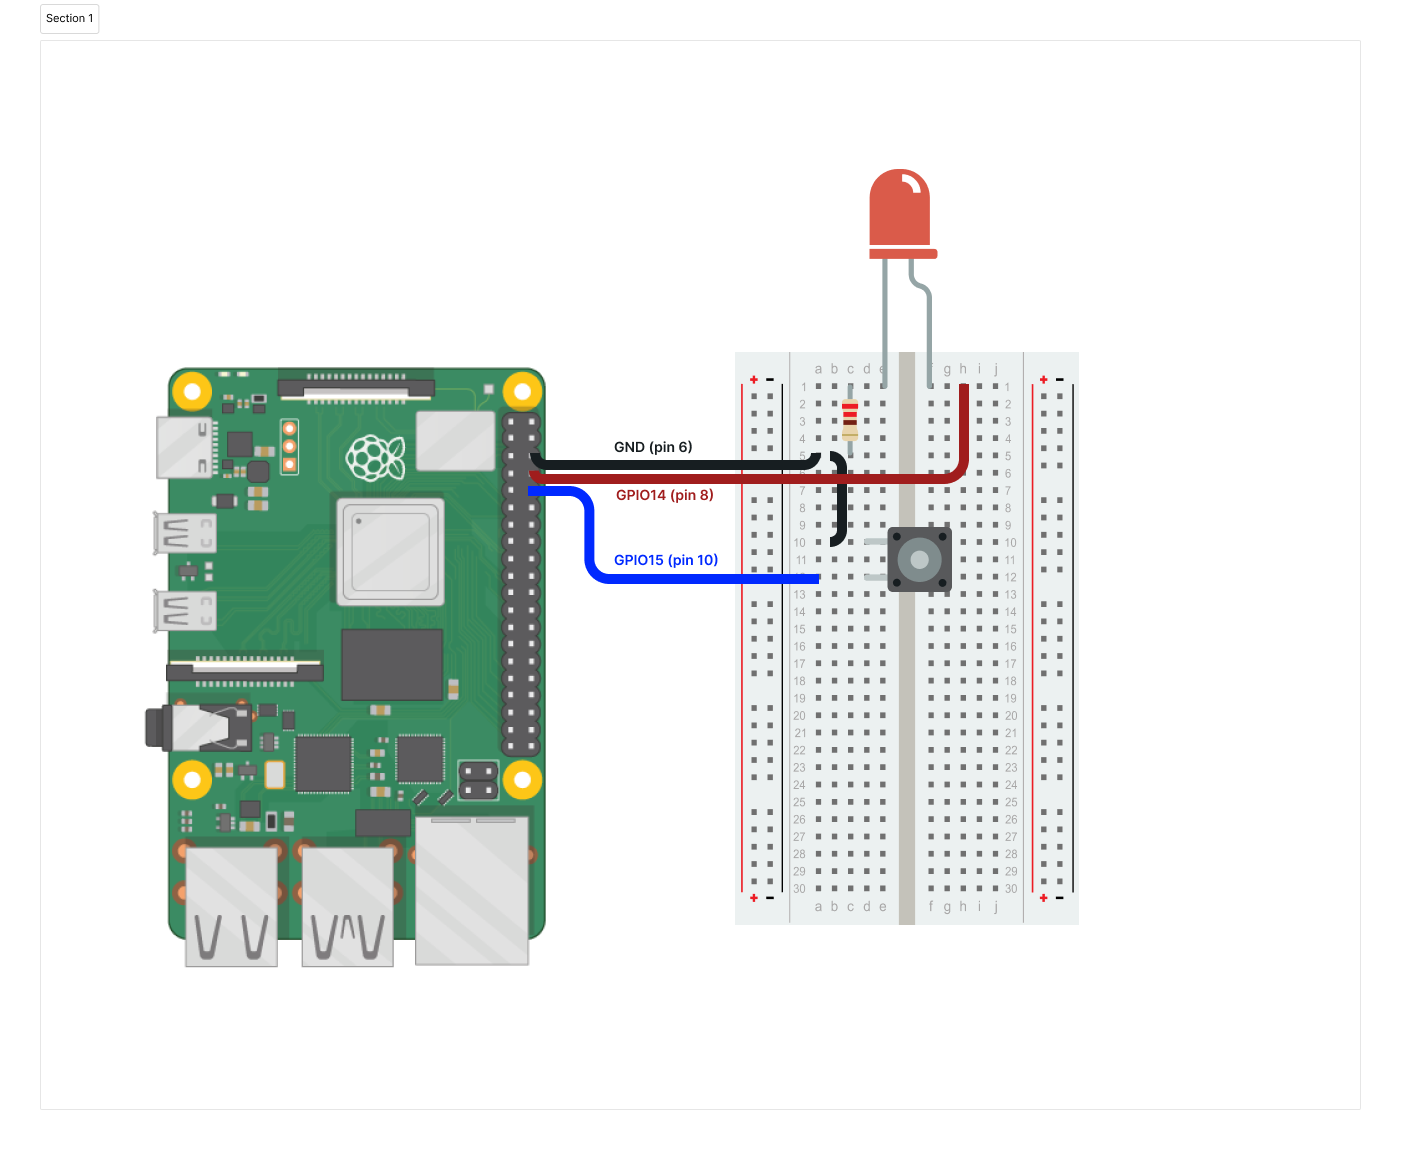
To get started, let’s connect an LED and a push button to your Raspberry Pi as illustrated in the diagram below.
It’s a very simple setup. Now that we have everything ready, let’s get started!
Create the Device and Thing in Arduino Cloud
To send your Raspberry Pi data to Arduino Cloud, you have to follow these simple steps:
In the example shown in this blog post, we use the following three variables:
test_value: We will use this integer variable to show an integer value generated periodically in our Raspberry Pi application in our Arduino Cloud dashboard.
button: We will use this boolean variable to send the information to the Cloud when the push button is pressed.
led: We will use this boolean variable to switch on and off the LED from the Arduino Cloud dashboard.
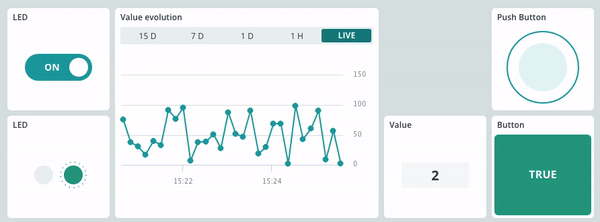
Create an Arduino Cloud dashboard for data visualization:
Create a switch widget (name: LED) and a LED widget (name: LED) and linke them to the led variable.
Create a chart widget (name: Value evolution) and a Value widget (name: Value) and link them to the test_value variable.
Create a Push button (name: Push Button) and a Status widget (name: Button) and link them to the button variable.
With the dashboard, you will be able to:
Switch ON and OFF the LED using the switch widget
Visualize the status of the LED with the LED widget
Visualize the real time value of the variable test_value with the Value widget
Visualize the evolution over time of the variable test_value with the chart widget
Visualize on the Push Button and Button widgets when the push button has been pressed on the board
Note: You can find more detailed information about the full process in our documentation guide.
Program your IoT device using Node.js
Now it’s time to develop your Node.j application.
const gpiod = require('node-libgpiod');
const { ArduinoIoTCloud } = require('arduino-iot-js');
const { DEVICE_ID, SECRET_KEY } = require('./credentials');


// Modify these lines according to your board setup
const GPIOCHIP = 'gpiochip4';
const LED = 14; // GPIO14, Pin 8
const BUTTON = 15; // GPIO15, Pin 10


// Make sure these variables are global. Otherwise, they will not
// work properly inside the timers
chip = new gpiod.Chip(GPIOCHIP);
ledLine = chip.getLine(LED);
buttonLine = chip.getLine(BUTTON);


ledLine.requestOutputMode("gpio-basic");
// To configure the pull-up bias, use 32 instead of gpiod.LineFlags.GPIOD_LINE_REQUEST_FLAG_BIAS_PULL_UP if it is undefined
buttonLine.requestInputModeFlags("gpio-basic", gpiod.LineFlags.GPIOD_LINE_REQUEST_FLAG_BIAS_PULL_UP);


let client;


// This function is executed every 1.0 seconds, polls the value
// of the button and sends the data to Arduino Cloud
function readButton(client) {
  let button = buttonLine.getValue() ? true : false;
  if (client)
     client.sendProperty("button", button);
  console.log("pollButton:", button);
}


// This function is executed every 10.0 seconds, gets a random
// number between 0 and 100 and sends the data to Arduino Cloud
function readValue(client) {
  let value = Math.floor(Math.random() * 101);
  if (client)
     client.sendProperty("test_value", value);
  console.log("pollValue", value);
}


// This function is executed each time the "led" variable changes
function onLedChanged(led) {
  ledLine.setValue(led ? 1 : 0);
  console.log("LED change! Status is: ", led);
}


// Create Arduino Cloud connection
(async () => {
  try {
     client = await ArduinoIoTCloud.connect({
        deviceId: DEVICE_ID,
        secretKey: SECRET_KEY,
        onDisconnect: (message) => console.error(message),
     });
     client.onPropertyValue("led", (led) => onLedChanged(led));
  }
  catch(e) {
     console.error("ArduinoIoTCloud connect ERROR", e);
  }
})();


// Poll Value every 10 seconds
const pollValue = setInterval(() => {
  readValue(client);
}, 10000);


// Poll Button every 1 seconds
const pollButton = setInterval(() => {
  readButton(client);
}, 1000);
Create a file called credentials.js with your Device ID and secret.
This code is compatible with all Raspberry Pi models and should also work on any Linux-based machine. Just make sure to specify the correct gpiochip and configure the appropriate GPIO lines in the code snippet below:
For more information about the project, check out the details on Project Hub. You can find the complete code and additional resources in the GitHub repository. Plus, don’t miss the comprehensive JavaScript + Arduino Cloud guide in the following article.
Start with Arduino Cloud for free
Getting your Raspberry Pi connected to Arduino Cloud with Node.js is incredibly easy. Simply create your free account, and you’re ready to get started. Arduino Cloud is free to use and comes with optional premium features for even greater flexibility and power.
If you’re ready to simplify data visualization and remote control for your Raspberry Pi applications using Node.js, Python, or Node-RED, Arduino Cloud is the perfect platform to explore and elevate your projects.
At Arduino, we know how precious your time is when you’re building your next big project or experimenting with new ideas. That’s why we’re thrilled to introduce a game-changing update to the Cloud Editor Builder — the engine behind compiling your sketches in Arduino Cloud.
This update is all about you: making your development faster, smoother, and more secure, so you can focus on what truly matters — creating.
Here’s what’s new:
Faster compilations: Up to 50% faster!
No more waiting around! With the new builder, sketch compilations are now up to 50% faster, enabling you to focus more on creating and testing your projects, and less on waiting. Two years ago, we significantly improved the Cloud Editor Builder, setting a new standard for performance.
And now, whether you’re working on a quick prototype or a complex IoT solution, we provide you with faster compilation times, which means you can iterate and innovate more efficiently.
See compilation progress at a glance
One of the standout features of the new builder is the introduction of a dedicated compilation progress bar. Now, you can see exactly how far along the compilation process is, with clear visibility into its completeness percentage. No more guesswork — just a smoother and more transparent experience.
Your IoT projects, more secure
We’ve also made improvements under the hood, adding an extra layer of security and reliability to the Cloud Editor Builder. Your data and projects are safer than ever, giving you peace of mind while you create.
IDE vs. Cloud Editor: Which one fits your workflow?
We understand that every Arduino user has unique needs, which is why we offer both the Arduino IDE and the Cloud Editor. Wondering which option suits your workflow best? We’ve prepared a clear comparison table showcasing the key differences between the two tools. From compilation speeds to storage options, see how the Cloud Editor stacks up against the IDE.
The new Cloud Editor Builder will be live in the coming days, and we can’t wait for you to try it! Stay tuned for updates, and get ready to enjoy faster compilations, improved usability, and enhanced security.
We’re excited to see how this update will elevate your projects. As always, we’d love to hear your feedback. Please share your thoughts, questions, and experiences with us on social media or Arduino Forum.
Let’s build something amazing together!
Ready to elevate your projects? Discover the full potential of the Arduino Cloud Editor and explore all its powerful features here. Need guidance? Dive into our comprehensive documentation.
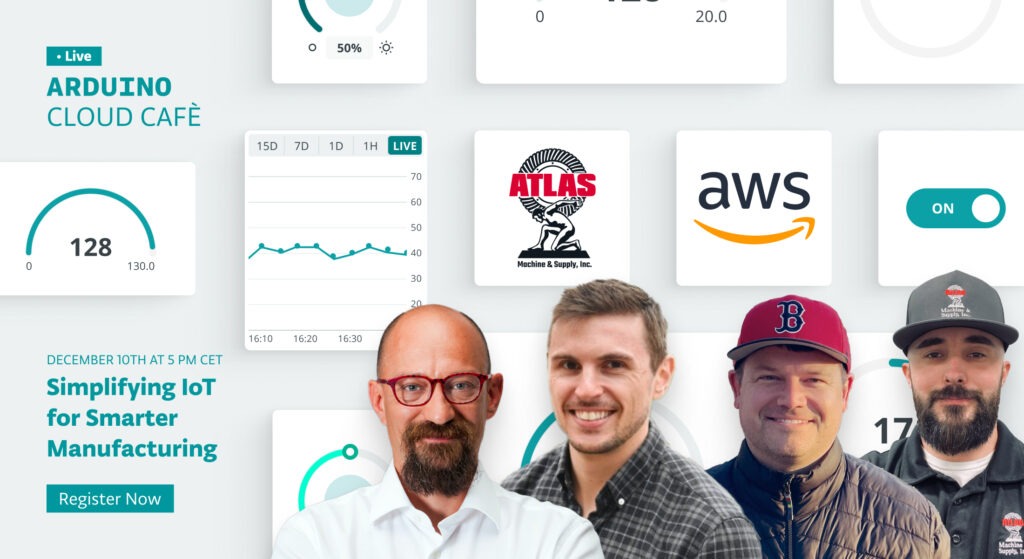
We all know that the future of manufacturing lies in IoT — yet the path to adoption can sometimes feel daunting. But what if you could simplify the process and start seeing results quickly? That’s exactly what we’re going to explore in our upcoming Arduino Cloud Café webinar on December 10 at 5PM CET / 11AM EST.
This session is a unique opportunity to hear from experts at Arduino, AWS, and Atlas Machine as they dive into how industrial IoT is transforming manufacturing operations. Whether you’re just starting to explore IoT or looking for ways to optimize your existing systems, this webinar is for you.
What to expect
In this session, we’ll be sharing actionable tips and insights to help you easily integrate IoT into your operations:
Learn how to collect data quickly — without months of delays.
Understand how to retrofit your legacy equipment and get real-time visibility into your operations.
Discover how to integrate the data from Arduino devices with the rest of your business systems on AWS for smarter decision-making.
We’ll also be sharing real-world success stories, including how Atlas Machine & Supply leveraged Arduino (Opta and Arduino Cloud) and AWS solutions for predictive maintenanceand remote monitoring across their global fleet of industrial equipment.
And don’t forget, we’ll have a live Q&A session at the end, where you can ask our experts anything. Feel free to submit your questions throughout the webinar, and we’ll do our best to address as many as possible.
Meet the speakers
We’re excited to be joined by a fantastic lineup of speakers who are experts in their fields:
Richie Gimmel, CEO at Atlas Machine & Supply
Danny Kent, IoT Development Director at Atlas Machine & Supply
Andrea Richetta, Principal Product Evangelist at Arduino
Gabriel Verreault, Senior Manufacturing Partner Solutions Architect at AWS
Why you should join
If you’ve been looking for a way to simplify IoT adoption in your manufacturing operations, this is your chance to learn from industry leaders who are making it happen. Whether you’re trying to modernize old equipment or integrate IoT into your larger business strategy, you’ll walk away with valuable insights and tips you can start using right away.
Save your spot today! Don’t miss out on this chance to hear from the experts and get your questions answered. We can’t wait to see you there!
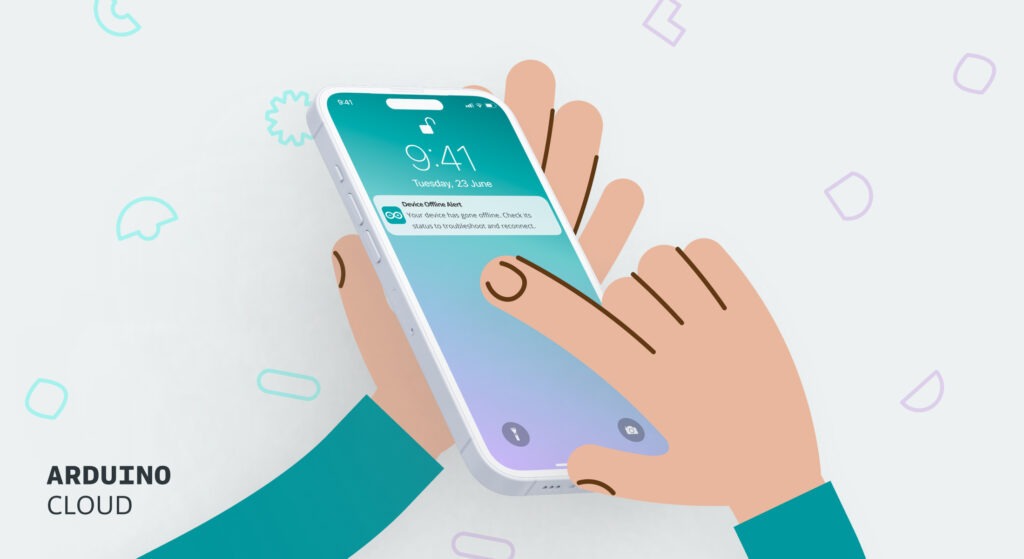
You’re managing a network of IoT sensors that monitor air quality across multiple locations. Suddenly, one of the sensors goes offline, but you don’t notice until hours later. The result? A gap in your data and a missed opportunity to take corrective action. This is a common challenge when working with IoT devices: staying informed about the real-time status of each device is crucial to ensure smooth operation and timely troubleshooting.
This is where Device Status Notifications, the latest feature in the Arduino Cloud, comes in. Whether you’re an individual maker or an enterprise, this feature empowers you to stay on top of your devices by sending real-time alerts when a device goes online or offline.
What is “Device Status Notifications?”
Device Status Notifications allow you to receive instant alerts whenever one of your devices changes its connectivity status, whether it’s going offline or coming back online. You can customize these alerts for individual devices or all devices under your account, with the flexibility to exclude specific devices from triggering notifications.
We announced it a while ago, Arduino Cloud already supports Triggers and Notifications, allowing you to create alerts based on specific conditions like sensor readings or thresholds. With the addition of Device Status Notifications, you can now monitor device connectivity itself. This means you can now receive an alert the moment a device loses connection, providing a proactive way to manage your IoT ecosystem. For more details on the original feature, check out our Triggers and Notifications blog post.
Key benefits for users
Real-time monitoring: Get notified instantly when a device disconnects or reconnects, helping you take corrective actions promptly.
Customization: Configure your alerts to focus on specific devices or apply rules to all your devices, with the flexibility to add exceptions. You can also decide when the notification should be sent — either immediately upon a status change or after a set period of downtime.
Convenience: Choose to receive notifications via email or directly on your mobile device through the Arduino IoT Remote app, making it easy to stay informed wherever you are.
How to set up Device Status Notifications
Video link
1. Set up a Trigger
Go to the Triggers section and select “+ TRIGGER”
2. Choose “Device Status” as your condition
Decide whether to monitor the status of:
A specific device (select “Single device”), or
Any device (select “Any device (existing and upcoming)”).
If you select “Single device,” you can choose the device that you want to be monitored.
If your selection is “Any device,” you can add exceptions for devices you don’t want to trigger the alert.
3. Configure what you are going to monitor
Choose whether to monitor when the device goes online, offline, or both. Then decide if the notification should be sent immediately or after a set period (options range from 10 minutes to 48 hours).
4. Customize the notification settings
Notifications are configured in the same way as any other Trigger. You can add the action of sending an email or a push notification to your phone via a push notification on the Arduino IoT Remote app.
Ready to test Device Notifications?
Want to make sure your IoT devices stay connected and functioning? Start using the Device Status Notifications feature today. Simply log in to your Arduino IoT Cloud account, and configure your notifications to stay informed whenever your devices go online or offline.
Make sure you’re on a Maker, Enterprise, or School plan to access this feature.
Take your IoT projects to the next level this Black Friday!
For a limited time, enjoy 25% off the Arduino Cloud Maker Yearly plan with code BLACKFRIDAY. Don’t miss this opportunity to access premium features and elevate your creativity. Hurry—this offer is valid for new Maker Yearly plan subscriptions only and ends on December 1st, 2024.