Control your Raspberry Pi GPIO with Arduino Cloud using Node.js | Part III

As a Node.js developer, you’re probably eager to put your JavaScript skills to work beyond the browser or server, diving into the world of hardware control with Raspberry Pi GPIOs. If that’s the case, you’re in the right place!
This article is the third part of our series, following A guide to visualize your Raspberry Pi data on Arduino Cloud | Part I and the Python-focused Control your Raspberry Pi GPIO in Arduino Cloud using Python | Part II, which introduced GPIO management. Now, it’s time to explore how Node.js can be your gateway to controlling Raspberry Pi GPIOs, a foundational task in IoT development. Whether you’re toggling LEDs, reading sensors, or controlling relays, Node.js offers the tools and flexibility to make it happen seamlessly.
But IoT isn’t just about managing hardware locally. True IoT projects require remote dashboards that let you visualize real-time and historical data, and control devices from anywhere. With Arduino Cloud, you can do all of this with ease.
Let’s dive in and see how you can take your IoT skills to the next level with Node.js and the Arduino Cloud!
Raspberry Pi basic GPIO setup
In this article, we present a straightforward yet comprehensive example to demonstrate the power of Arduino Cloud. You’ll learn how to use an Arduino Cloud dashboard to remotely control and monitor your Raspberry Pi’s digital GPIOs. Specifically, we’ll cover how to:
- Turn an LED connected to your Raspberry Pi on and off.
- Detect when a push button connected to your Raspberry Pi is pressed.
- Visualize the real-time and historical values of an integer variable.
To get started, let’s connect an LED and a push button to your Raspberry Pi as illustrated in the diagram below.
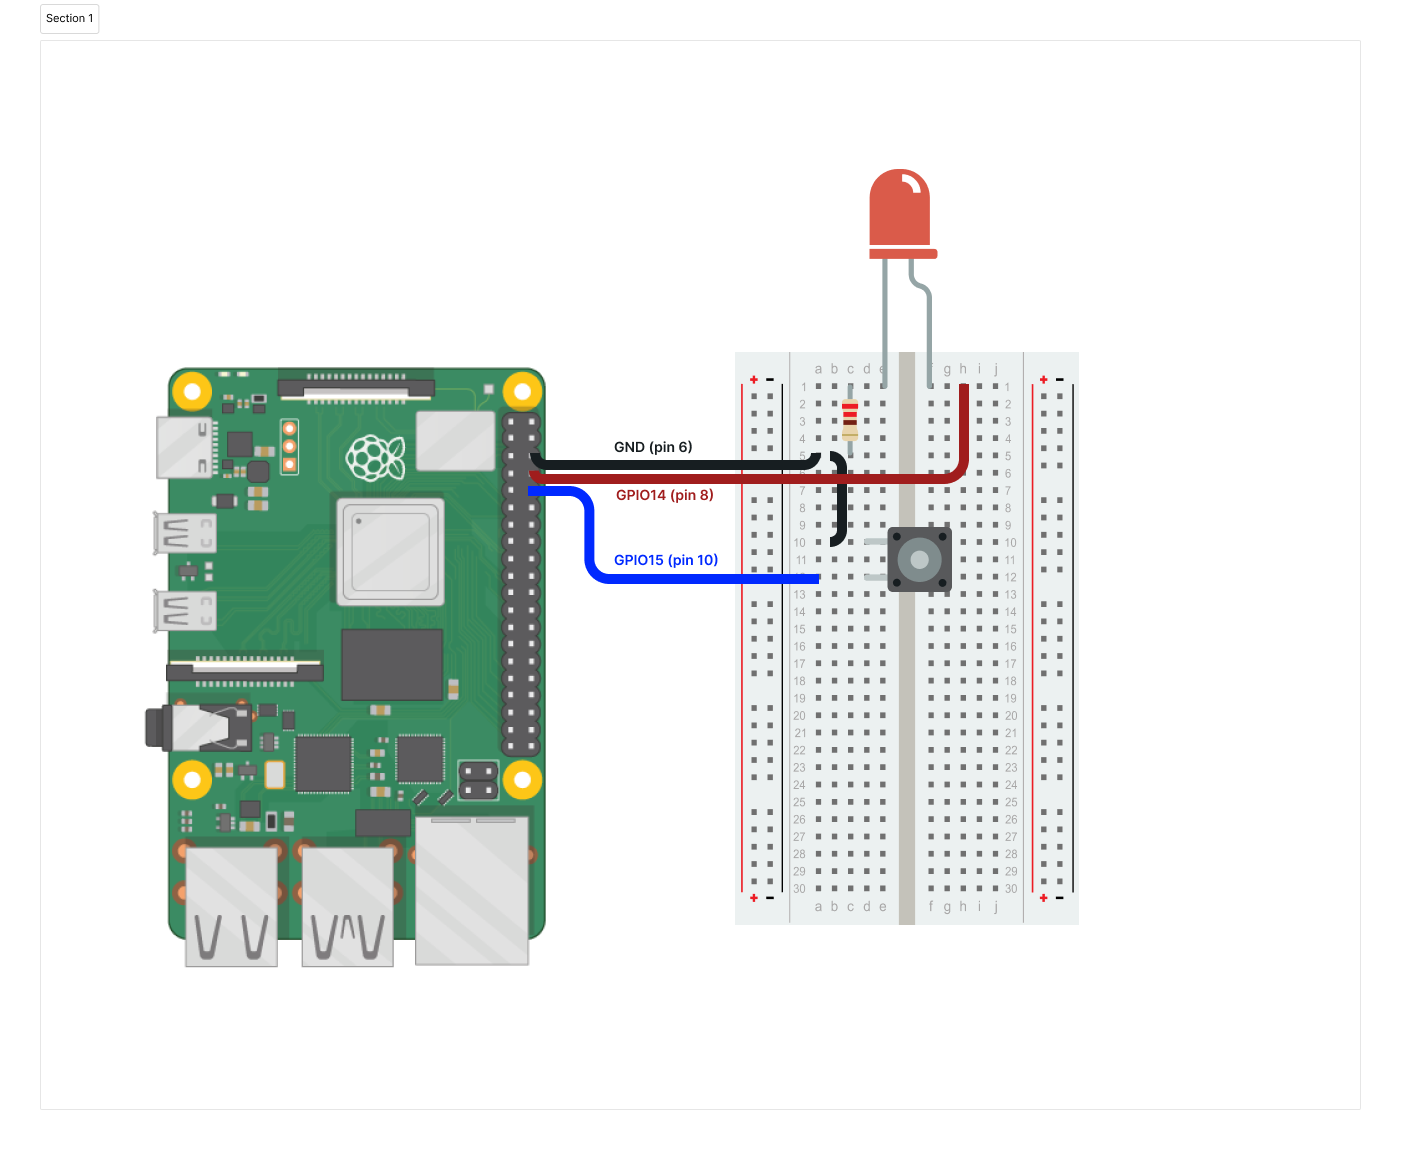
It’s a very simple setup. Now that we have everything ready, let’s get started!
Create the Device and Thing in Arduino Cloud
To send your Raspberry Pi data to Arduino Cloud, you have to follow these simple steps:
1. Set up an Arduino Cloud account if you didn’t have one before.
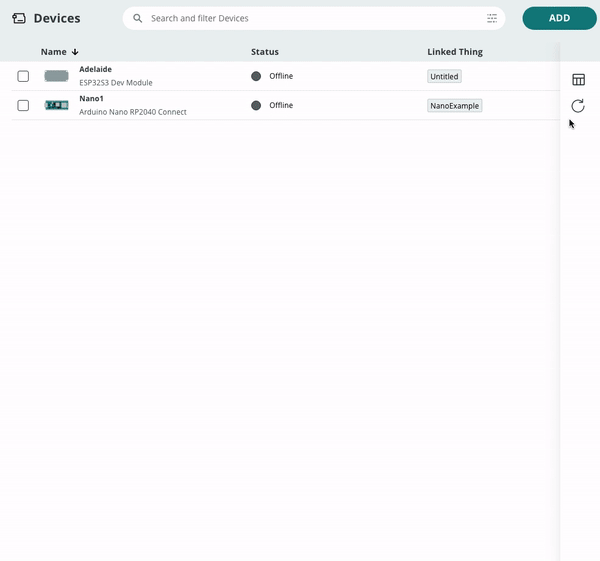
2. Create your device as a Manual device.
Note: Jot down your Device ID and Secret, as we will need them later.
3. Create your Thing and add your variables.

In the example shown in this blog post, we use the following three variables:
- test_value: We will use this integer variable to show an integer value generated periodically in our Raspberry Pi application in our Arduino Cloud dashboard.
- button: We will use this boolean variable to send the information to the Cloud when the push button is pressed.
- led: We will use this boolean variable to switch on and off the LED from the Arduino Cloud dashboard.
Create an Arduino Cloud dashboard for data visualization:
- Create a switch widget (name: LED) and a LED widget (name: LED) and linke them to the led variable.
- Create a chart widget (name: Value evolution) and a Value widget (name: Value) and link them to the test_value variable.
- Create a Push button (name: Push Button) and a Status widget (name: Button) and link them to the button variable.

With the dashboard, you will be able to:
- Switch ON and OFF the LED using the switch widget
- Visualize the status of the LED with the LED widget
- Visualize the real time value of the variable test_value with the Value widget
- Visualize the evolution over time of the variable test_value with the chart widget
- Visualize on the Push Button and Button widgets when the push button has been pressed on the board
Note: You can find more detailed information about the full process in our documentation guide.
Program your IoT device using Node.js
Now it’s time to develop your Node.j application.
const gpiod = require('node-libgpiod');
const { ArduinoIoTCloud } = require('arduino-iot-js');
const { DEVICE_ID, SECRET_KEY } = require('./credentials');


// Modify these lines according to your board setup
const GPIOCHIP = 'gpiochip4';
const LED = 14; // GPIO14, Pin 8
const BUTTON = 15; // GPIO15, Pin 10


// Make sure these variables are global. Otherwise, they will not
// work properly inside the timers
chip = new gpiod.Chip(GPIOCHIP);
ledLine = chip.getLine(LED);
buttonLine = chip.getLine(BUTTON);


ledLine.requestOutputMode("gpio-basic");
// To configure the pull-up bias, use 32 instead of gpiod.LineFlags.GPIOD_LINE_REQUEST_FLAG_BIAS_PULL_UP if it is undefined
buttonLine.requestInputModeFlags("gpio-basic", gpiod.LineFlags.GPIOD_LINE_REQUEST_FLAG_BIAS_PULL_UP);


let client;


// This function is executed every 1.0 seconds, polls the value
// of the button and sends the data to Arduino Cloud
function readButton(client) {
  let button = buttonLine.getValue() ? true : false;
  if (client)
     client.sendProperty("button", button);
  console.log("pollButton:", button);
}


// This function is executed every 10.0 seconds, gets a random
// number between 0 and 100 and sends the data to Arduino Cloud
function readValue(client) {
  let value = Math.floor(Math.random() * 101);
  if (client)
     client.sendProperty("test_value", value);
  console.log("pollValue", value);
}


// This function is executed each time the "led" variable changes
function onLedChanged(led) {
  ledLine.setValue(led ? 1 : 0);
  console.log("LED change! Status is: ", led);
}


// Create Arduino Cloud connection
(async () => {
  try {
     client = await ArduinoIoTCloud.connect({
        deviceId: DEVICE_ID,
        secretKey: SECRET_KEY,
        onDisconnect: (message) => console.error(message),
     });
     client.onPropertyValue("led", (led) => onLedChanged(led));
  }
  catch(e) {
     console.error("ArduinoIoTCloud connect ERROR", e);
  }
})();


// Poll Value every 10 seconds
const pollValue = setInterval(() => {
  readValue(client);
}, 10000);


// Poll Button every 1 seconds
const pollButton = setInterval(() => {
  readButton(client);
}, 1000);
Create a file called credentials.js with your Device ID and secret.
module.exports = {
   DEVICE_ID: '09d3a634-e1ad-4927-9da0-dde663f8e5c6',
   SECRET_KEY: 'IXD3U1S37QPJOJXLZMP5'
 };
This code is compatible with all Raspberry Pi models and should also work on any Linux-based machine. Just make sure to specify the correct gpiochip and configure the appropriate GPIO lines in the code snippet below:
const GPIOCHIP = 'gpiochip4';
const LED = 14; // GPIO14, Pin 8
const BUTTON = 15; // GPIO15, Pin 10
For more information about the project, check out the details on Project Hub. You can find the complete code and additional resources in the GitHub repository. Plus, don’t miss the comprehensive JavaScript + Arduino Cloud guide in the following article.
Start with Arduino Cloud for free
Getting your Raspberry Pi connected to Arduino Cloud with Node.js is incredibly easy. Simply create your free account, and you’re ready to get started. Arduino Cloud is free to use and comes with optional premium features for even greater flexibility and power.
If you’re ready to simplify data visualization and remote control for your Raspberry Pi applications using Node.js, Python, or Node-RED, Arduino Cloud is the perfect platform to explore and elevate your projects.
Get started with Arduino Cloud!
The post Control your Raspberry Pi GPIO with Arduino Cloud using Node.js | Part III appeared first on Arduino Blog.