Reading view

There are new articles available, click to refresh the page.

Cardiography signal measuring device built on Raspberry Pi Pico W

Having looked to see how blood pressure monitors operate, Miloš Rašić has been hard at work trying to improve their accuracy. David Crookes conducted this interview for the special 150th anniversary issue of our official magazine.

Keeping track of blood pressure is crucial for maintaining good health, especially when managing heart-related conditions. Electrical engineer Miloš Rašić knows this only too well. “Like most older people, my grandma suffers from elevated blood pressure, so a digital pressure monitor is something that is being used daily in the household,” he says. But he also noticed the machines can be flawed.

Besides the main PCB, which is based around a Raspberry Pi Pico W, there is an air pump and valve, GX12 connectors, buttons, an 18650 battery, NeoPixel LEDs, an OLED display, and some other smaller parts

“Different monitors have provided widely different measurements and their performance was highly dependent on their battery level, which is not a good thing,” he explains. “So for my master’s thesis project, I wanted to explore digital blood pressure monitors and discover how they work.” This led him to develop a cardiography signal measuring device based around a Raspberry Pi Pico W.

Conducting experiments

When Miloš approached his project, he had a list of requirements in mind, chief among them being safety. “The device had to have optical isolation when connected to a PC and be battery-powered or have an isolated power supply,” he says. 

As a priority, it needed to measure blood pressure. “This included measuring the air pressure inside an arm cuff, controlling a small air pump, and controlling an electromagnetic valve,” he adds. Miloš also wanted the device to use a well-supported microcontroller unit with wireless capabilities, hence the use of a Raspberry Pi Pico W. “It provided everything I needed in a small package and was supported by a large community, which meant everything would be easy to troubleshoot,” he says.

The main device casing as well as the PPG clamp have been 3D printed using a Creality K1C. The models can be downloaded from Printables

Along the way, Miloš began to add more features, including a stethoscope and the ability to take an ECG measurement. By using a photoplethysmography (PPG) clamp, he also figured the device could detect blood volume changes in the microvascular bed of tissue and that, combined, these sensors would be able to give a better insight into a person’s heart health.

And yet he was clear from the start that he wasn’t going to create a medical device. Instead, the ultimate aim was to take readings and conduct experiments to discover an optimal algorithm for measuring blood pressure. “The whole area of blood pressure monitors was a curiosity for me and I wanted to demystify it a bit and generally have a platform which other people can experiment with,” he explains. “So I created a setup that can be used for experimenting with new methods of analysing cardiography signals.”

To connect the stethoscope to the system, the earphones were removed and a small piezo microphone was then connected to an amplifier circuit

Heart of the build

To fulfil his ambition, he got to work designing the PCB before looking at the other necessary components, such as the pump, valve, battery, and connectors. Some parts were simple enough — for example, the air pressure cuff, which you’ve likely seen on a visit to a GP or hospital. “This is the only sensor most commercial devices use, and the estimations using it are good enough for most cases,” Miloš says. But others required more work.

The ECG sensor to record heart activity was an important part of the build. “I wanted to extract the pulses from the air pressure signal and for the ECG to be my reference measurement so that I knew the algorithm was working properly,” he says. For this, Miloš included a custom layout of the AD8232 IC on the PCB (AD8232 is an integrated signal conditioning block for ECG measurement applications), allowing measurements to be taken.

The pressure sensor calibration apparatus was created so that constant pressure can be maintained in the system

Miloš also made a PPG clamp using a MikroE Oxi5 Click board that communicated with the rest of the system over I2C. “The PPG clamp is often used to measure blood oxygen saturation, but since it works by detecting the changes in blood flow in the finger, it’s a very useful sensor when it’s used in combination with the arm cuff,” Miloš says. “Since the arm cuff cuts off circulation in the arm, and then slowly lowers the air pressure inside until the circulation is established again, by using the PPG we can have a precise detection of when the laminar flow has been established again, which is the moment that the air pressure inside the arm cuff is equal to the diastolic air pressure.”

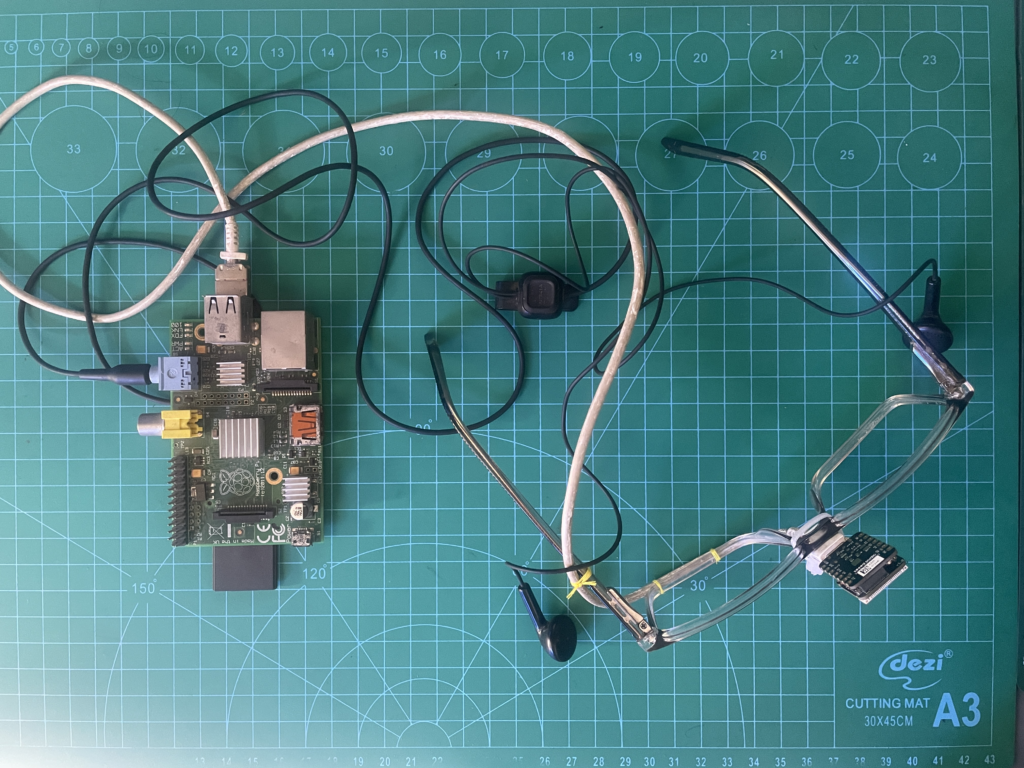
Finally, an old analogue stethoscope was added. Miloš combined this with a small piezo microphone, turning the stethoscope into an electronic device. “A stethoscope is used when doing manual blood pressure measurements, and since [this] is still the gold standard for non-invasive methods, I wanted to see how the signal on the stethoscope looks during this process and if I could draw any conclusions from it,” Miloš reveals.

Pressure’s on

To make sense of the data, Miloš decided the project would need a graphical interface. “This would have a live view of all of the measured signals and the capability of recording all of the data into a CSV file,” he says. It required a hefty dose of programming; Python was used to code the GUI, handling the graphical interface, the communication with the device, and the data logging capabilities. Python was also used to analyse the recorded signals, while the firmware was written in C++, “so that it runs as fast as possible on the Pico,” Miloš explains. 

A custom four-layer PCB was developed, using Raspberry Pi Pico W as the microcontroller

With everything working, Miloš designed a case. “I needed to see the rough space required for everything, which allowed me to design a case with mounting points for each of those things,” he says. “On the top, there is a lid that has NeoPixel LEDs and a small OLED display that can be programmed to show information to the user.”

Since then, he’s been using the project to conduct many tests, and you can see the results of those on Miloš’ GitHub page. The project has also been made open source because he hopes it will help others with their own projects. “It can give them a head start so they don’t have to develop their electronics from scratch if all they want to do is, for example, signal analysis,” he says. “This is why I’ve also included some data that I’ve recorded with this device if anyone wants to use just that without ever having any contact points with the hardware!”

Of course, you shouldn’t use home-made tools to diagnose medical problems; Miloš made it clear from the start that he wasn’t creating a medical device.

The post Cardiography signal measuring device built on Raspberry Pi Pico W appeared first on Raspberry Pi.

Third Eye assistive vision | The MagPi #149

This #MagPiMonday, we take a look at Md. Khairul Alam’s potentially life-changing project, which aims to use AI to assist people living with a visual impairment.

Technology has long had the power to make a big difference to people’s lives, and for those who are visually impaired, the changes can be revolutionary. Over the years, there has been a noticeable growth in the number of assistive apps. As well as JAWS — a popular computer screen reader for Windows — and software that enables users to navigate phones and tablets, there are audio-descriptive apps that use smart device cameras to read physical documents and recognise items in someone’s immediate environment.

Understanding the challenges facing people living with a visual impairment, maker and developer Md. Khairul Alam has sought to create an inexpensive, wearable navigation tool that will free up the user’s hands and describe what someone would see from their own eyes’ perspective. Based around a pair of spectacles, it uses a small camera sensor that gathers visual information which is then sent to a Raspberry Pi 1 Model B for interpretation. The user is able to hear an audio description of whatever is being seen.

There’s no doubting the positive impact this project could have on scores of people around the world. “Globally, around 2.2 billion don’t have the capability to see, and 90% of them come from low-income countries,” Khairul says. “A low-cost solution for people living with a visual impairment is necessary to give them flexibility so they can easily navigate and, having carried out research, I realised edge computer vision can be a potential answer to this problem.”

Cutting edge

Edge computer vision is potentially transformative. It gathers visual data from edge devices such as a camera before processing it locally, rather than sending it to the cloud. Since information is being processed close to the data source, it allows for fast, real-time responses with reduced latency. This is particularly vital when a user is visually impaired and needs to be able to make rapid sense of the environment.

The connections are reasonably straightforward: plug the Xiao ESP32S3 Sense module into a Raspberry Pi

For his project, Khairul chose to use the Xiao ESP32S3 Sense module which, aside from a camera sensor and a digital microphone, has an integrated Xtensa EPS32-S3R8 SoC processor, 8MB of flash memory, and a microSD card slot. This was mounted onto the centre of a pair of spectacles and connected to a Raspberry Pi computer using a USB-C cable, with a pair of headphones then plugged into Raspberry Pi’s audio out port. With those connections made, Khairul could concentrate on the project’s software.

As you can imagine, machine learning is an integral part of this project; it needs to accurately detect and identify objects. Khairul used Edge Impulse Studio to train his object detection model. This tool is well equipped for building datasets and, in this case, one needed to be created from scratch. “When I started working on the project, I did not find any ready-made dataset for this specific purpose,” he tells us. “A rich dataset is very important for good accuracy, so I made a simple dataset for experimental purposes.”

To help test the device, Khairul has been using an inexpensive USB-C portable speaker

Object detection

Khairul initially concentrated on six objects, uploading 188 images to help identify chairs, tables, beds, and basins. The more images he could take of an object, the greater the accuracy — but it posed something of a challenge. “For this type of work, I needed a unique and rich dataset for a good result, and this was the toughest job,” he explains. Indeed, he’s still working on creating a larger dataset, and these things take a lot of time; but upon uploading the model to the Xiao ESP32S3 Sense, it has already begun to yield some positive results.

When an object is detected, the module returns the object’s name and position. “After detecting and identifying the object, Raspberry Pi is then used to announce its name — Raspberry Pi has built-in audio support, and Python has a number of text-to-speech libraries,” Khairul says. The project uses a free software package called Festival, which has been written by The Centre for Speech Technology Research in the UK. This converts the text to speech, which can then be heard by the user.

A tidier solution will be needed — including a waterproof case — for real-world situations

For convenience, all of this is currently being powered by a small rechargeable lithium-ion battery, which is connected by a long wire to enable it to sit in the user’s pocket. “Power consumption has been another important consideration,” Khairul notes, “and because it’s a portable device, it needs to be very power efficient.” Since Third Eye is designed to be worn, it also needs to feel right. “The form factor is a considerable factor — the project should be as compact as possible,” Khairul adds.

Going forward

Third Eye is still in a proof-of-concept stage, and improvements are already being identified. Khairul knows that the Xiao ESP32S3 Sense will eventually fall short of fulfilling his ambitions for the project as it expands in the future and, with a larger machine learning model proving necessary, Raspberry Pi is likely to take on more of the workload.

“To be very honest, the ESP32S3 Sense module is not capable enough to respond using a big model. I’m just using it for experimental purposes with a small model, and Raspberry Pi can be a good alternative,” he says. “I believe for better performance, we may use Raspberry Pi for both inferencing and text-to-speech conversions. I plan to completely implement the system inside a Raspberry Pi computer in the future.”

Other potential future tweaks are also stacking up. “I want to include some control buttons so that users can increase and decrease the volume and mute the audio if required,” Khairul reveals. “A depth camera would also give the user important information about the distance of an object.” With the project shared on Hackster, it’s hoped the Raspberry Pi community could also assist in pushing it forward. “There is huge potential for a project such as this,” he says.

The MagPi #149 out NOW!

You can grab the new issue right now from Tesco, Sainsbury’s, Asda, WHSmith, and other newsagents, including the Raspberry Pi Store in Cambridge. It’s also available at our online store, which ships around the world. You can also get it via our app on Android or iOS.

You can also subscribe to the print version of The MagPi. Not only do we deliver it globally, but people who sign up to the six- or twelve-month print subscription get a FREE Raspberry Pi Pico W!

The post Third Eye assistive vision | The MagPi #149 appeared first on Raspberry Pi.

❌